For those not in the know, we have an introductory Beginners Guide to Git here.
But to summarise: GitTM allows you work on multiple versions of your website (or any codebase), and track the changes that have been made. If you’re happy with the changes, they can then be ‘pushed’ to the live version. You can restore previous versions too.
Git is a great way to work collaboratively, allowing multiple people to work on a single project simultaneously without getting in each others’ way. You can track revisions and boost team productivity without the ‘live’ code being modified.
Git and My20i
While it’s always been possible to use Git on projects on 20i hosting, it involved accessing the files by SSH and then using the command line to manage the project. It wasn’t the most user-friendly way to do it.
Now, with the Git and My20i integration, we have a graphical user interface inside our hosting control panel. It will speed things up for you and web development team.
You can clone, manage and deploy Git repositories directly. If you want to manage multiple repositories in one package, you can keep track of version changes and deploy your sites as and when you’d like.
And the best bit: you can do all this at a click of a button.
Get started in My20i
What follows is a brief intro to how to manage Git Version Control in My20i. This information is also available in the 20i Knowledge Base: How do I use Git version control in My20i?
We’ll be covering:
- How to access Git in My20i
- How to clone a remote repository using Github
- Managing a repository
- Creating a local repository
To get started, you’ll first need to:
- Sign in to My20i
- Head to Manage Hosting, and select Options > Manage on the package you want use Git with
- Under Web Files, you’ll see a GitTM Version Control icon – select it
You’ll be asked for a name and email – set these to be the details you’d like to show when deploying using Git. Then click Enable.
Cloning a remote Git repository in My20i
The first thing you’ll see is your repository (repo) list – empty if this is new to you – and the option to set up your first repo.
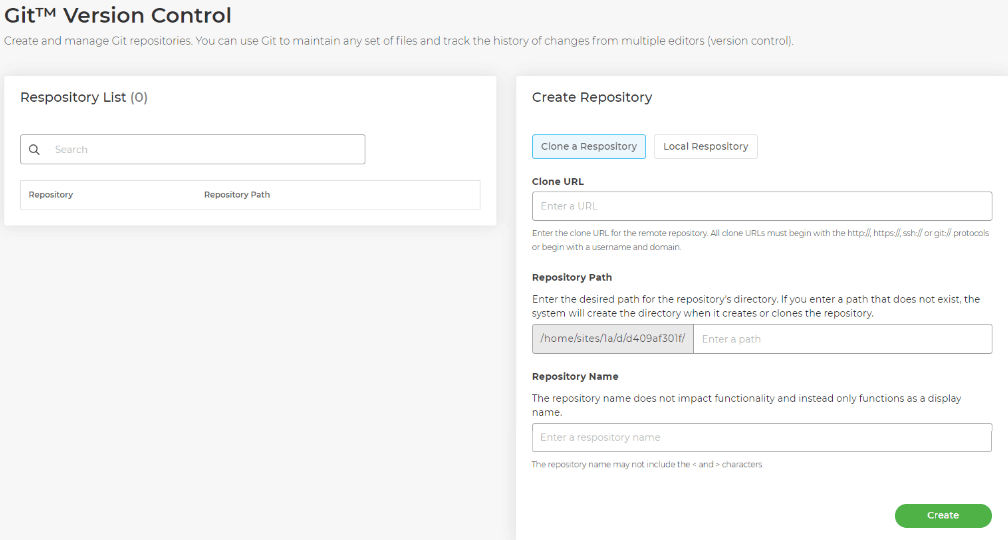
Cloning a repository using our tool means that you’ll first need to have a remote repository in GitHub. The best way to do this is to follow the steps highlighted in their documentation.
Once done, head to the Github repository, select Code, then copy the URL provided.
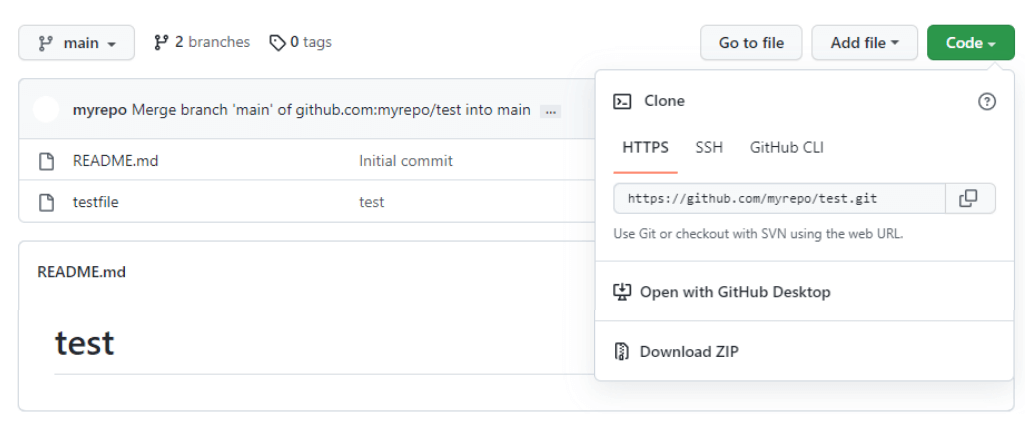
(Note that for private repositories, you’ll need to set up a public/private key pair and use the SSH URL provided instead.)
Paste the URL into the Clone URL area in My20i, then set the file path of where you want your repository to set up. Lastly, set up a Repository Name – a display name for the My20i UI.
Then, hit Create. Your repo and its path will show in the Repository List now.
Managing a repository
You’ll notice that there’s a ‘kebab’ – three vertical dots – to the right of your repo name and path. From here, you can Manage the repo, see its History, go to the File Manager, Copy the URL or Remove it from the list.
We’ll concern ourselves with Managing a repo here. You can pull or deploy changes, view its history or edit information:
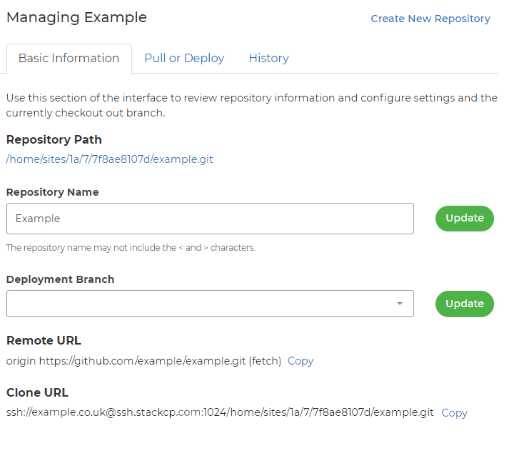
To pull or deploy, go to the second tab. You can select Deploy HEAD Commit to deploy the changes you’ve made.
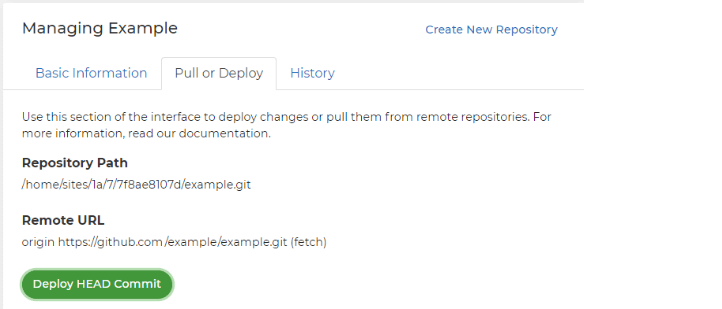
You can use the History tab to see what changes have been deployed in the history of the Git setup.
Creating a local Git repository in My20i
Don’t want to deploy to a remote repository, and simply use a local one in your package’s file space? You can set this up via the UI too.
Select Create New Repository and then hit the Local Repository tab.
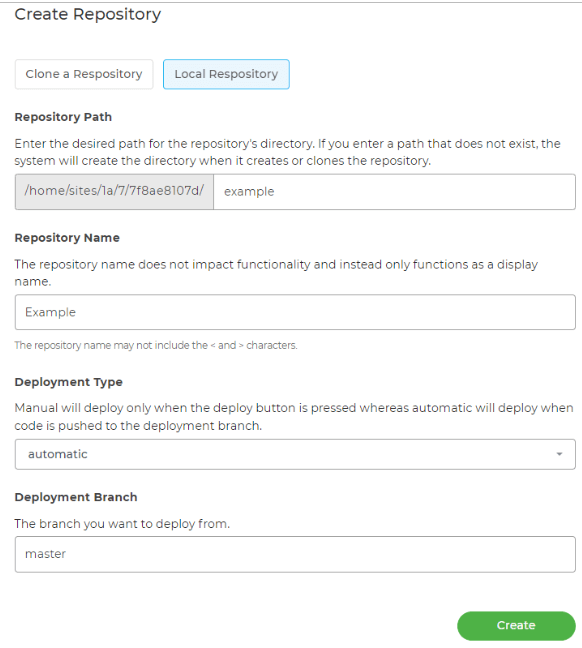
You can then fill out the informational fields.
Deployment Type is a choice between whether you want changes to deployed automatically, or if you want to only deploy your changes when manually selecting the Deploy button.
The Deployment Branch is used if you have multiple branches being worked-on simultaneously that don’t affect your repo’s main codebase. You can find a great tutorial on Git Branches here.
Version Control: Git down
So there’s a very basic guide to how the new My20i Git version control user interface works. We hope you can make good use of it, speeding up your collaborative workflow and tracking changes.
On use, you might find ways it can be improved and optimised – so, as always, let us know how you get on.
If you have any suggestions, please use our customer feedback form in My20i.


Add comment