
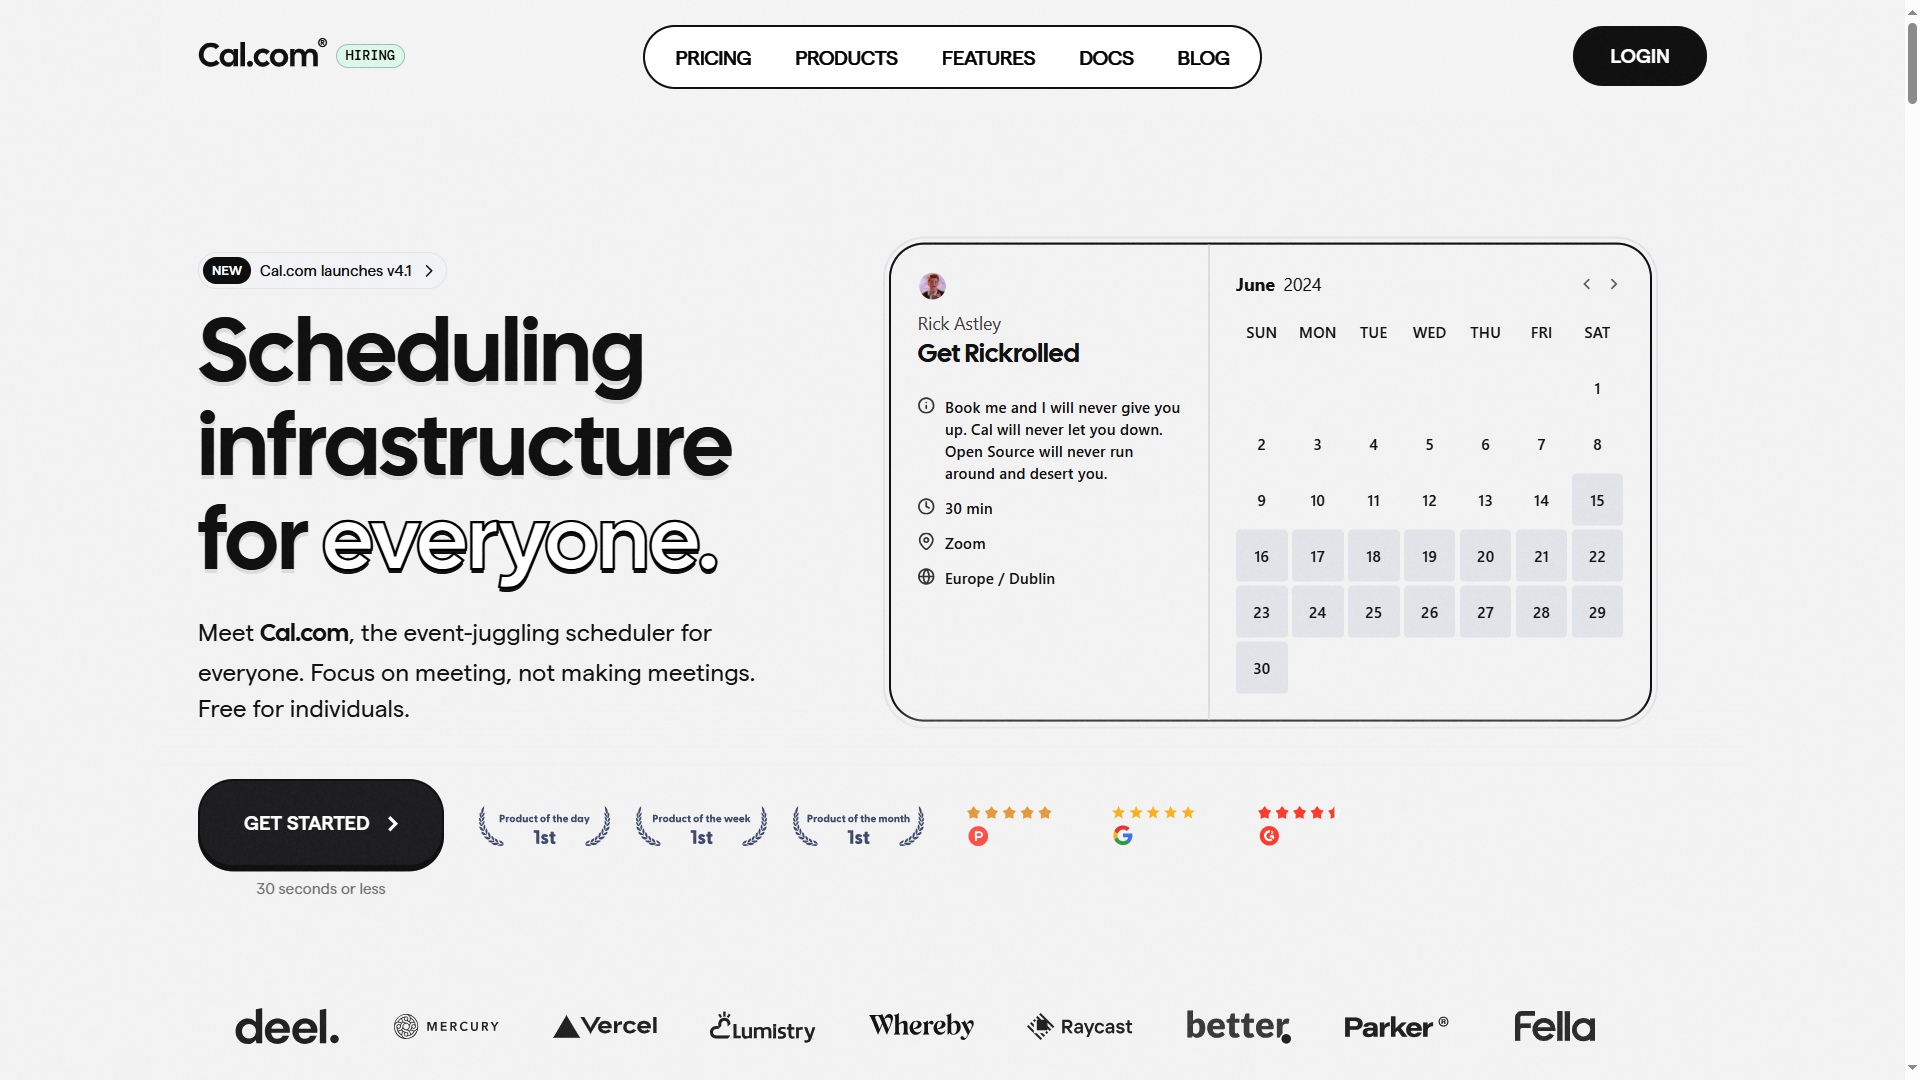
In this review I’ll be looking at the self-hosted version of Cal.com, an online event/meeting scheduling application.
Is it an efficient solution for scheduling meetings with your customers? Is it easy use? What helpful features are included? Will I be recommending it to friends, family and customers?
Cal.com Review
TL:DR
✅ Easy to use
✅ Vast array of 3rd party integrations
✅ Lightweight and performant
❌ Tricky to install for non-technical users
What is Cal.com?
Formerly known as Calendso; Cal.com is open-source scheduling software designed to help individuals, teams and organisations arrange and manage online or in-person meetings.
Cal.com has several pricing tiers, but can be self-hosted; and used for free.
The premise of Cal.com is that you set your availability, connect your personal/work calendars to it, and share the links it generates with whoever you want to arrange meetings with.
You can extensively customise what constitutes a “meeting”:
- Duration
- Where it takes place (in person, via phone or online)
- How often someone can book you
- If you want the meeting to recur
Cal.com is a direct competitor to the likes of Calendly, Chili Piper and Doodle. If you currently use one of these services; Cal.com will be of interest.
What do I need to run Cal.com?
I used a 4 core VPS (virtual private server) with 4GB of RAM and 75GB of SSD space for this review.
The CPU utilisation graphs on the My20i control panel showed that Cal.com, despite running very smoothly, hardly uses any resources.
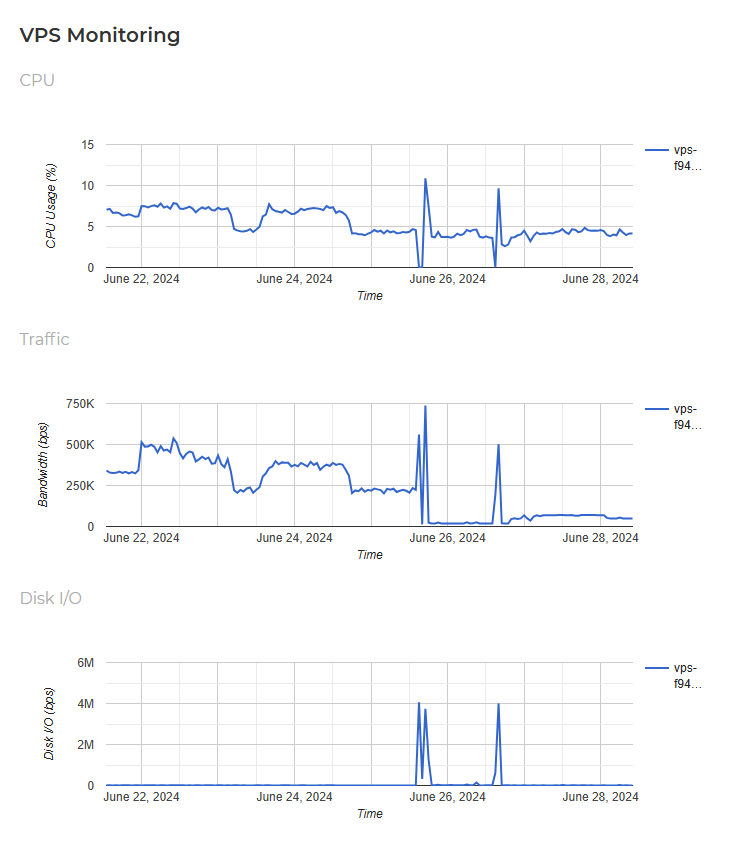
My VPS is running Alma Linux 9.4, but you’ll be able to get Cal.com working on any operating system that can run Docker.
You’ll need sudo privileges to run some of the installation commands.
How to install Cal.com using Docker
You’ll need healthy command line chops, and a basic understanding of Docker is highly recommended – especially if you need to customise your deployment.
Getting a self-hosted version of Cal.com working is made easier thanks to the Cal.com Docs guide:
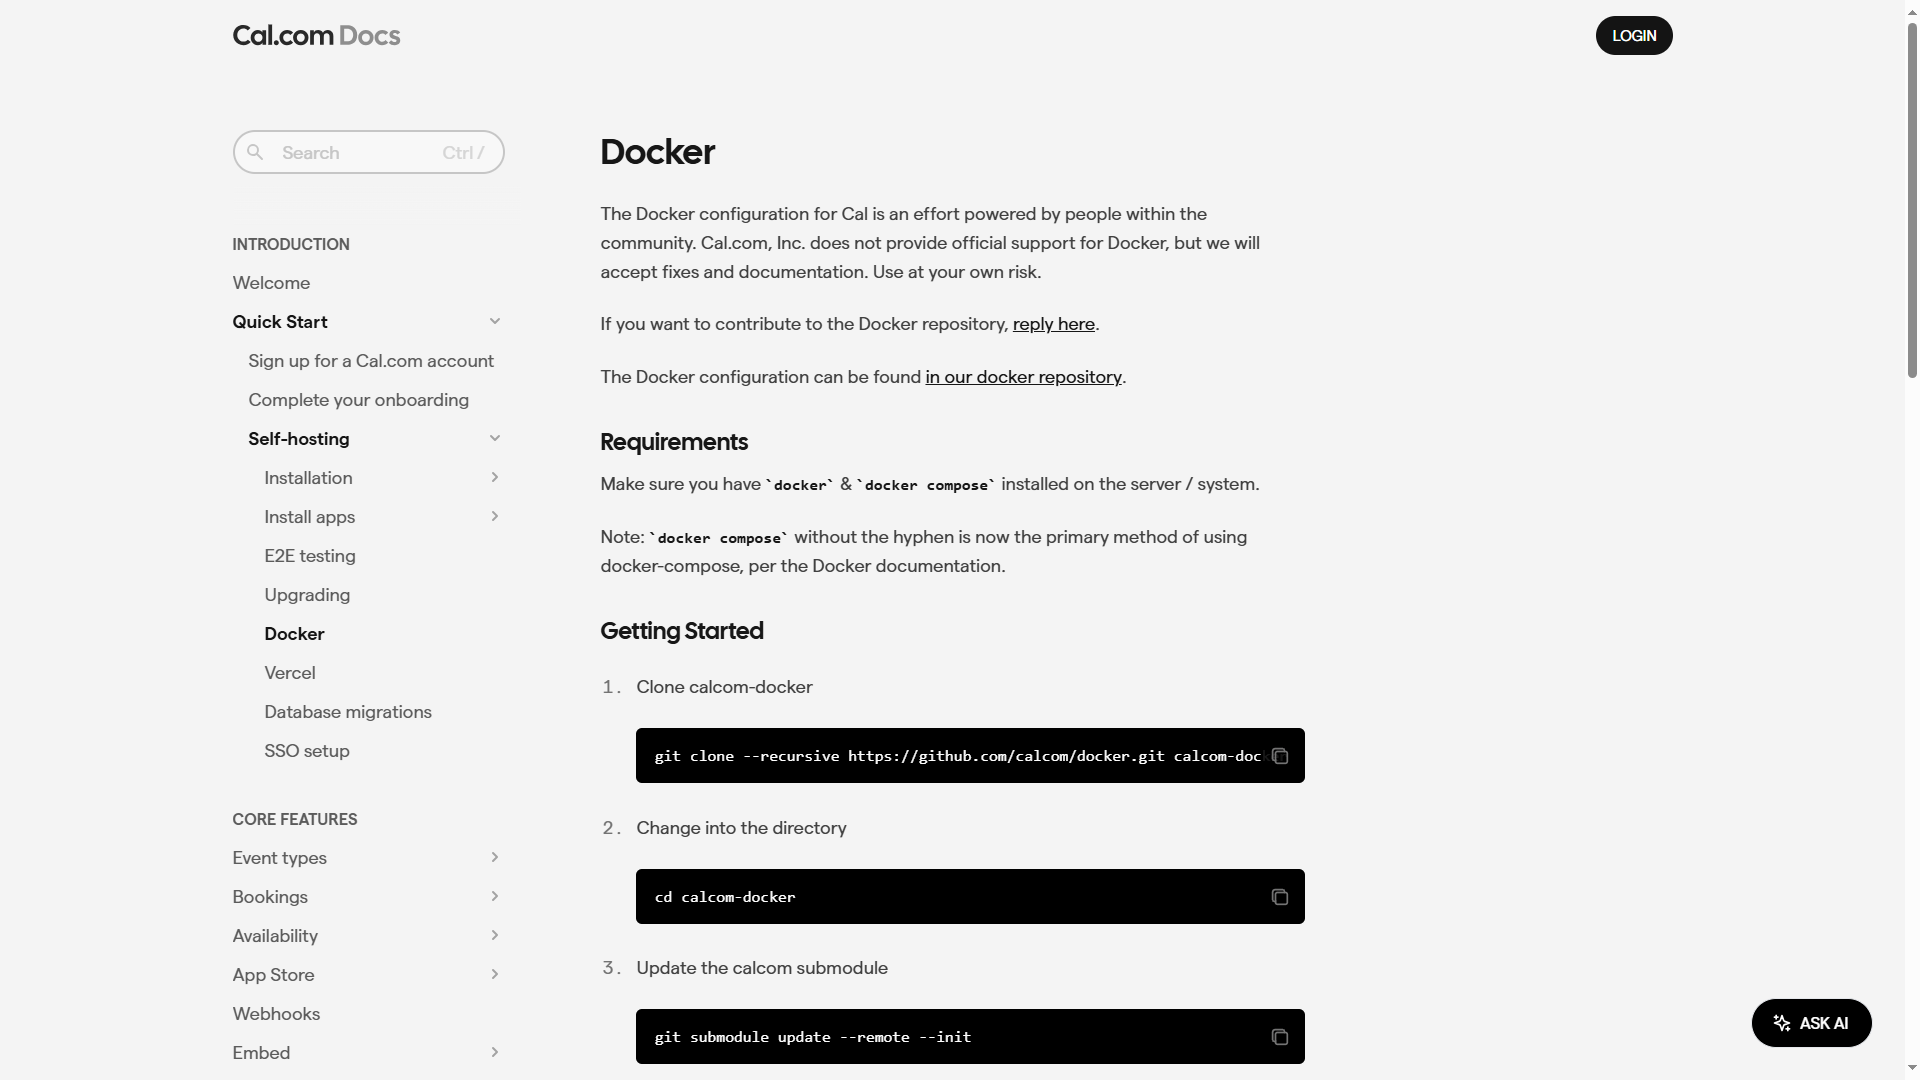
I started by installing Docker on my VPS using our recently published guide. With Docker ready to go, the next step was to install GitHub:
sudo dnf install gitAfter that, I made sure that all packages were fully up to date:
sudo dnf update -yI then cloned the GitHub version of the Cal.com image into my chosen directory:
git clone --recursive https://github.com/calcom/docker.git docker/calcomUpdated the submodule:
git submodule update --remote --initAnd renamed the .env.example file to .env so that it would be used when I was ready to deploy:
mv .env.example .envI needed to make changes to keep Cal.com from conflicting with other software running on my VPS, so I edited certain variables in the .env file.
Check the run-time and build-time variables on the github.com/calcom/docker page before proceeding to make sure that deploying Cal.com won’t break anything for you.
When ready:
vi .env This opens the file so I can make changes. When ready to save and exit:
:wqI also needed to make made a few tweaks to the docker-compose.yaml file:
vi docker-compose.yamlWhen I was happy with how things looked I saved my changes:
:wqWith everything ready, it was time to deploy. After a deep breath, I entered and ran this command:
docker compose up -d calcomAfter a few moments, PuTTY – my SSH client of choice – showed me that the command had run successfully: Cal.com was installed.
Setting up Cal.com
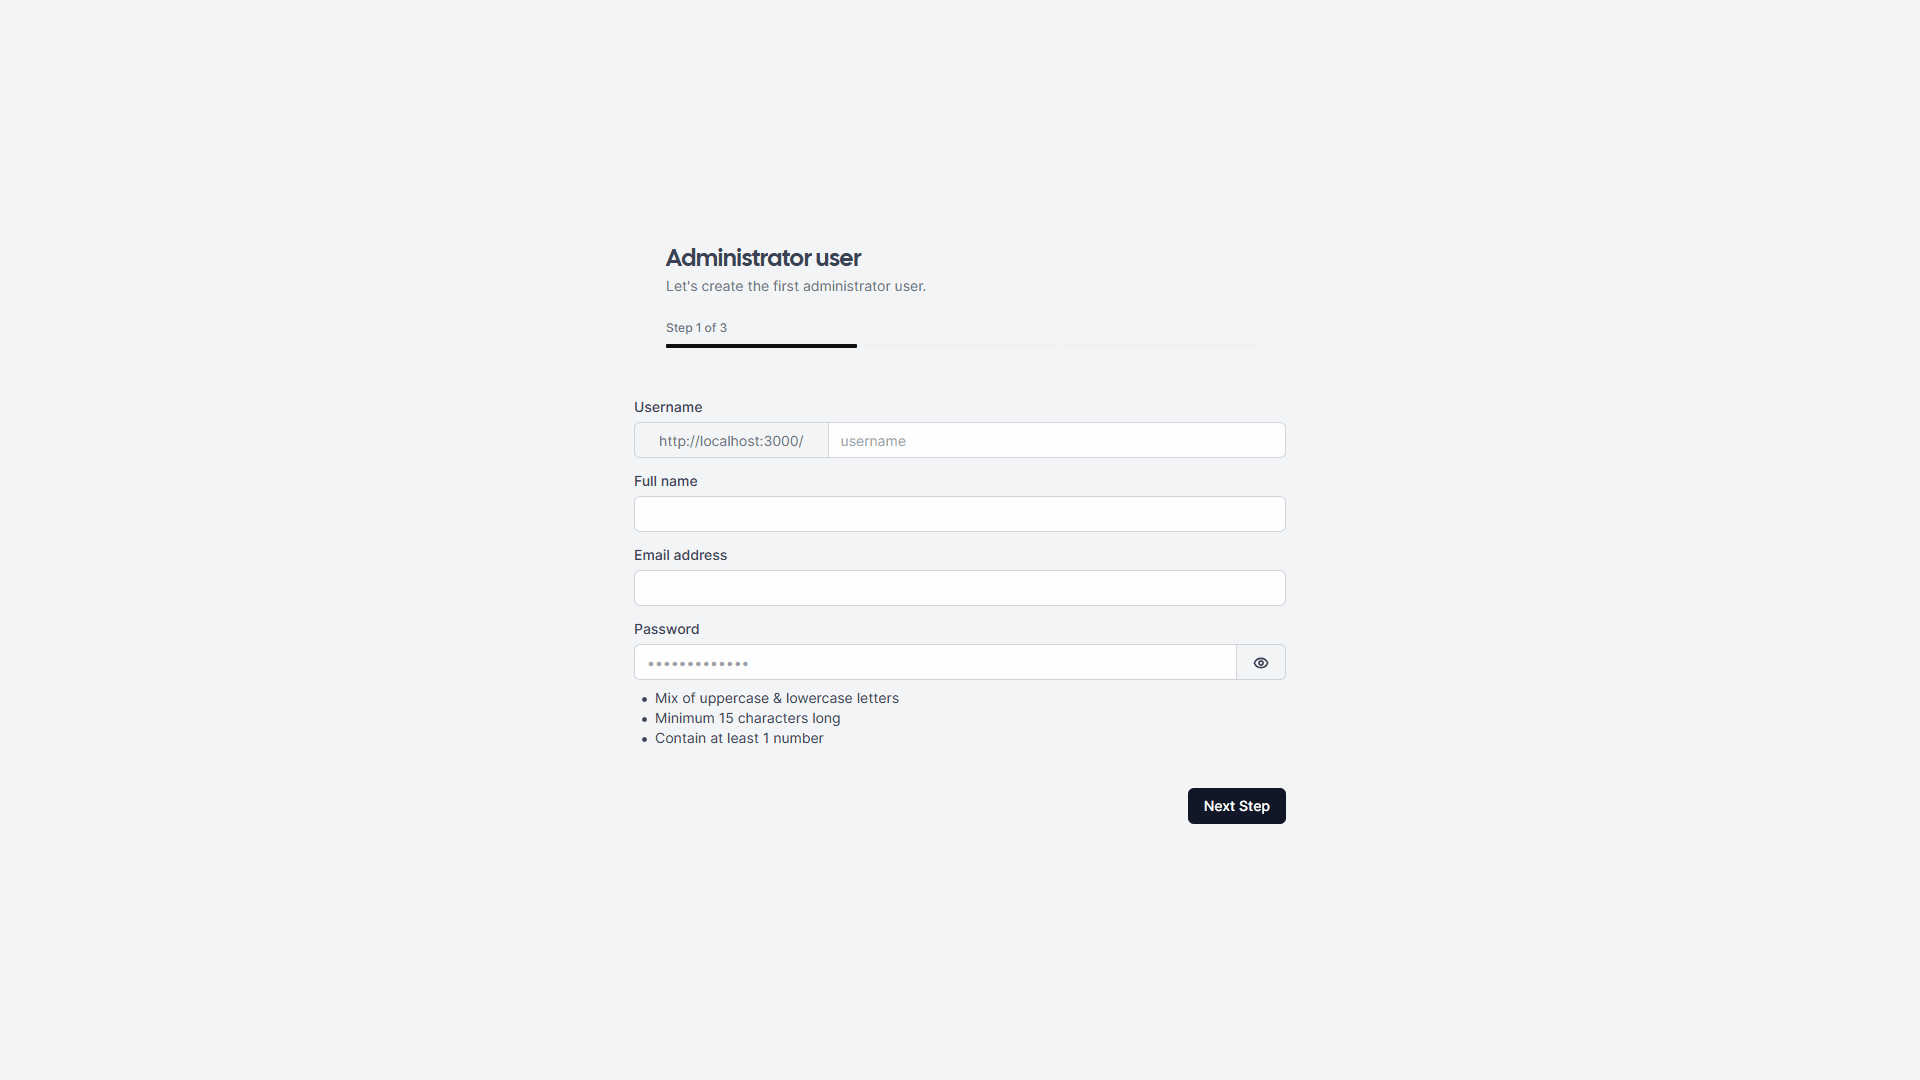
When you log into your Cal.com URL for the first time; you’ll need to create an Administrator user. You’ll then choose a license. In this case I went with AGPLv3 as I’ll be testing Cal.com “as is” and not rebranding it.
Choose from the available app integrations and click ‘Finish’ to complete this stage.
I was then taken to the Cal.com user profile setup page, and gave it the details I wanted to use.
Next up was connecting calendars. You can connect all your calendars at this stage or choose to do it later; convenient if you don’t have all your credentials at hand.
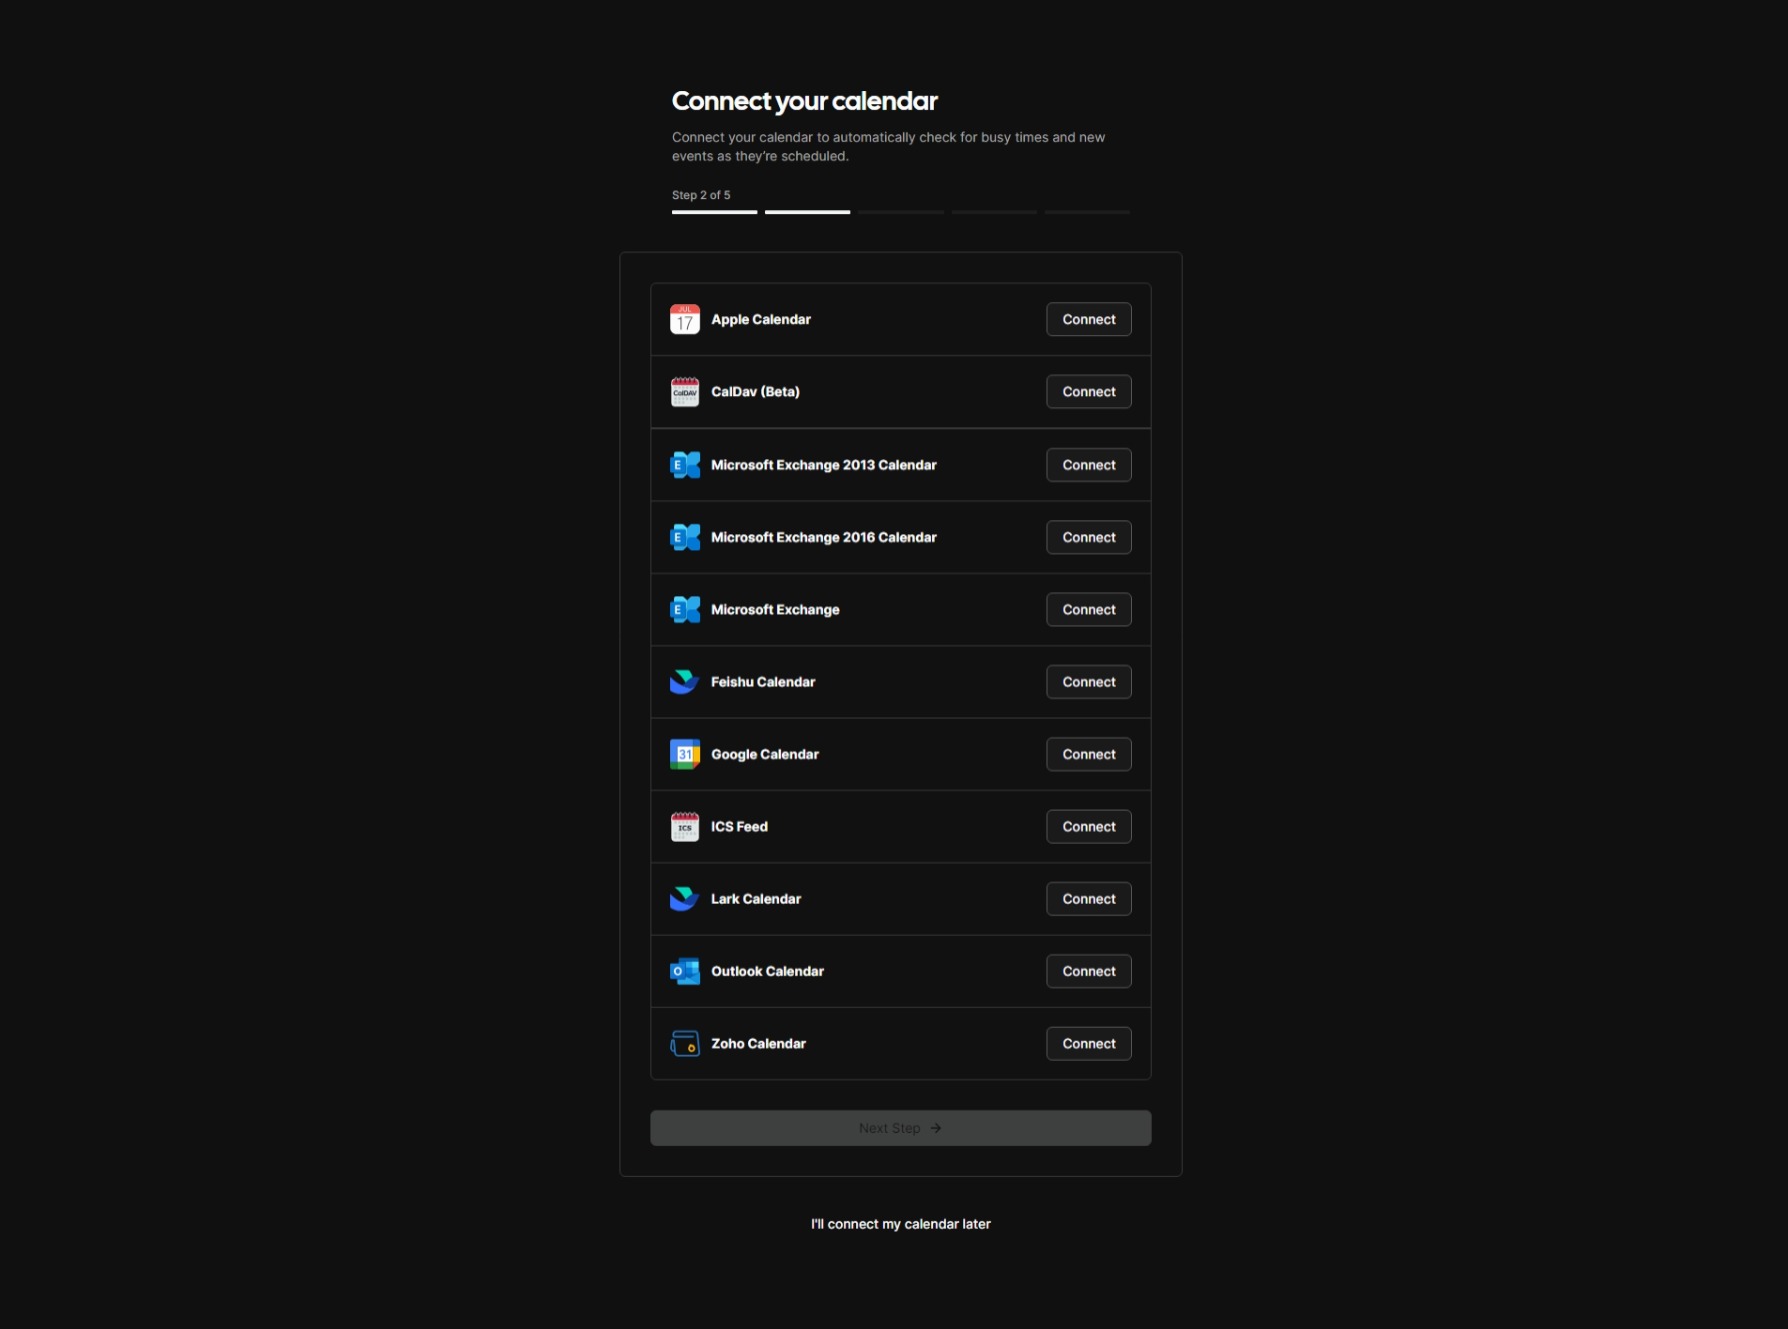
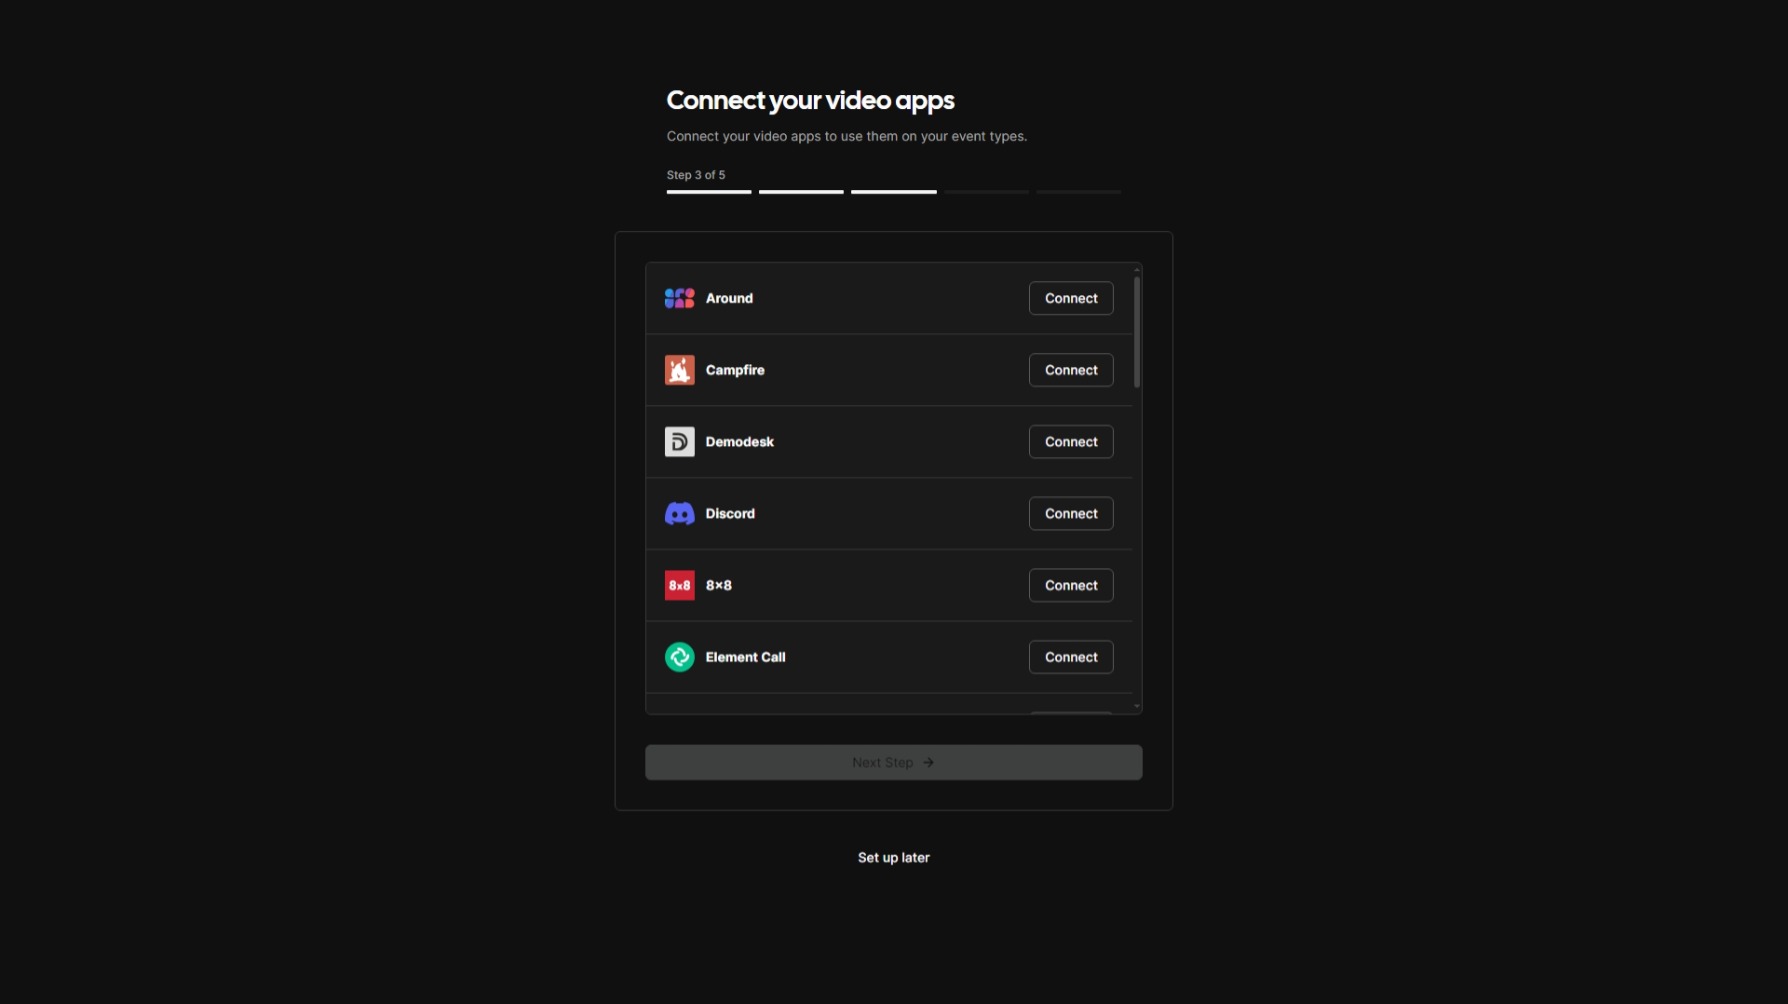
Step 3 is for video conferencing apps. There are a lot to choose from, which makes it likely that you’ll be able to integrate your current workflow with little friction. Again, you can choose to defer setting these up until later.
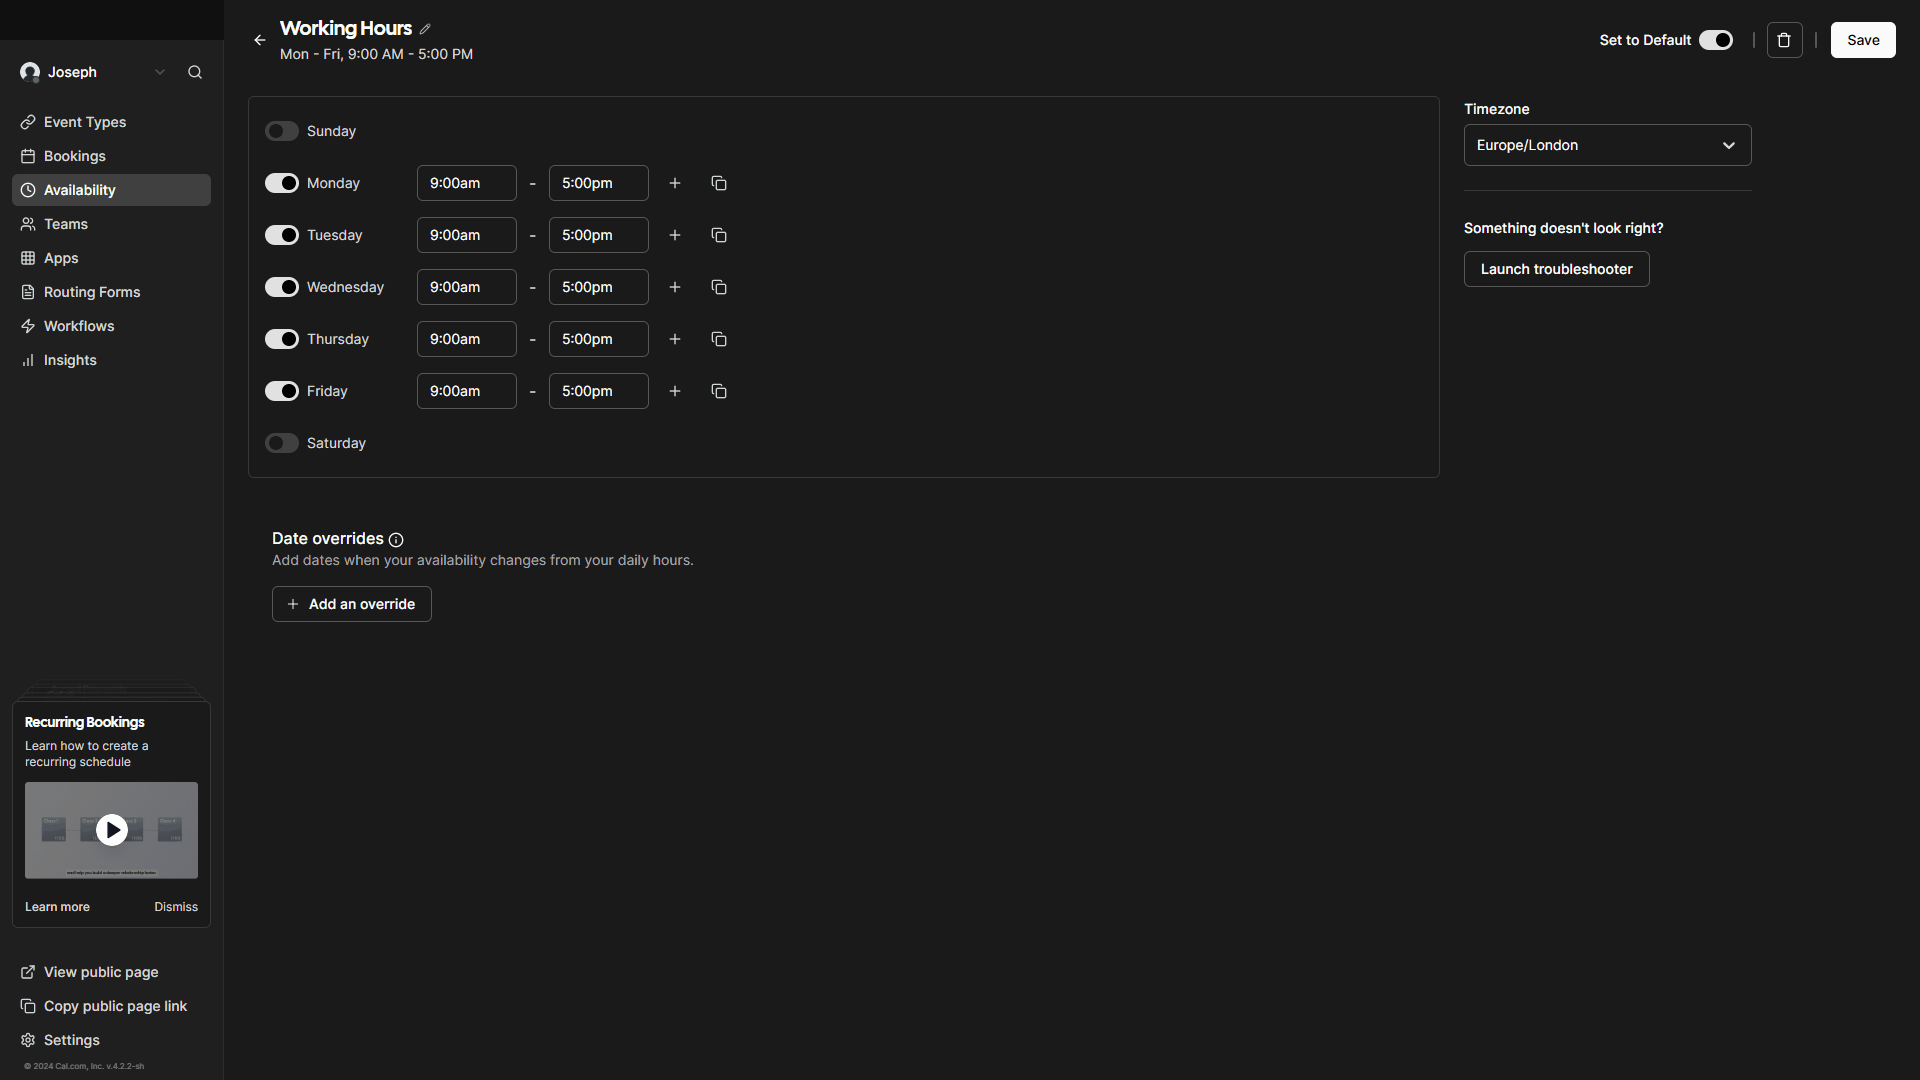
The penultimate step is where you tell Cal.com when you are available for meetings. The Monday to Friday 9 am to 5 pm working week is prefilled.
You can tweak your availability here to accommodate part time working hours, different start or finish times and blocking out lunch breaks.
Far more granular availability details can be specified, and I’ll cover this in the next section.
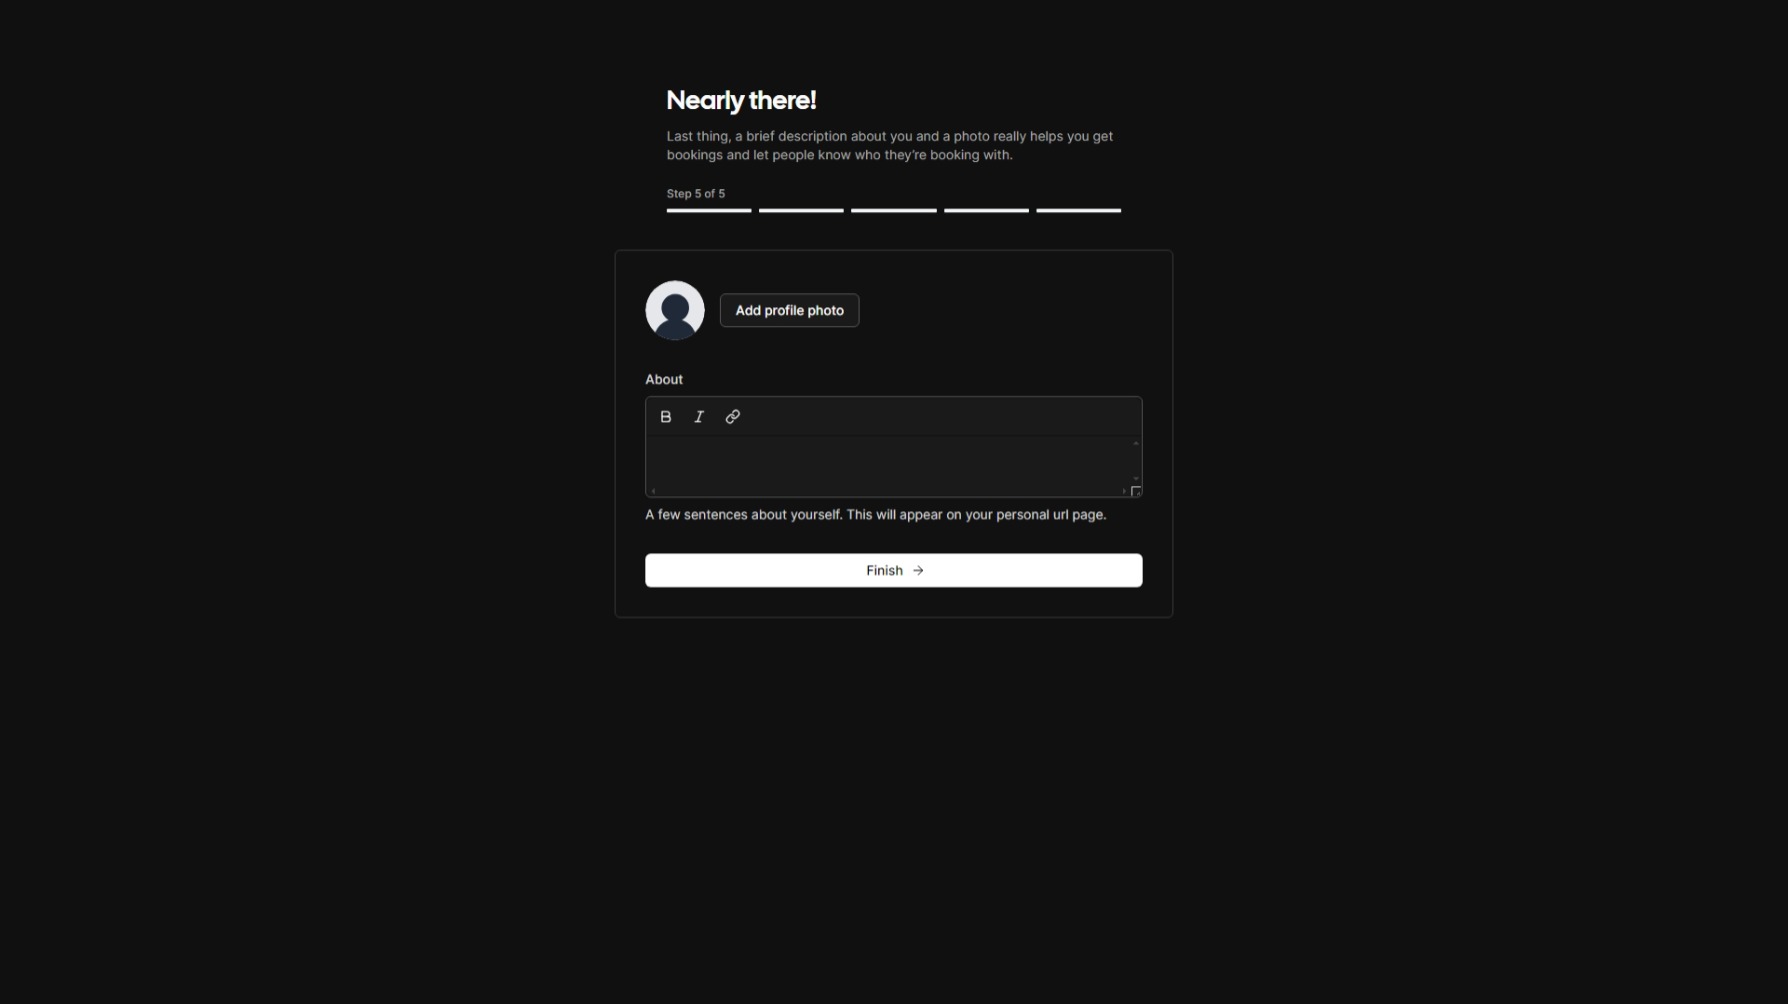
The last step of this process is adding a picture and a paragraph or two about yourself. What you put in here is displayed on your personal URL page, and can be changed later if required.
Using Cal.com
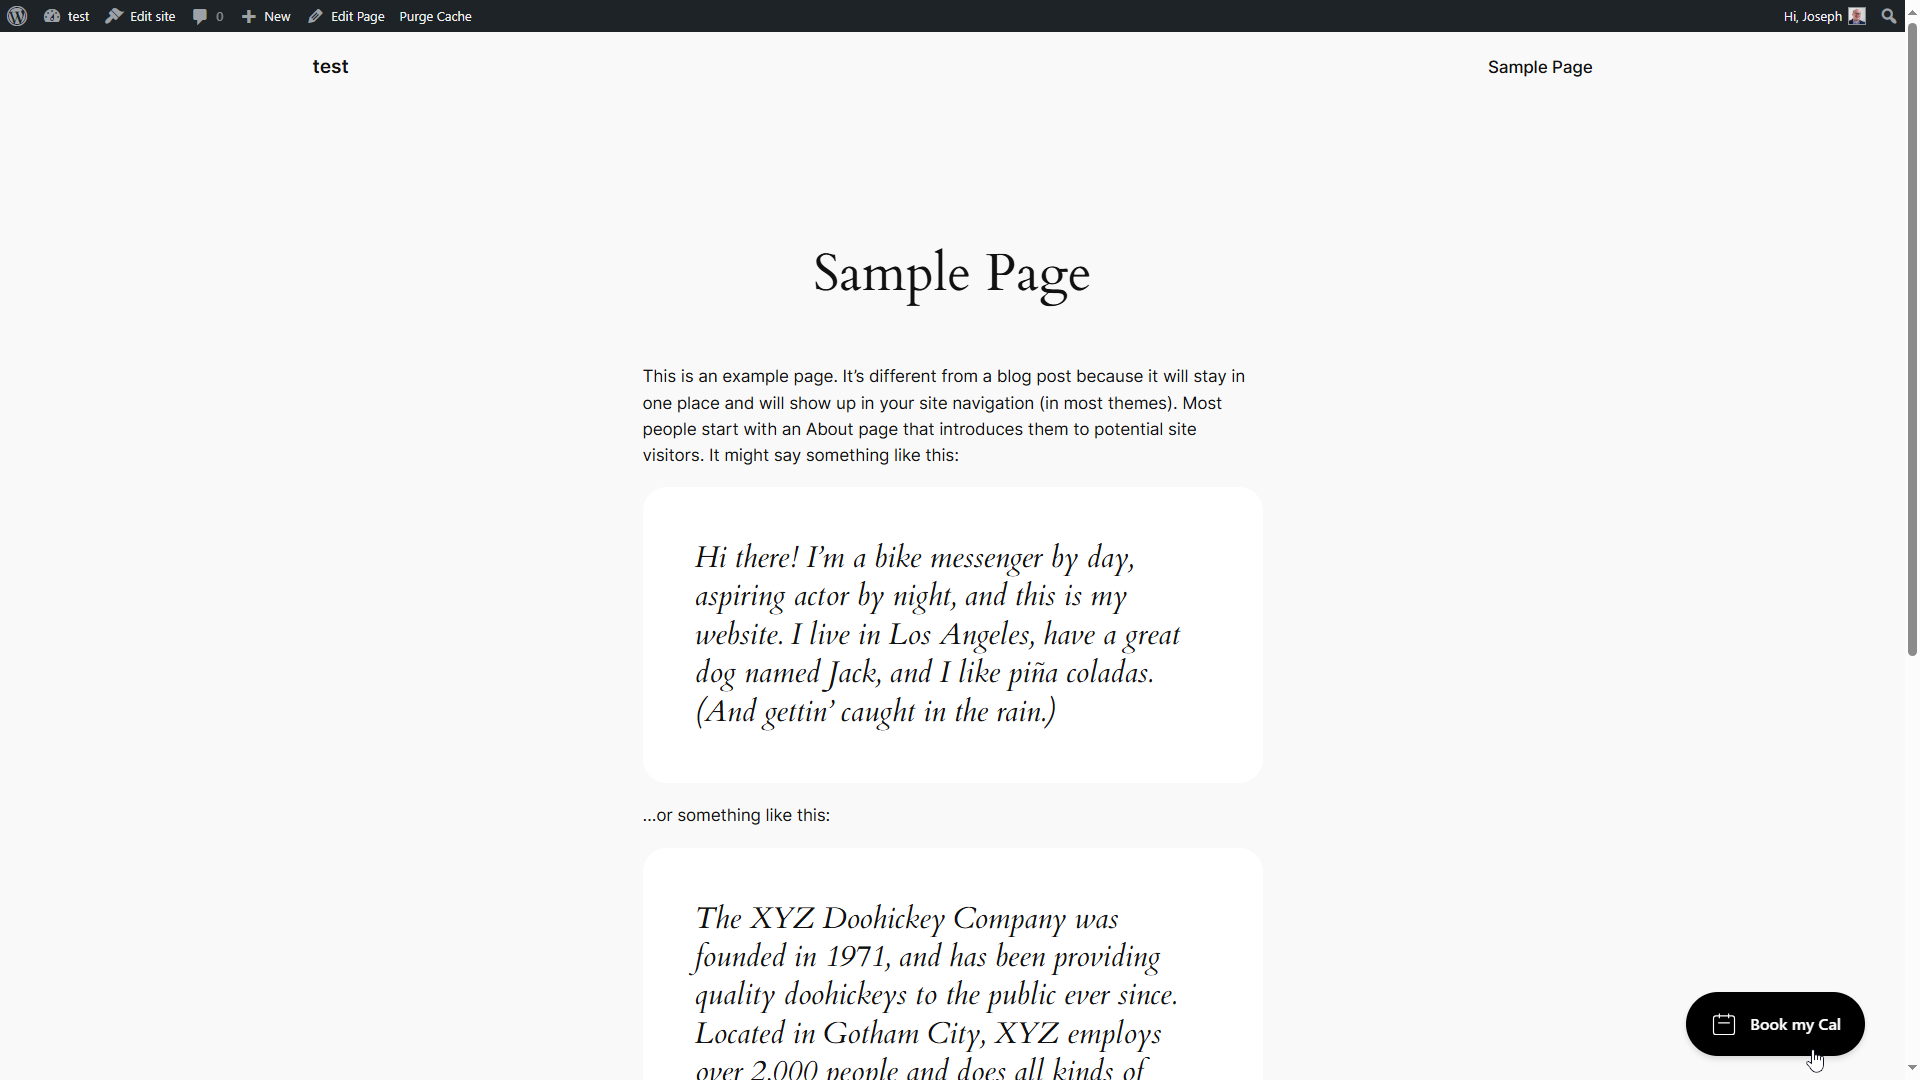
After completing the set-up steps and logging in; you are taken to the Cal.com dashboard:

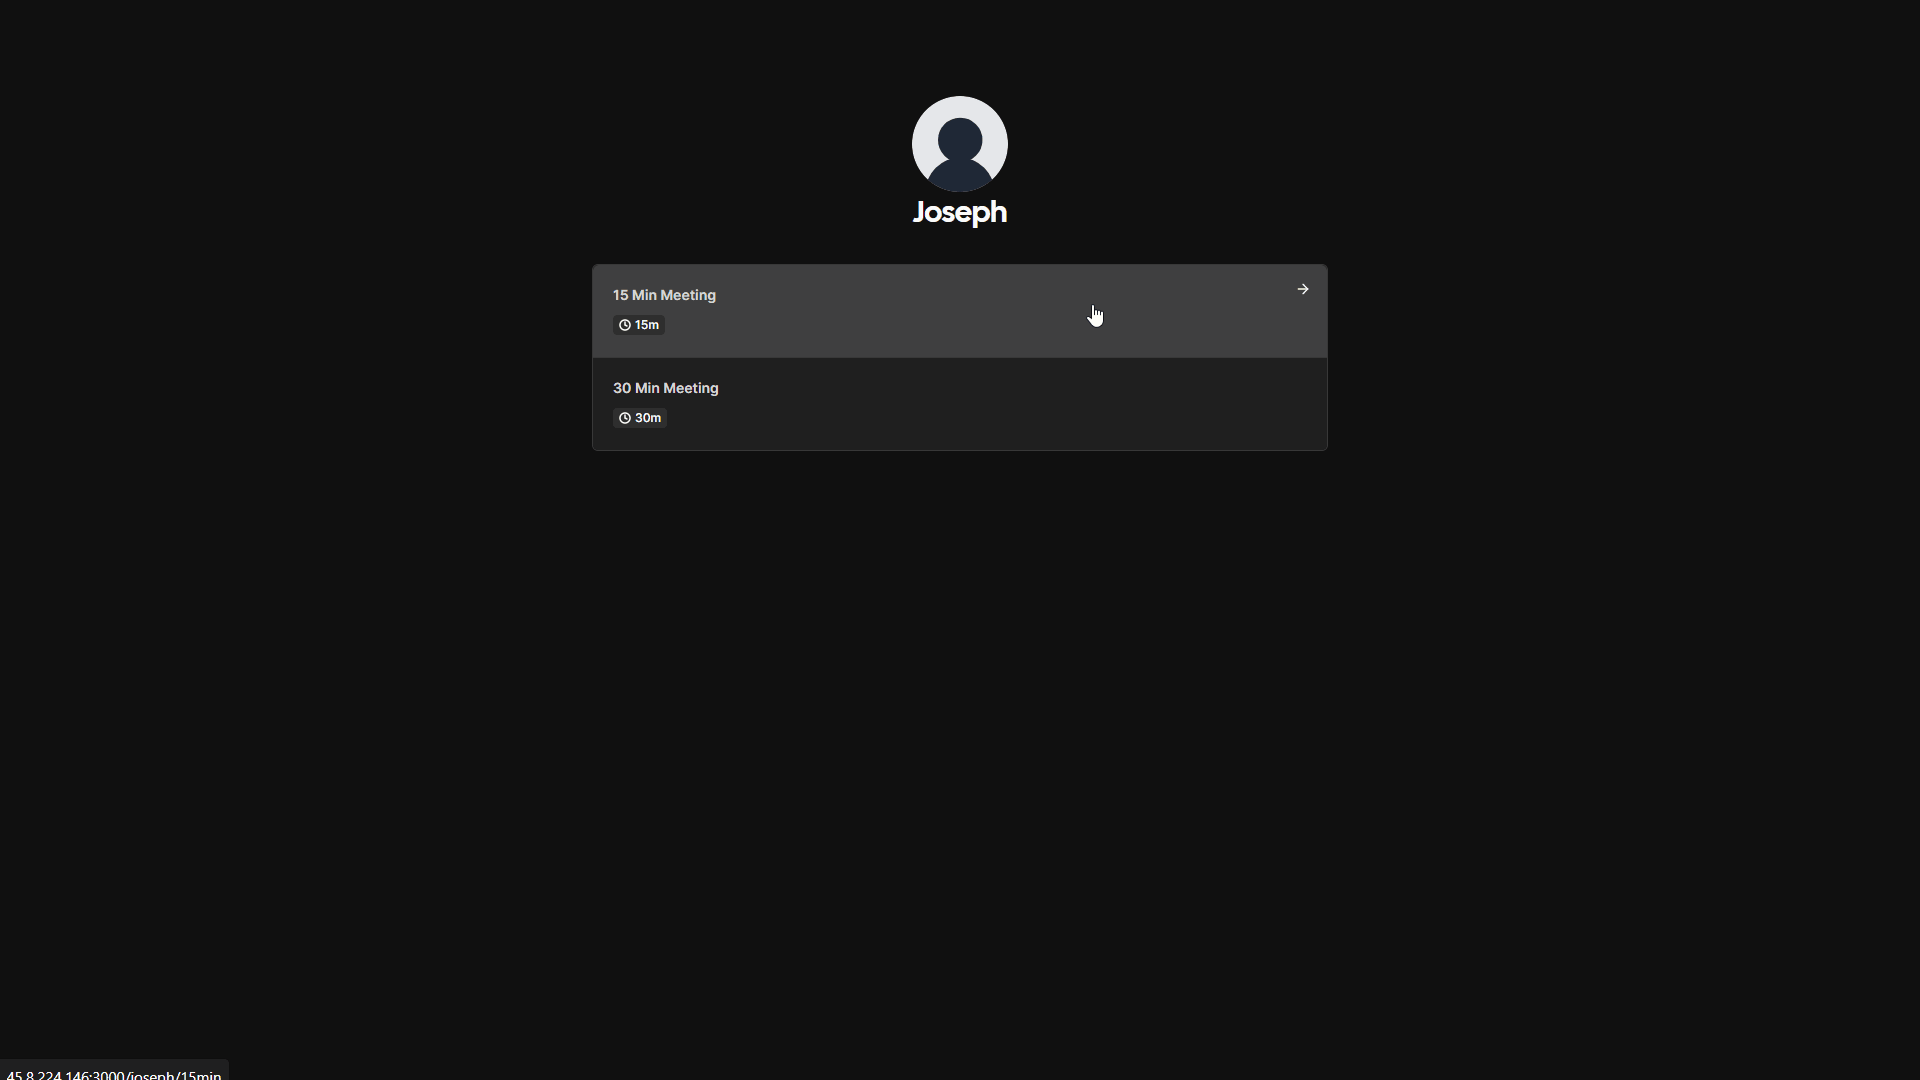
Before digging through the settings and going through all the features, I wanted to establish a baseline and see what my Public page looked like – so I clicked “View public page”:
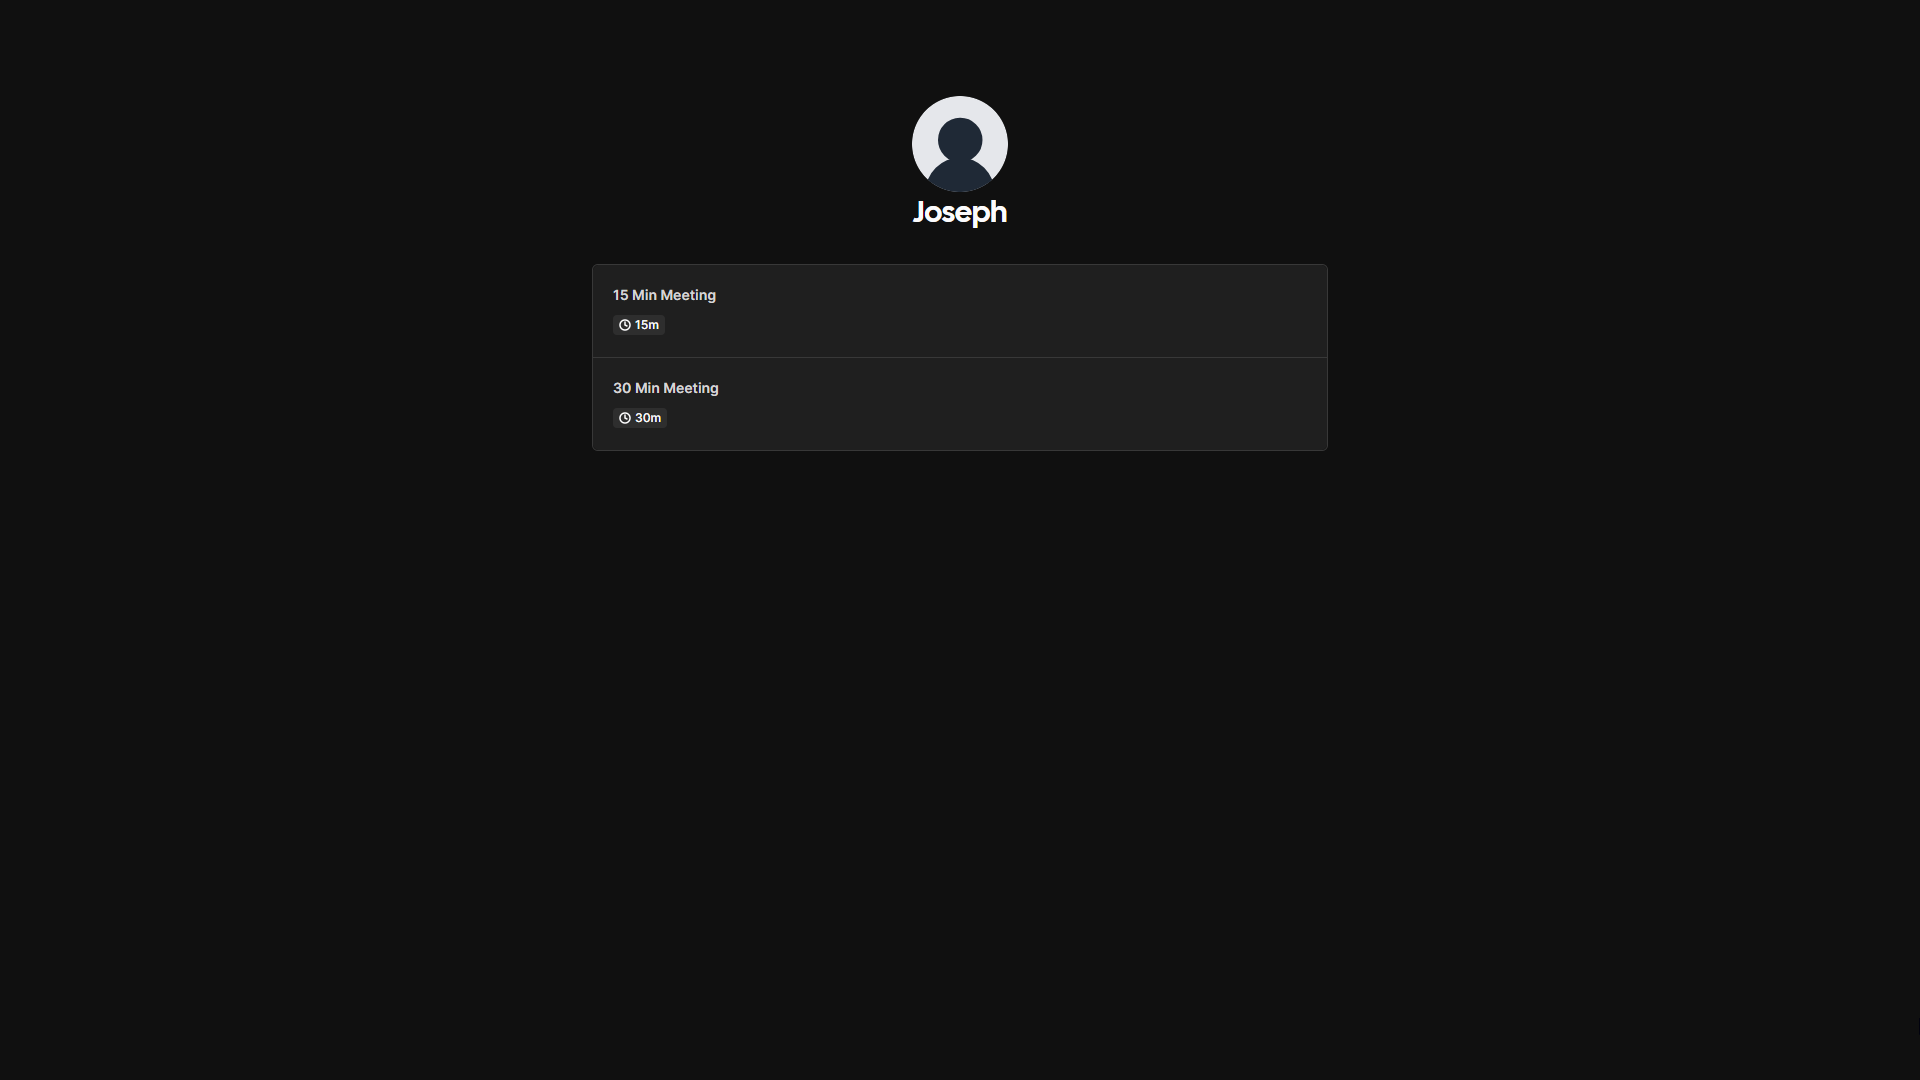
Pretty barebones out of the box, but you can easily picture where a branded image and some text would come in.
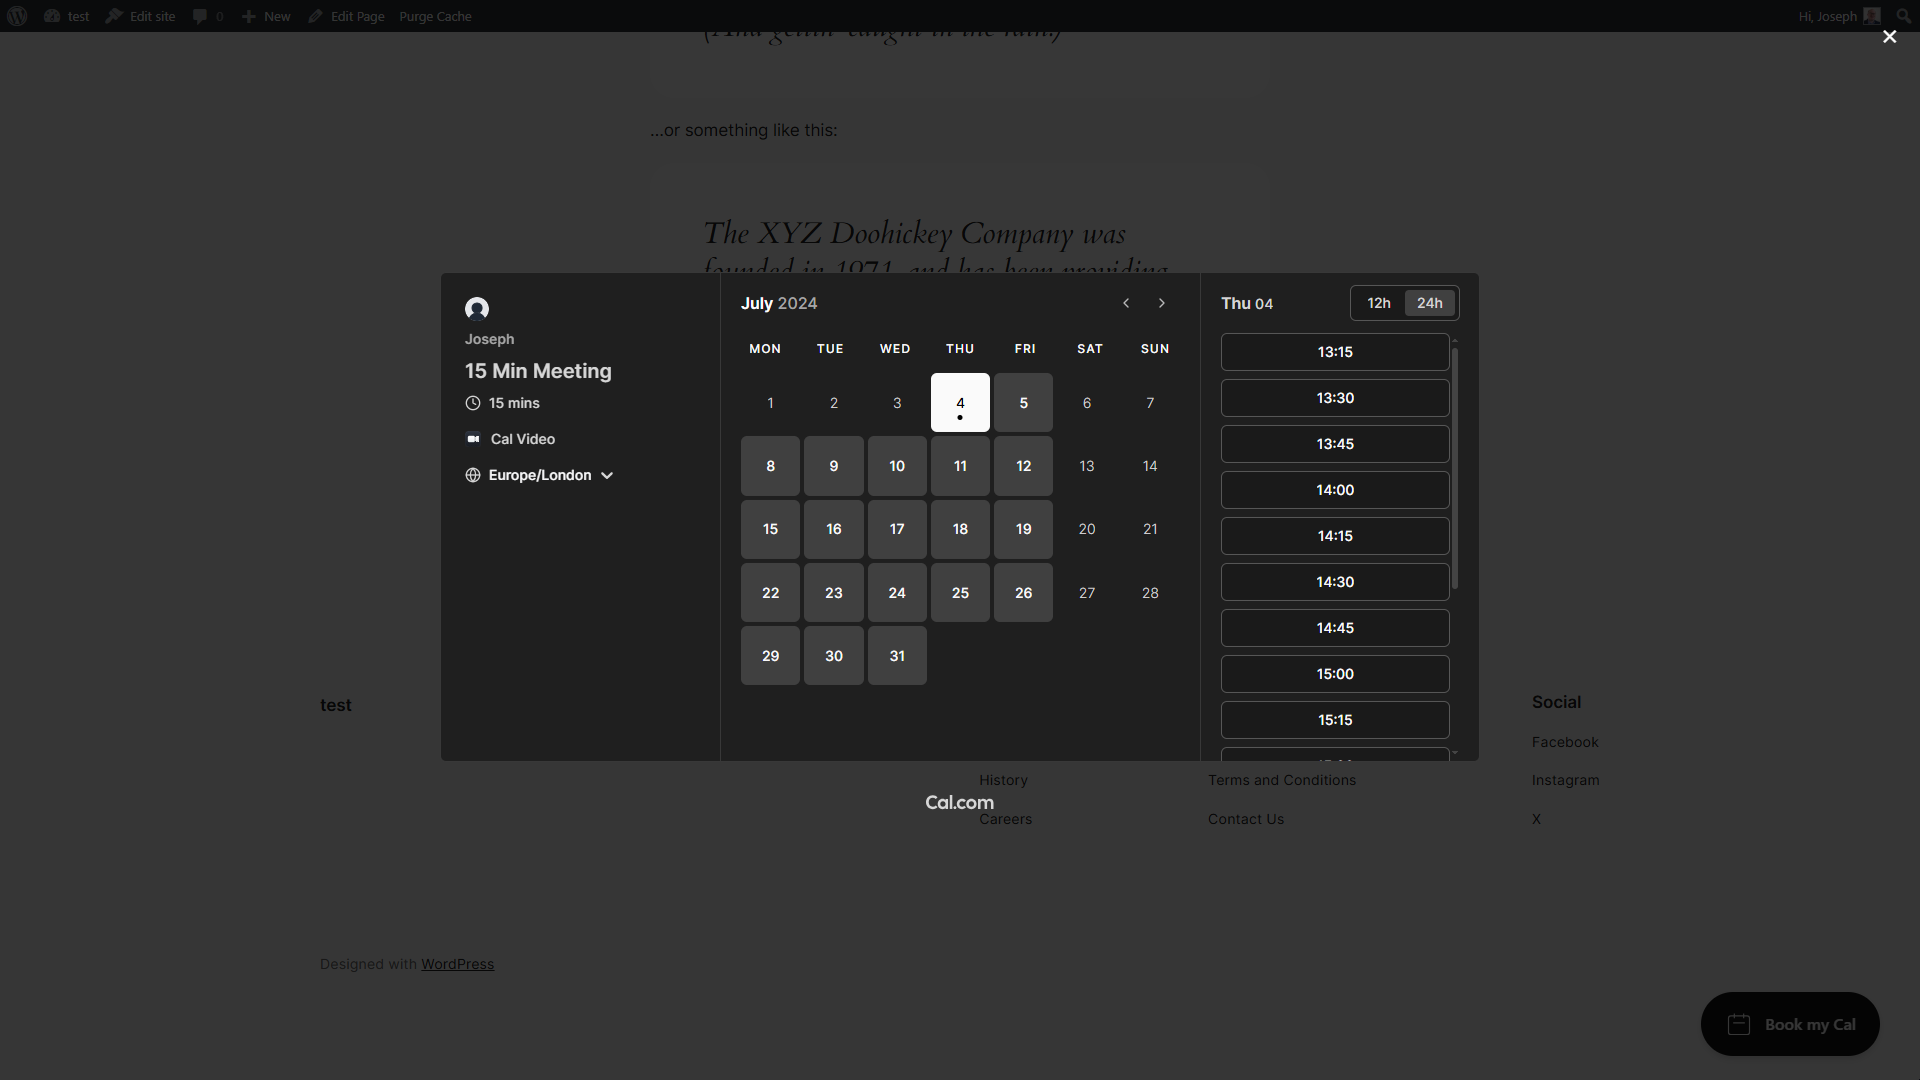
I clicked on the 15 Min Meeting option and went through the booking process to see what the experience is like as a client.
I saw the Monday to Friday time slots that I’d chosen during setup were available, and chose a slot.
Booking with Cal.com
The booking confirmation screen had useful, relevant information including both a Reschedule and Cancel button.
The 4 options at the bottom of the confirmation page let you add the meeting you’ve just scheduled to Google, Outlook, Microsoft Office or Other calendars.
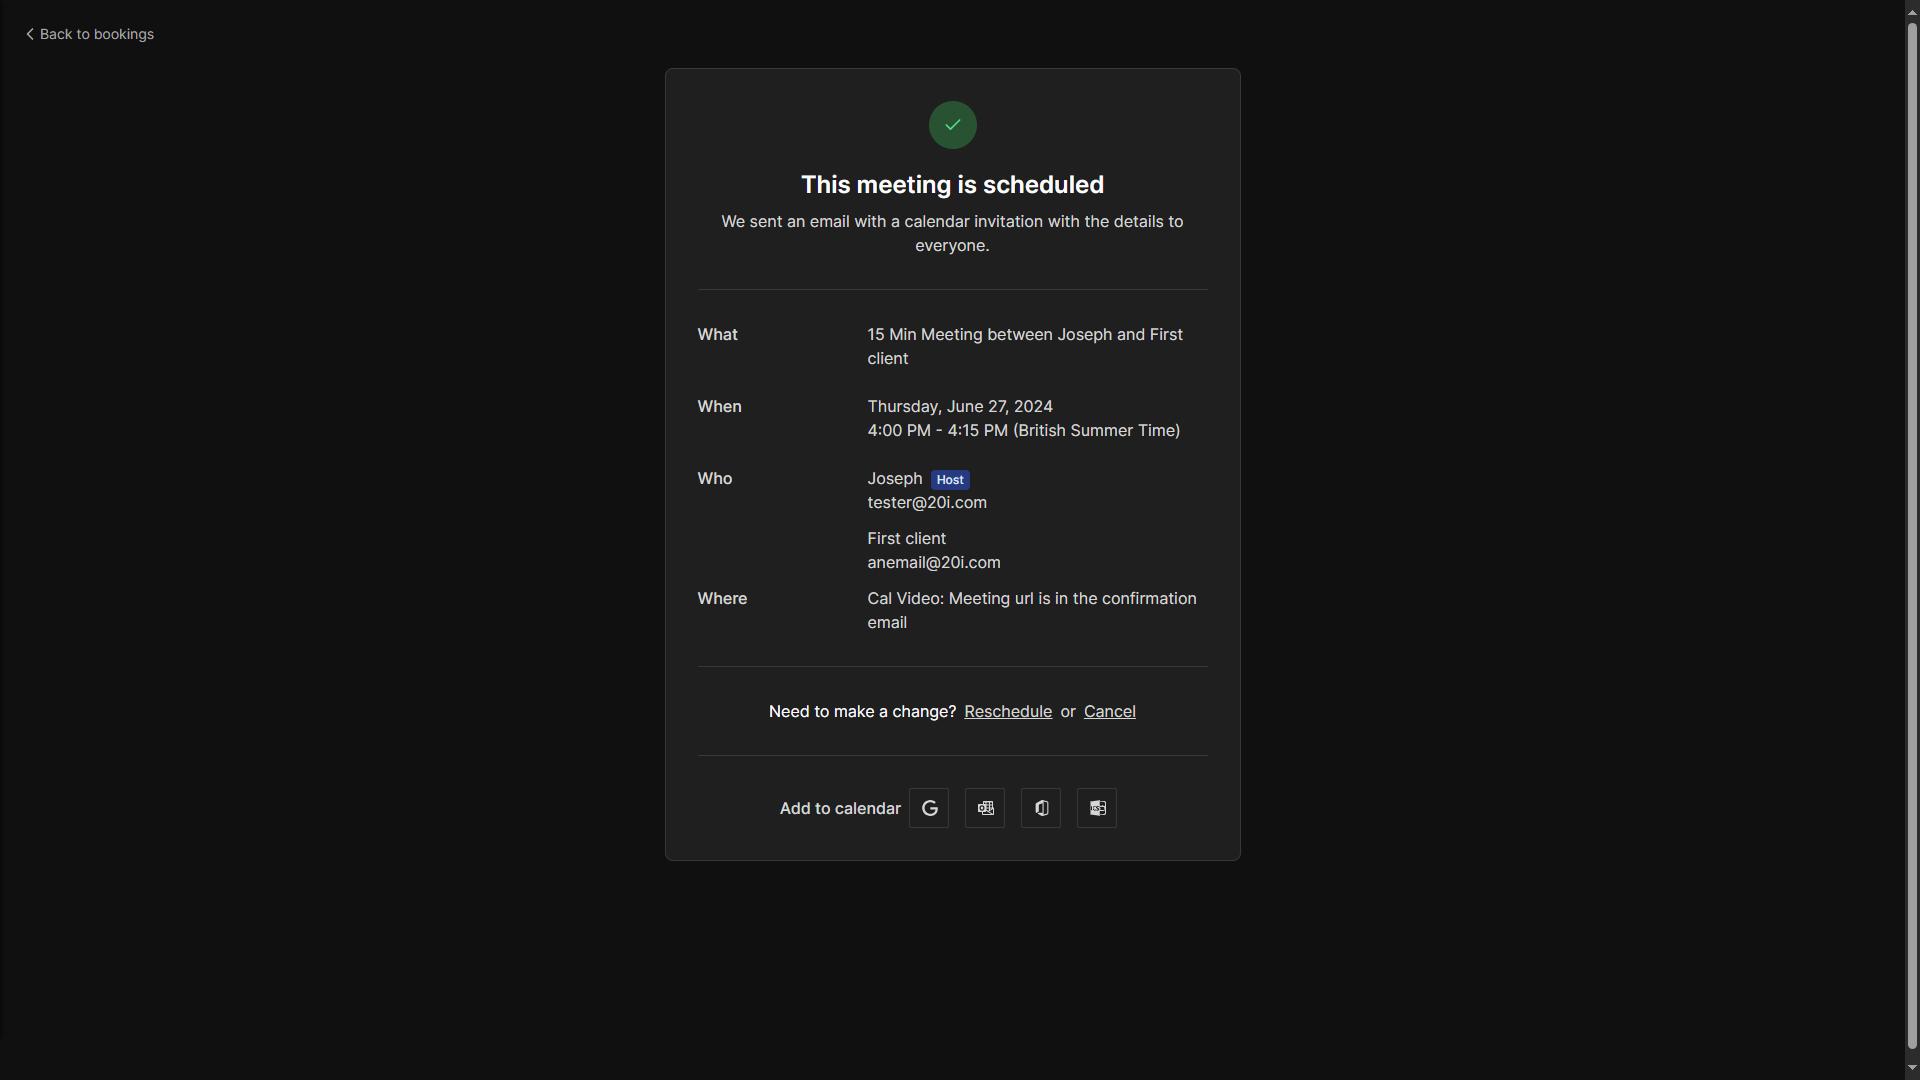
I had not set up a video conferencing app during the installation process, and was interested to see that Cal.com uses its own Cal Video solution as the default meeting option.
Clicking “Back to bookings” in the top left took me to the Bookings dashboard. I could see the meeting that I’d just scheduled when acting as a client. Having a link to your public page, in your email footer for example, could be very useful!
I was impressed to find you can use a combination of the Upcoming, Unconfirmed, Recurring, Past and Cancelled tabs with both People and Event Type filters. This allows you to easily identify clients who bail on their appointments for example. IYKYK!
Event Types with Cal.com
There are three default Event Types: 15 Min Meeting, 30 Min Meeting and Secret Meeting. You can add as many more as you like, but let’s take a look at these first to get a better idea of what is involved.
Here is what you see when clicking on 15 Min Meeting:
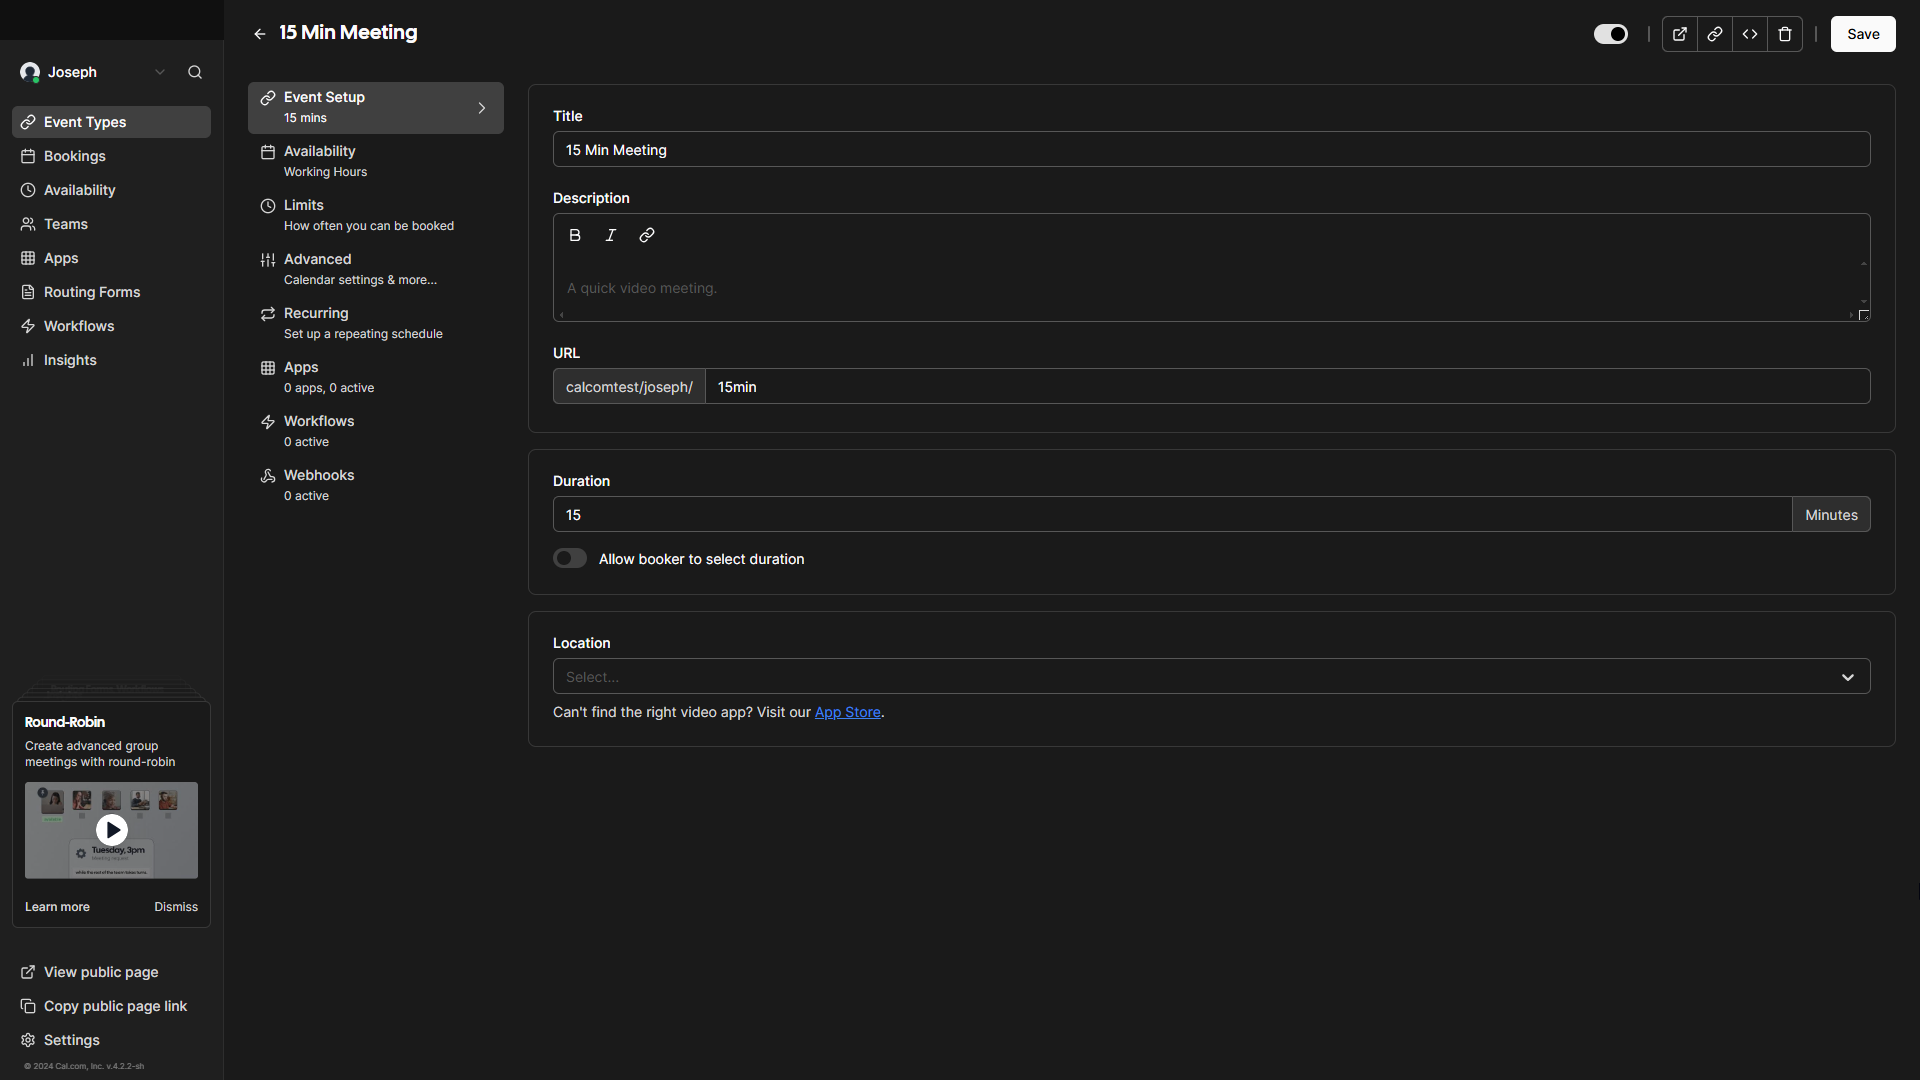
Event Setup
This menu allows you to change the basic details of your meeting: Title, Description, URL, Duration and Location of the meeting.
For Description, you have a basic text editor and the ability to add links. This is good for situations where you’d want to attend a meeting with preliminary paperwork filled in, or for terms and conditions to have already been signed.
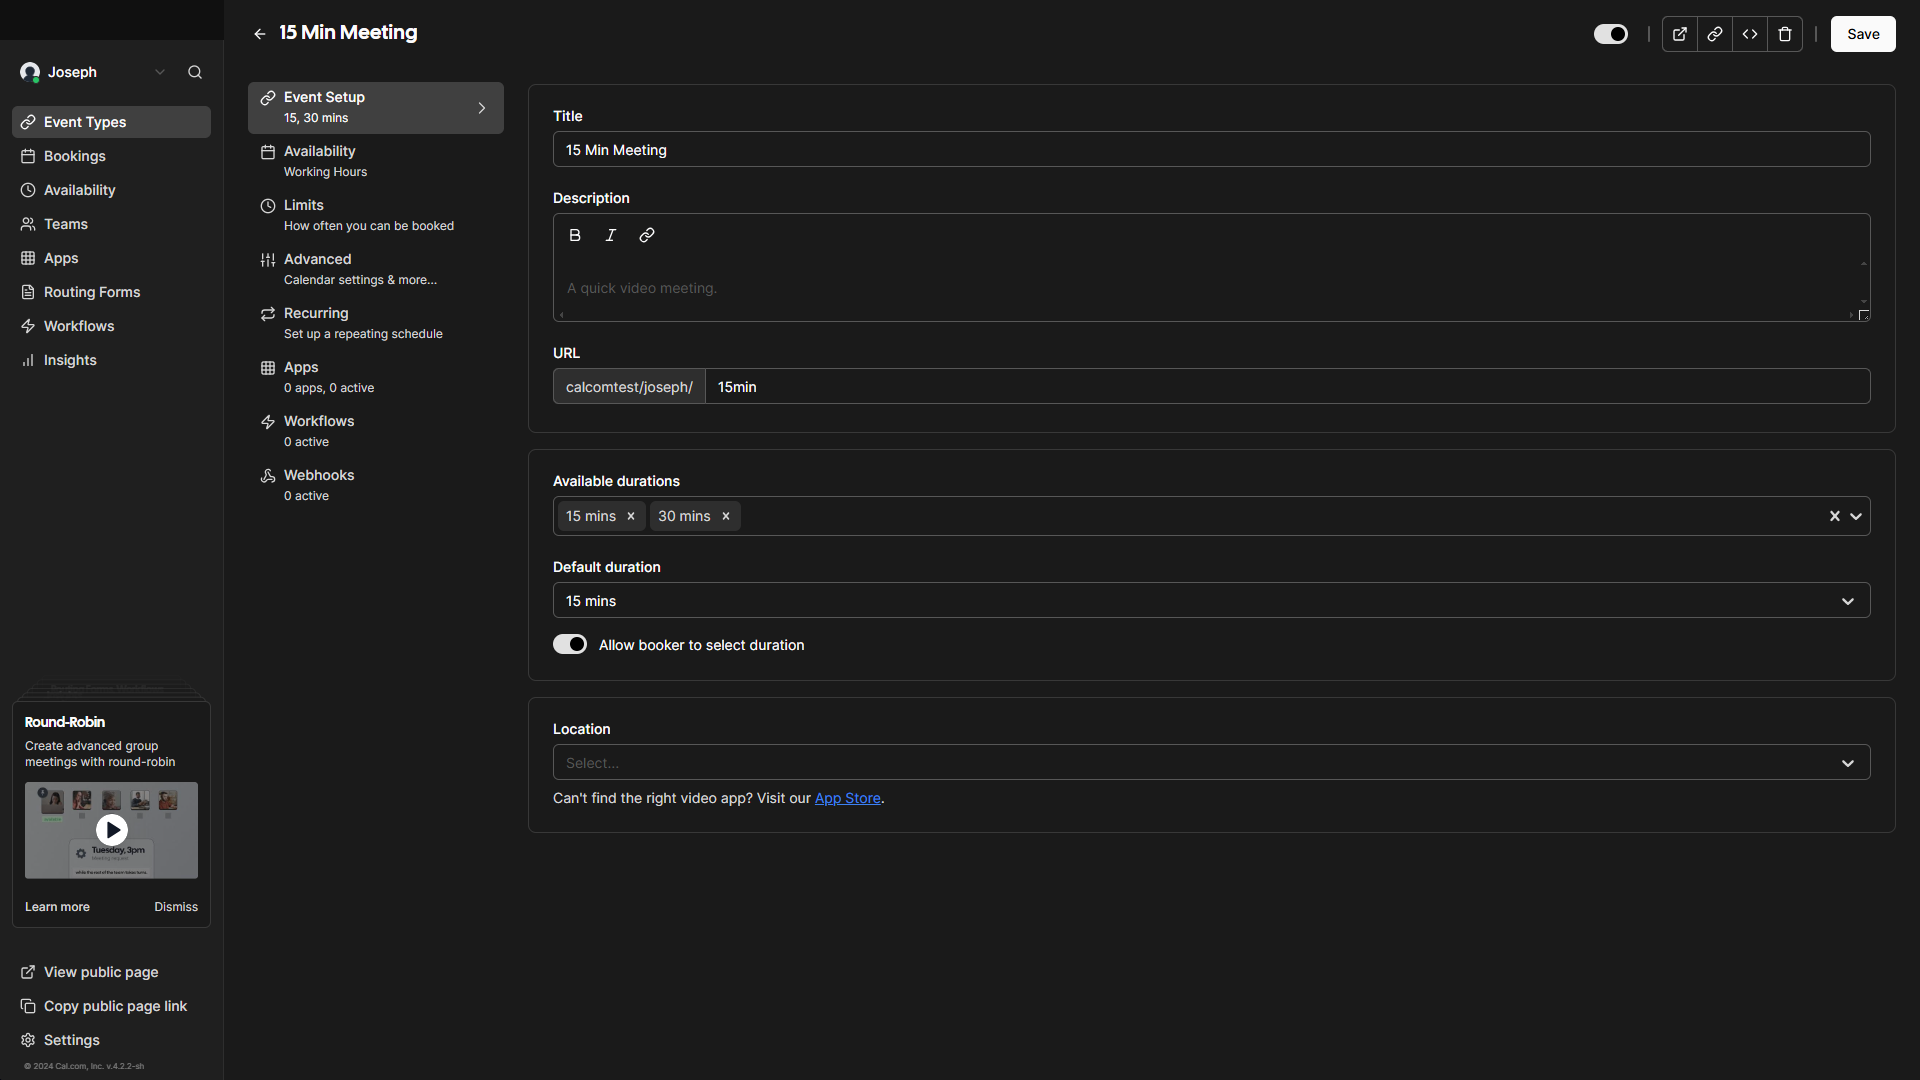
The Duration field has an interesting sub-option called “Allow booker to select duration”. If you check this box, you can add all the duration options from 5 minutes up to 480 minutes that you want, and set a default.
This is powerful when used with the buffer times that you can add before and after your events from the Limits sub menu as I will illustrate further down in this section.
The Location part allows you to specify the setting in which the meeting is to take place. Options include:
- Any of the video conferencing platforms you set up
- In person at your address or at the attendee address
- A link to a meeting place (you could choose anything here – What-3-Words, VDO.Ninja, a link to a Google Maps location etc)
- Phone number of organiser or attendee
Availability
From here, you use the dropdown menu to choose from options you set up via the top-level Availability menu. More on that top level Availability menu in the next section.
The flexibility on offer here is brilliant. Say you want 15 minute meetings for your regular work days, but 30 minute meetings on Saturday mornings:
- Duplicate your 15 minute meeting
- Change the duration to 30 mins
- Change availability to Saturday
- Set the name of the meeting to “Saturdays – 30 Mins”
- Press the “Save” button in the top right
Clients who visit your public page can see your 15 Min weekday slots and your Saturdays – 30 Mins ones, and book you accordingly.
Limits
This submenu is where you make your Event Types manageable.
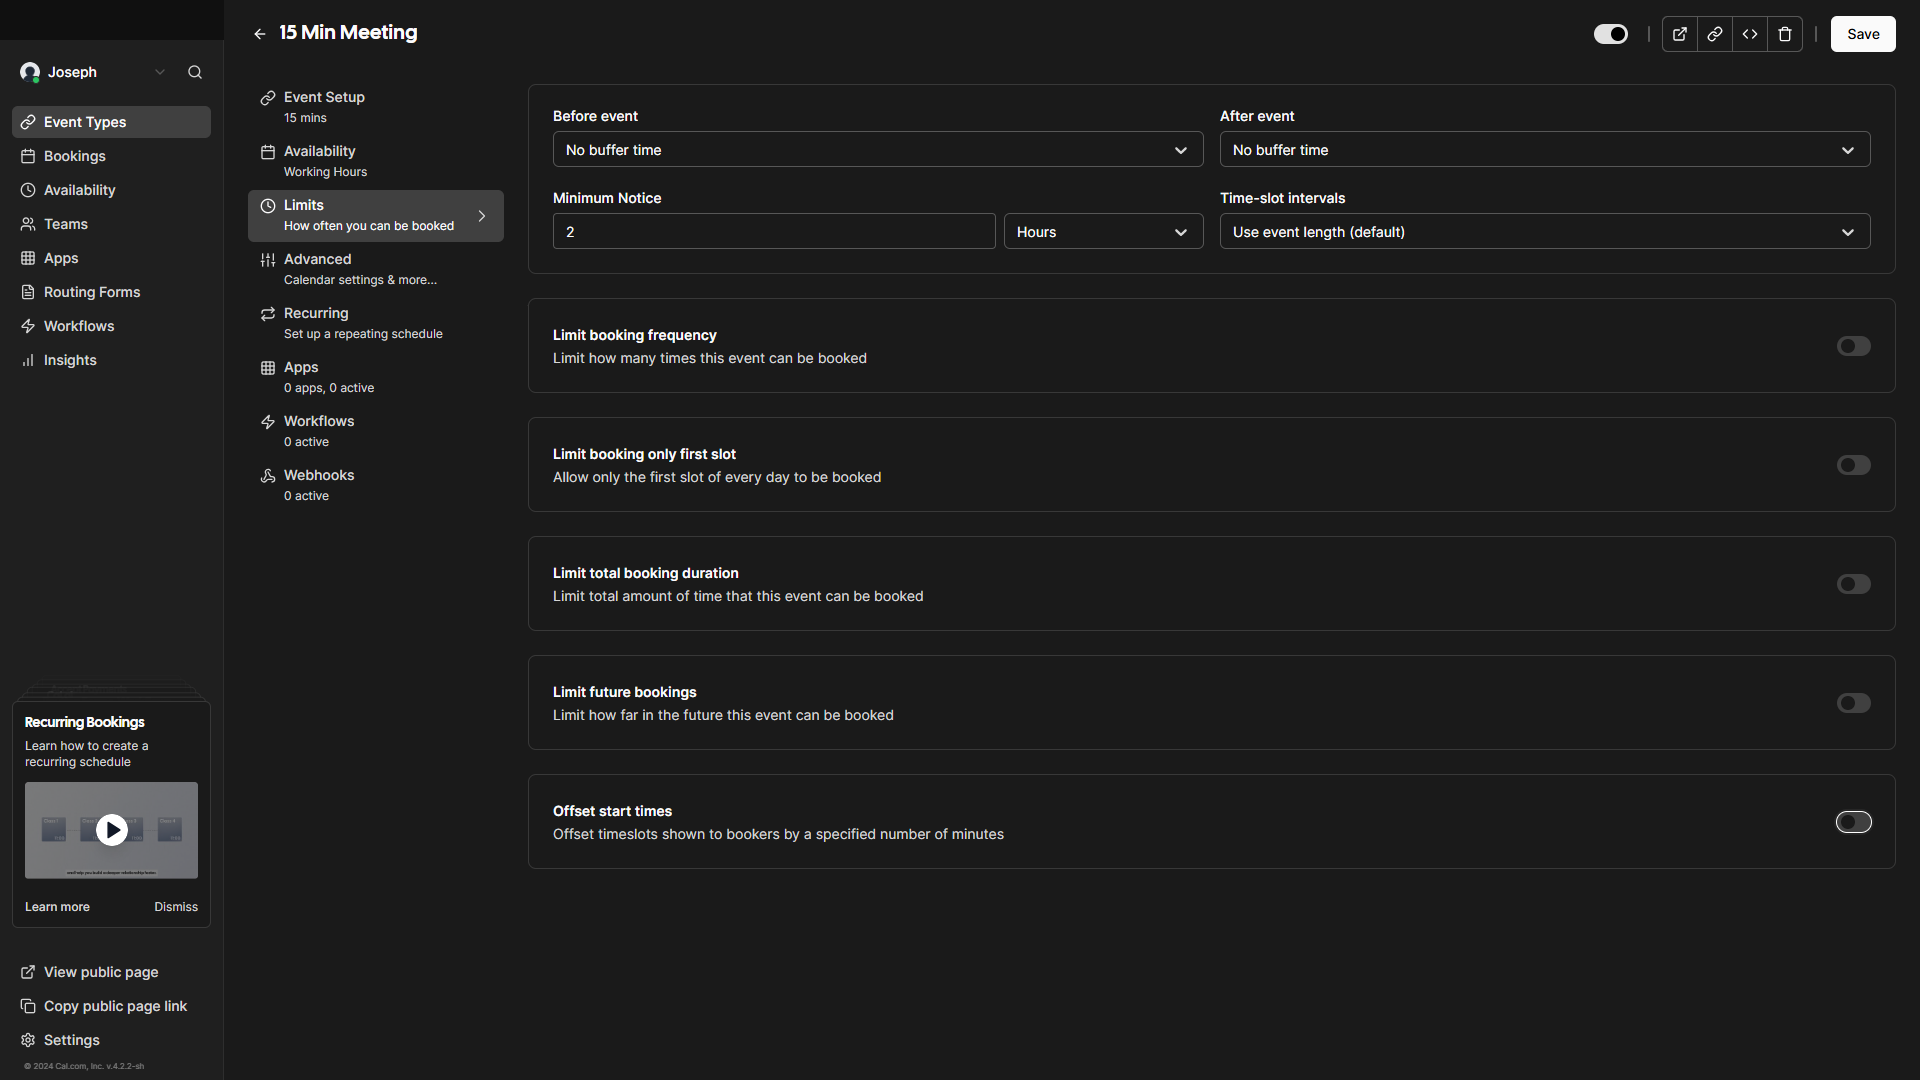
Buffer time before and after your event lets you build in time to prepare and follow up actions.
A sales manager, for example, could use buffer time to catch up on customer notes before an appointment and have time set aside afterwards to process sales and arrange any further after-sales services.
“Minimum notice” and “Limit future bookings” give space to account the logistical side of your operation: preparing a product or accounting for the supply/restocking of materials.
“Limit booking frequency” keeps you from overextending yourself by specifying how many times you can be booked per day, month and/or year.
These factors, together, give Cal.com users fine control over the details of their events/meetings so they are sustainable and realistic. This is far beyond what most calendar apps are capable of – being open source and free to use as well makes Cal.com compelling. There is more.
Advanced
Dictate how event names are displayed for clients, if you want to manually confirm appointments instead of them being automatically accepted, if you hide notes from displaying on the calendars you use and if clients have to verify their email address before they can book you.
You can add questions – aka fields – to your event booking forms. There are a lot of options to choose from:
- Phone
- Address
- Short text
- Number
- Long text
- Select
- MultiSelect
- Multiple Emails
- Checkbox Group
- Radio Group
- Checkbox
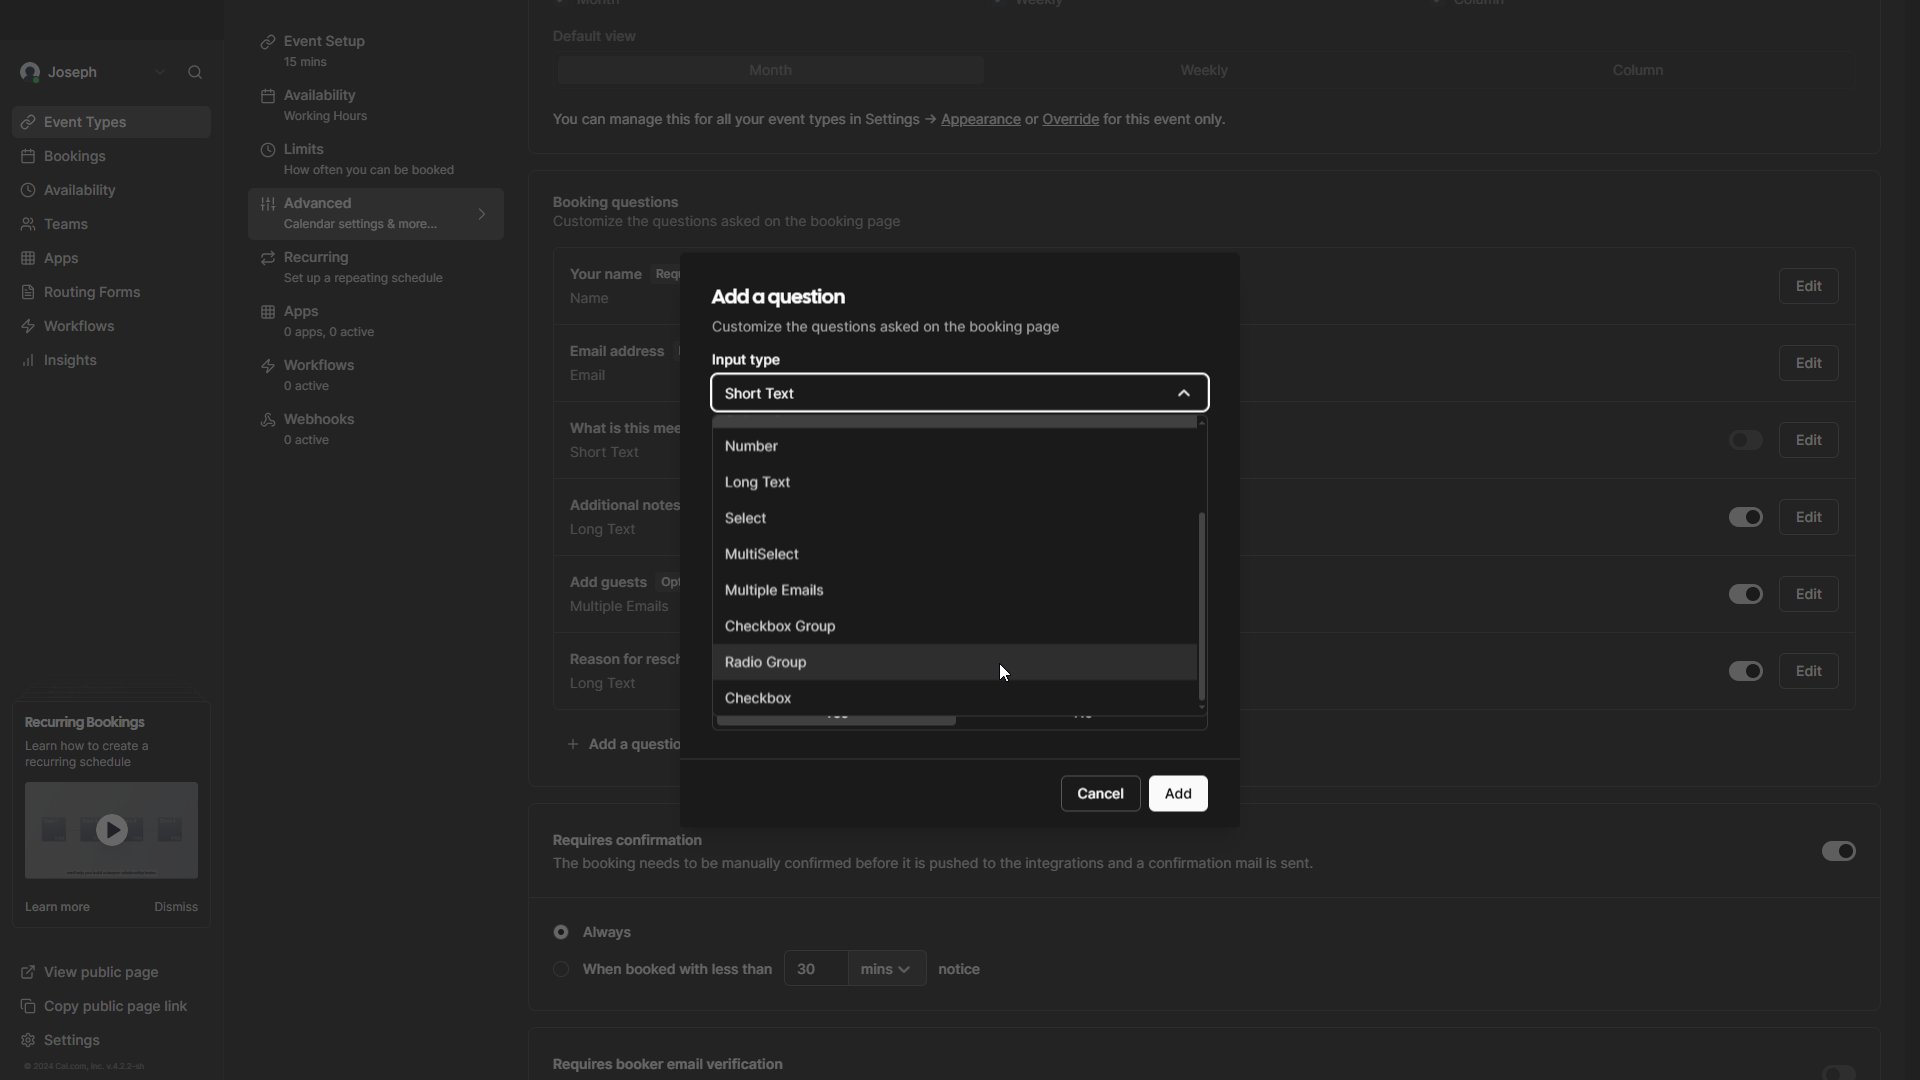
The identifiers, labels and options specified here can be used with APIs, but that is outside of the scope of this review as this is a paid feature.
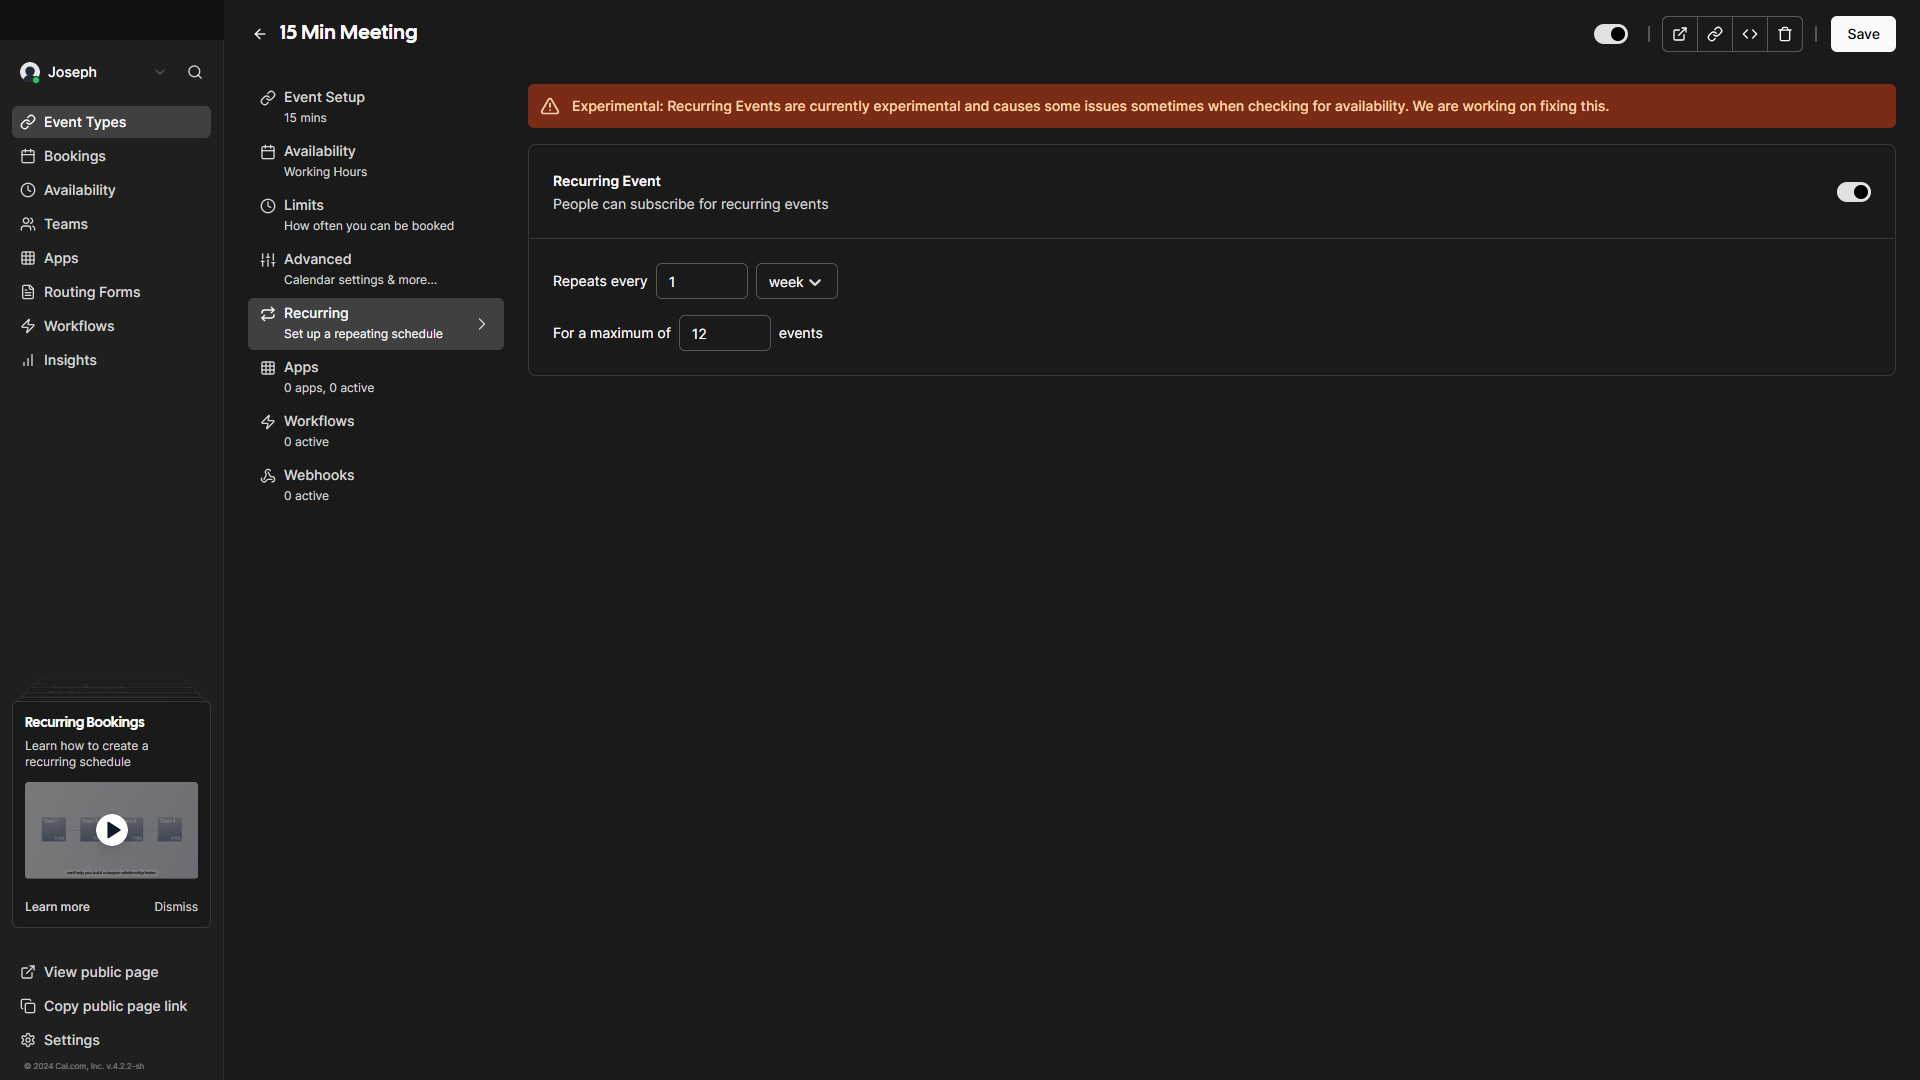
Recurring
At the time of this review, this is an experimental feature. In my testing it appeared to work without issues in the few weeks I spent using the platform.
If you toggle this on, you can set how often and how many events your meeting can be booked for.
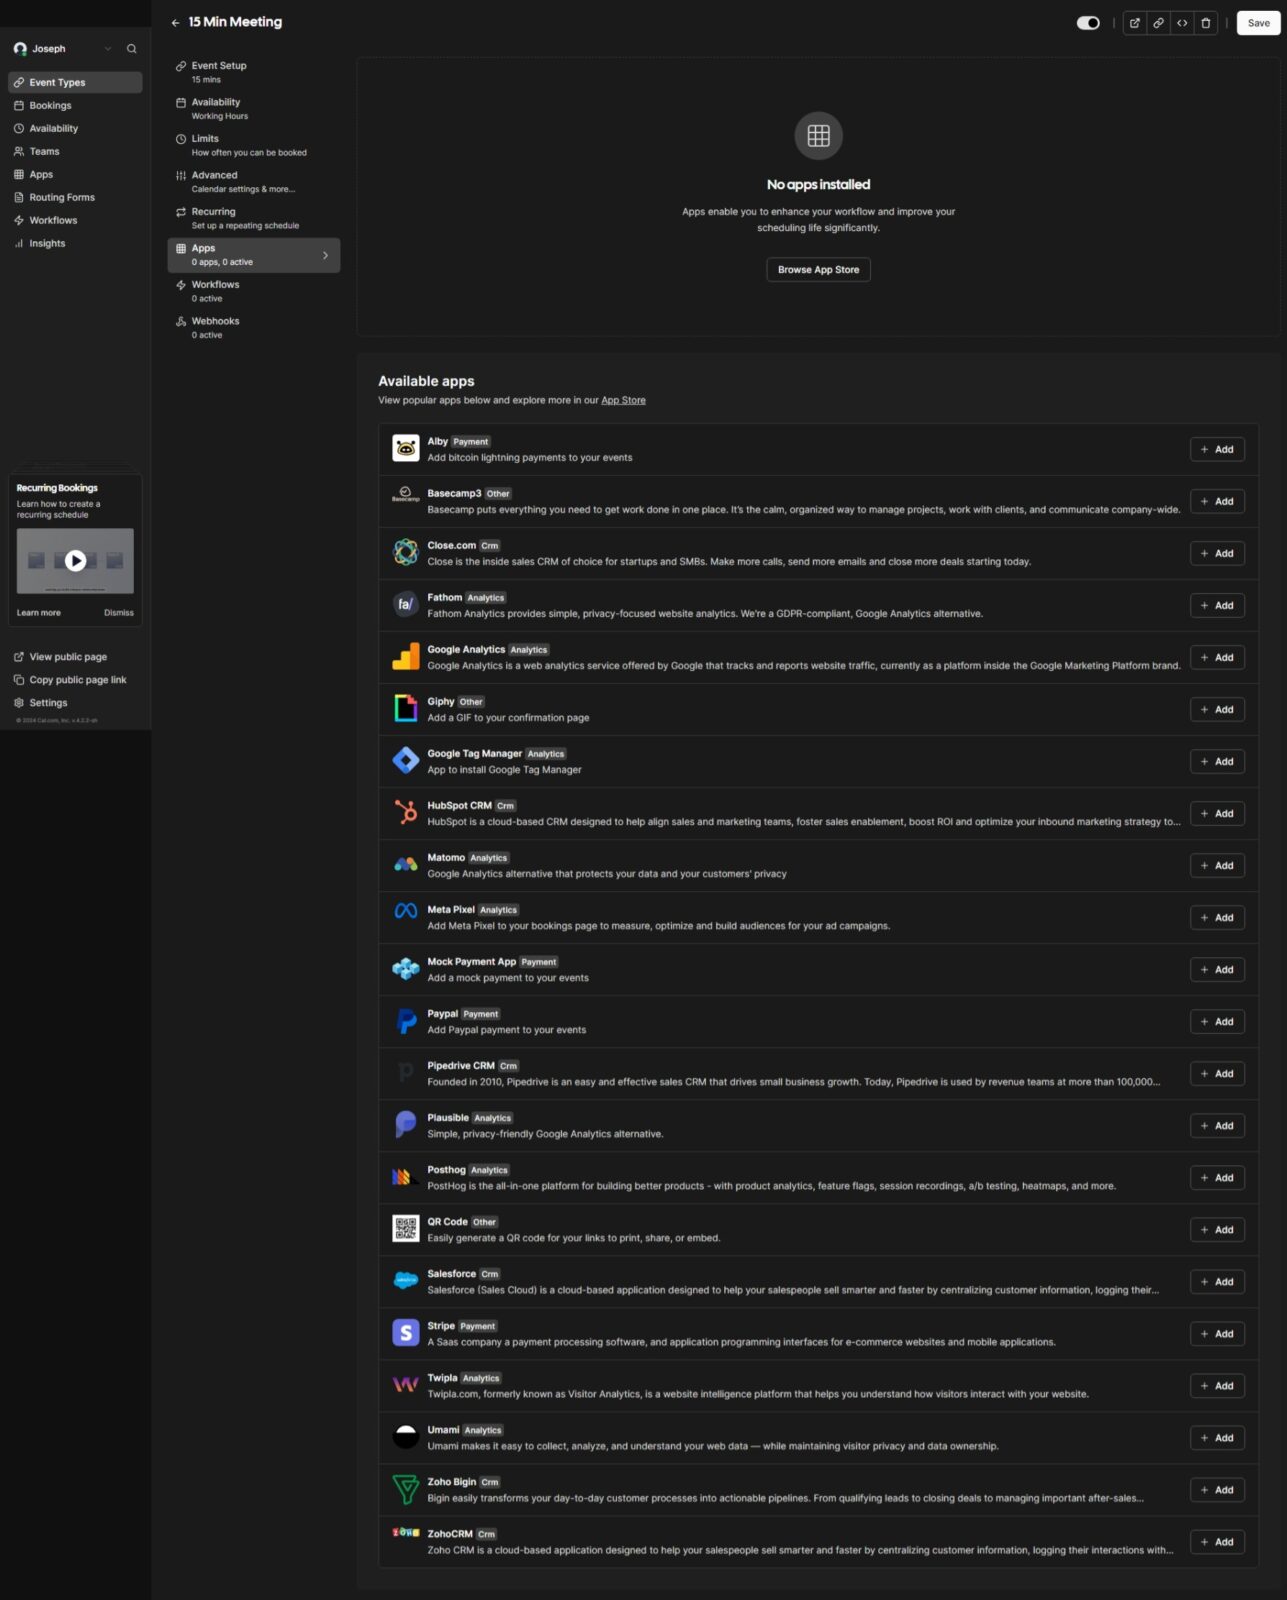
Apps
Here is where you integrate your Cal.com Event with services like PayPal, Stripe, Google Analytics, Matomo and much more. The functionality of these apps makes the free-to-use version of Cal.com capable and viable.
I’ll include a full-page screenshot below so you can see what was available during my review. Click the image to zoom in:
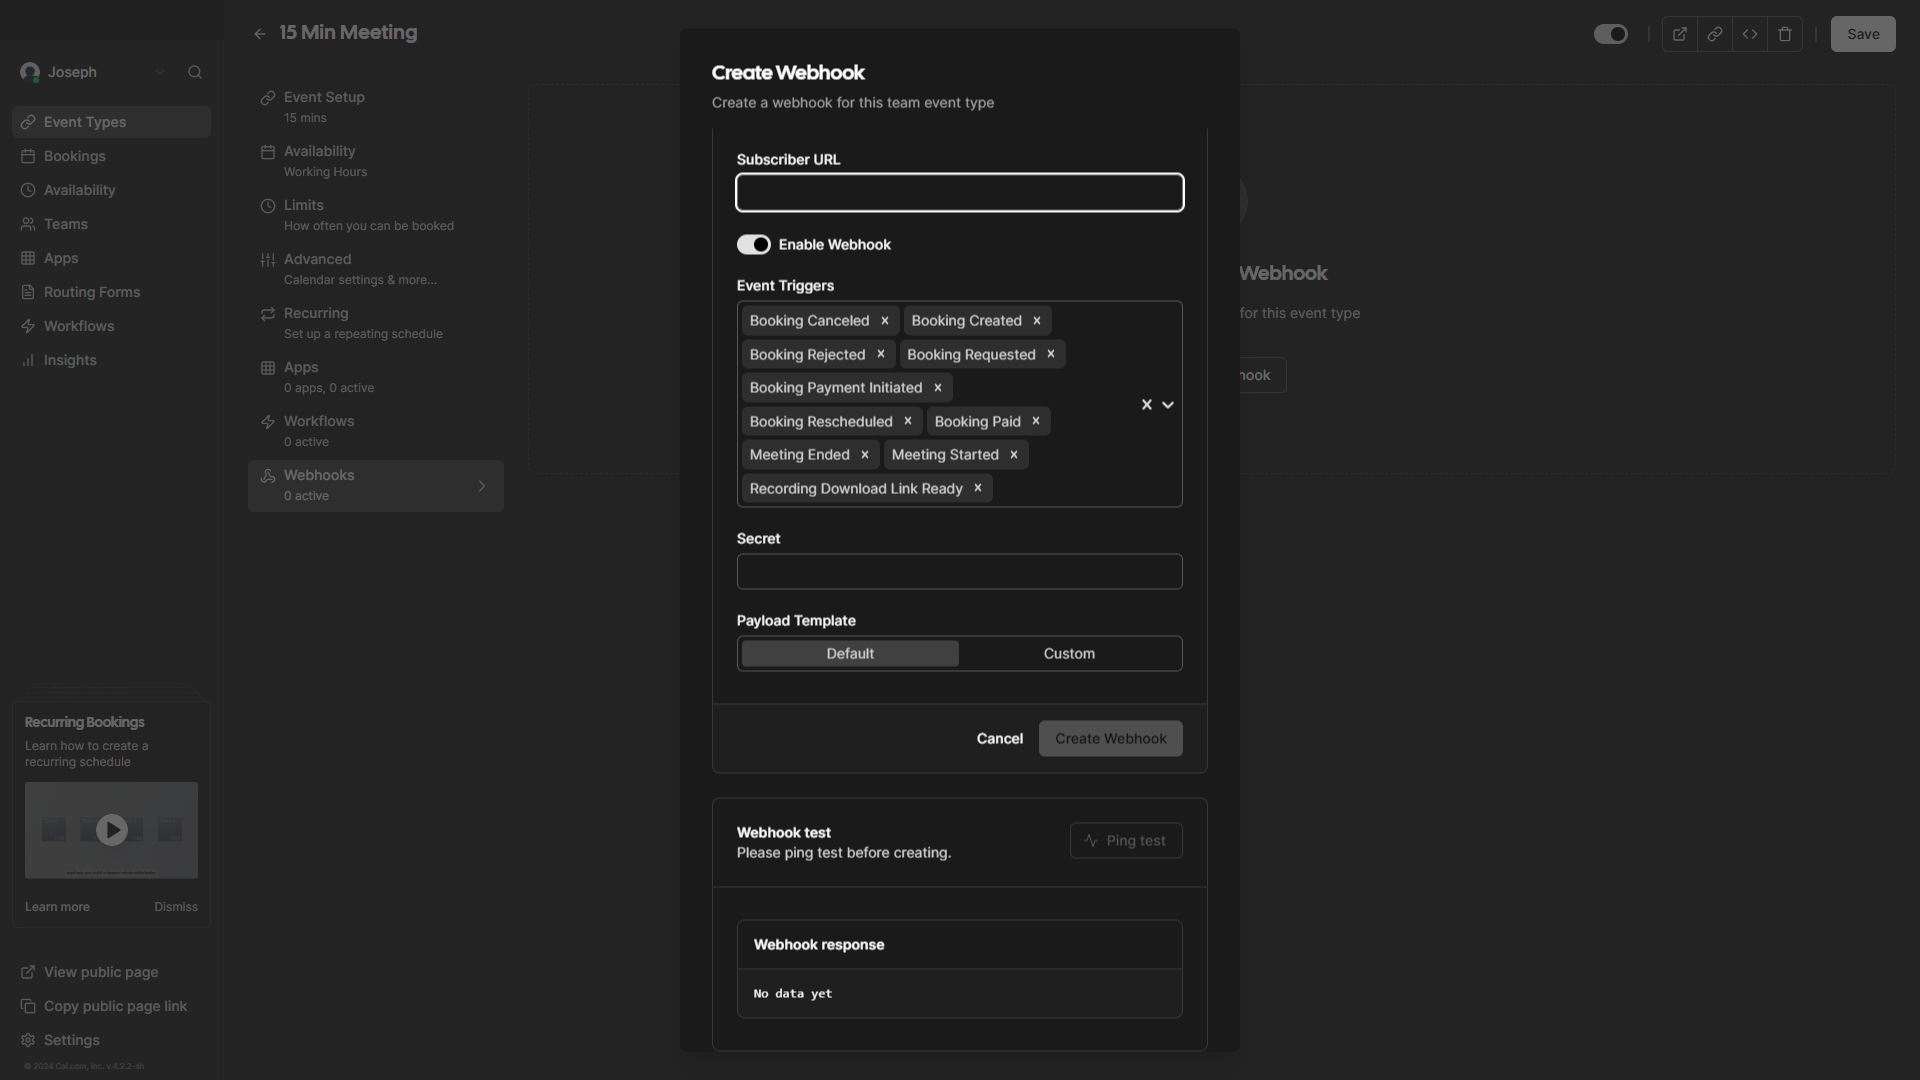
Webhooks
Set up real-time notifications and integrate Cal.com with apps that aren’t yet available through their store. Offering this level of functionality for free is rare, and certainly not the norm in the SaaS industry!
The Event Triggers at the time of my review are:
- Booking Cancelled
- Booking Created
- Booking Paid
- Booking Payment Initiated
- Booking Rejected
- Booking Requested
- Booking Rescheduled
- Form Submitted
- Meeting Ended
- Meeting Started
- Recording Ready
Availability with Cal.com
This top-level menu is where you put together the dates and times that are assigned to Events. I’ll go over how to add half days, carve out a lunch hour and account for annual leave to give you an idea of what can be achieved.
Half days
Find the working day that you’d like to change into a half day. You’ll see a start and a finish time. Click on the finishing time, and a drop down menu will appear that shows 15 minute increments. Choose your end time and Cal.com will automatically save your new schedule.
Lunch hour
Use the plus button to add a new time slot on Monday. Click on the finishing time of the original time slot and choose the time your lunch break starts.
Now, change the times on the new slot to match your return to work. Repeat these steps for each day and you’ll have an appointment-free lunch break each day!

Annual leave
If you wanted to be more discreet about your availability than the Out-of-Office feature allows, here is how you do it. With a regular work week as our starting point; you’ll need to click the “Add an override” button in the Date overrides section.
Use the arrows to go to the month you annual leave starts in. For this example, we’ll use October.
Click the days that you’ll be on leave for. You’ll see that the days you have selected change colour. If you have leave booked for later on in the year – use the arrows to change month and click the dates you’ll be off for again.
With all of your holidays selected: activate the “Mark unavailable (All day)” toggle switch, and then click the “Add Override” button in the bottom right.
Cal.com will save your changes, and now you don’t need to worry about clients booking you while you’re out-of-office.

That segues nicely into the Out-of-Office feature, but before we take a look at that – let’s talk about Cal.com from the perspective of someone who does not have a regular working schedule.
Irregular availability
When we added annual leave to our calendar in the previous subsection; we made use of the “Mark unavailable (All day)” toggle to tell Calendly that we cannot be booked on the days we selected, but are otherwise available.
If you uncheck all days from your general availability, then use “Add an override”; you can specify individual dates your clients can book you on. You can then add time slots to each date you choose.
This level of customisation is exactly what zero hour contractors, the semi-retired, freelancers, consultants etc need to make Cal.com work for their use cases.
Out of office
From top level ‘Settings’ menu, within the ‘Out of office’ submenu; you can add OOO notifications that prevent you from being booked. There is a ‘Reason’ dropdown menu that lets you assign emojis and you can add notes that show on your public page when applied:
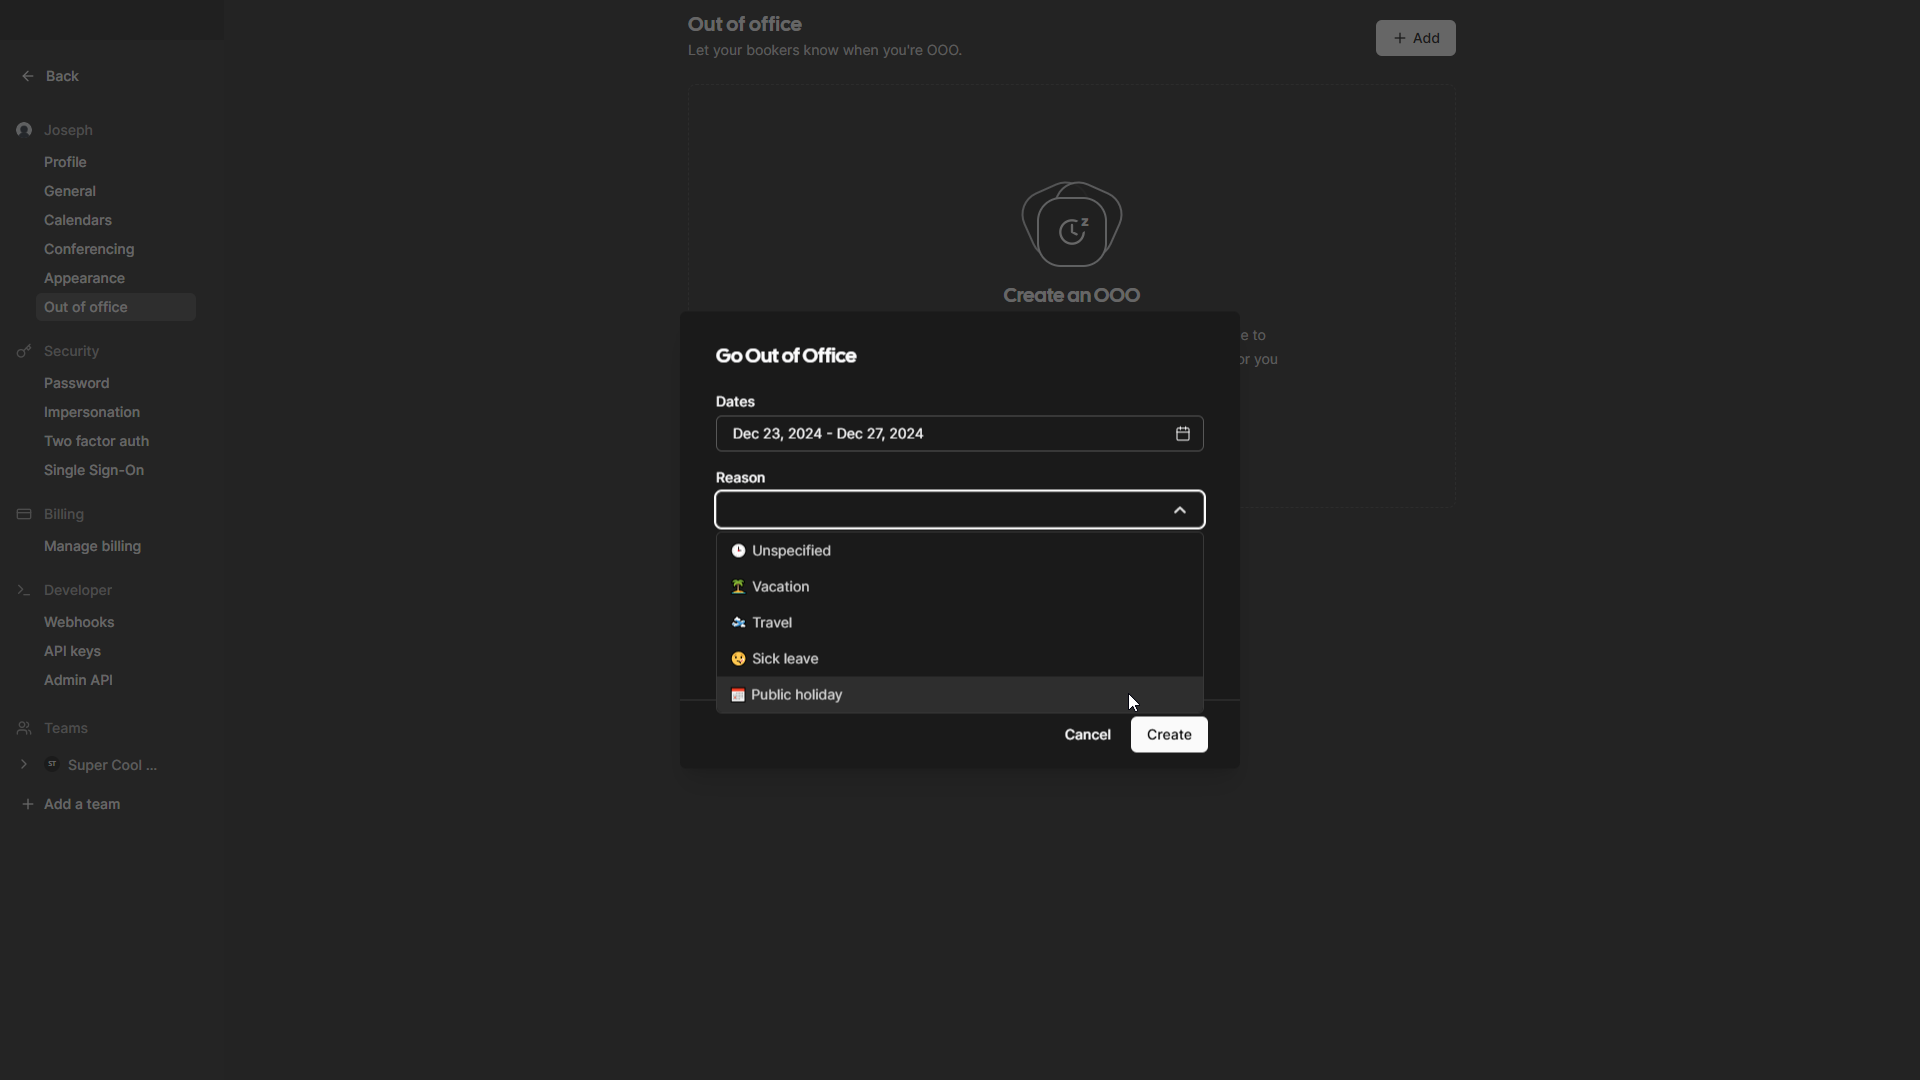
Using this dedicated OOO feature is a quicker way to set annual leave than I outlined above, but there are use cases where a little more discretion is required than is afforded here.
The act of specifying a date with the OOO tool was a little fiddly. Cal.com automatically preselected the dates of the working week I was currently in whenever I clicked ‘Add’. Moving through the months to December, and choosing a date range was also a little unrefined as you can see:
Despite these minor niggles, it only takes a few seconds to get the OOO set up in the way I wanted.
Creating Teams with Cal.com
Adding a team was very simple. Click ‘Teams’ on the top level nav bar, then use the ‘Create Team’ button. Enter the details into the fields that pop up, add members to your team – along with their permissions – and click ‘Finish’.
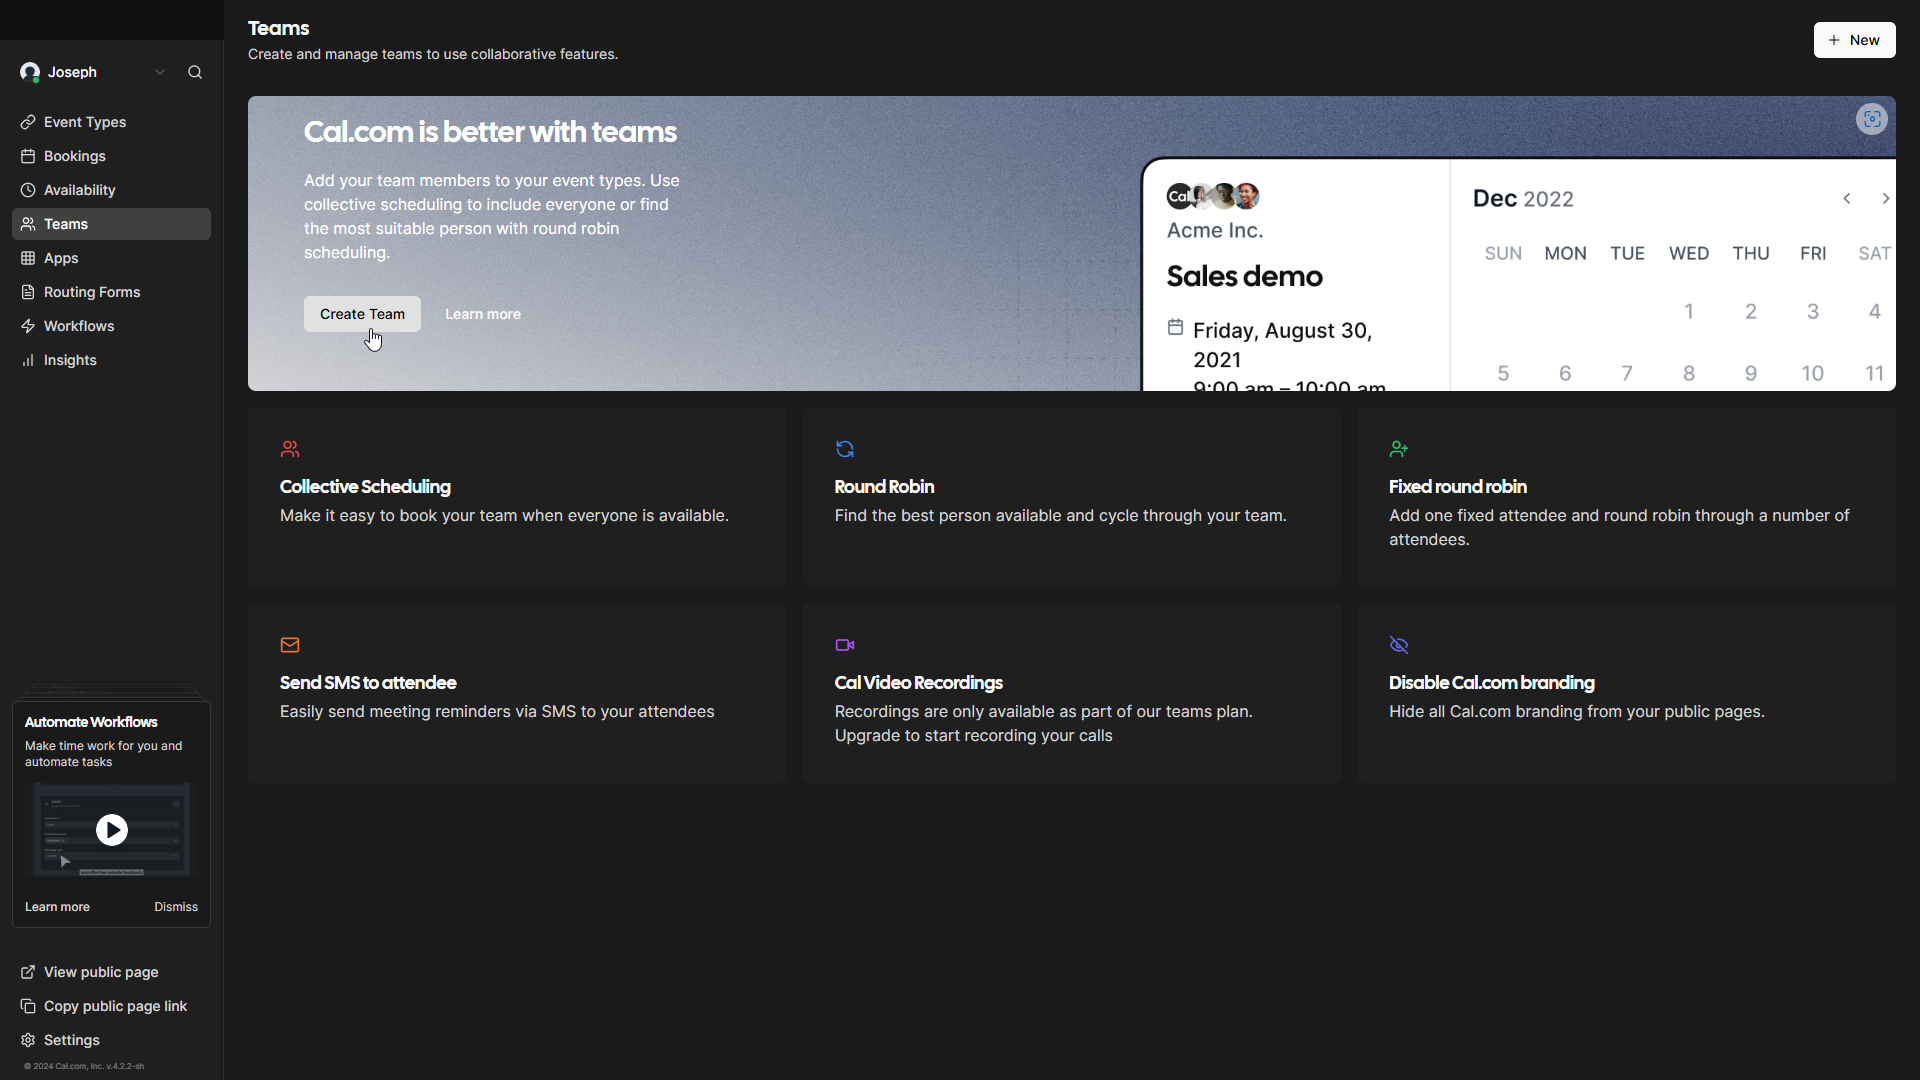
You can edit the details of your team from by clicking the top-level ‘Teams’ menu item. Invite members, change the behaviour type (collective vs round-robin) and change how your team’s profile will appear on the team public URL. The options for appearance are:
- Add or change a logo
- Edit the URL that serves as the public page for your team
- Add a description (and any links)

The top Availability menu is where you can set up when your team can be booked. The toggle in the top right allows you to switch between your individual and team schedules, and dialling your team calendar in follows the same process as with individuals.
Cal.com App Store
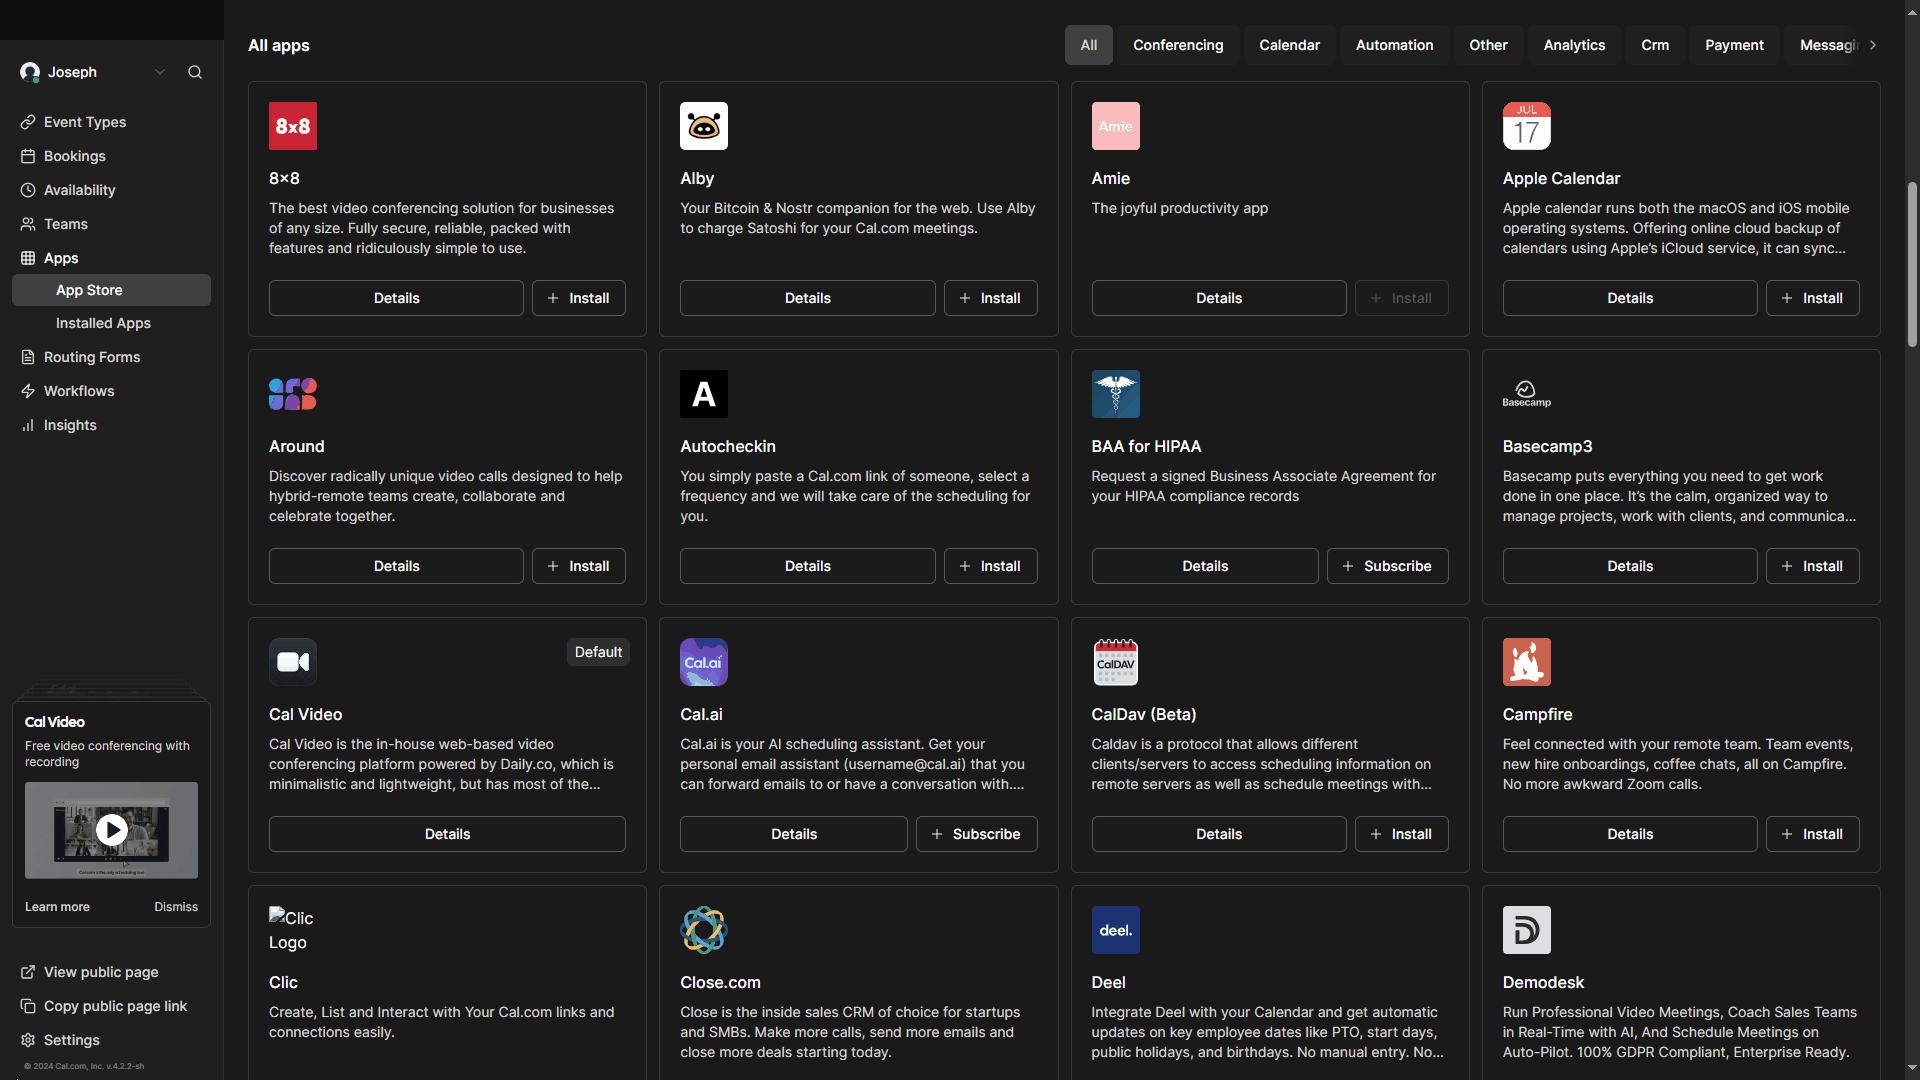
I was impressed with the amount and variety of integrations available during the Cal.com account setup process, and was eager to take a look at this section in more detail. Clicking the top level ‘Apps’ menu item whisks you to the Cal.com ‘App Store’:
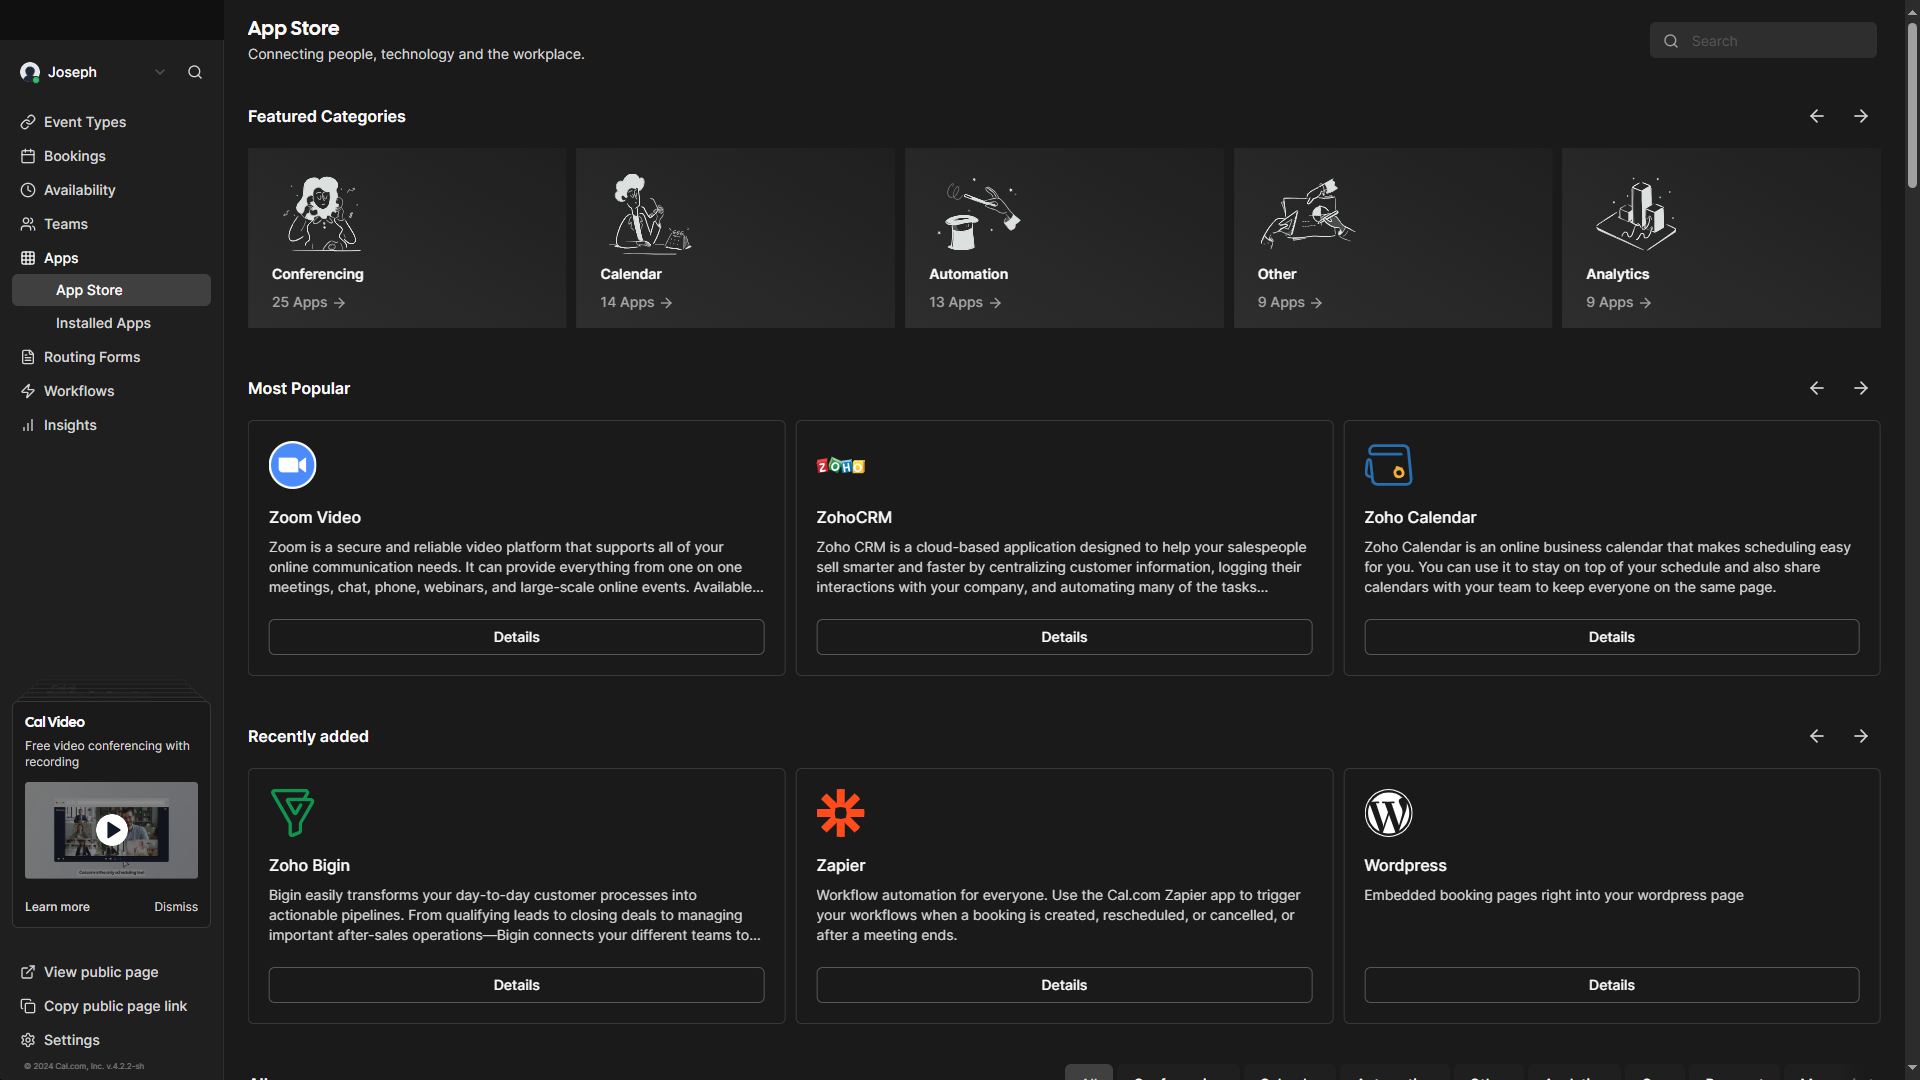
From here you can see everything on offer, and filter by categories to find what you need.
There are ‘Most Popular’ and ‘Recently added’ rows, which implies that more are in the works. For free to use software – this level of third-party application support is impressive:
You can view the apps you are already using from ‘Installed Apps’ submenu, and make any necessary adjustments in case you change passwords or credentials.
Integrating Cal.com with WordPress
The Cal.com App Store has a WordPress app and, as WordPress Hosting specialists; I was keenly interested to see how this worked. Clicking ‘Details’ takes you to a page outlining what the app does, and how to use it:
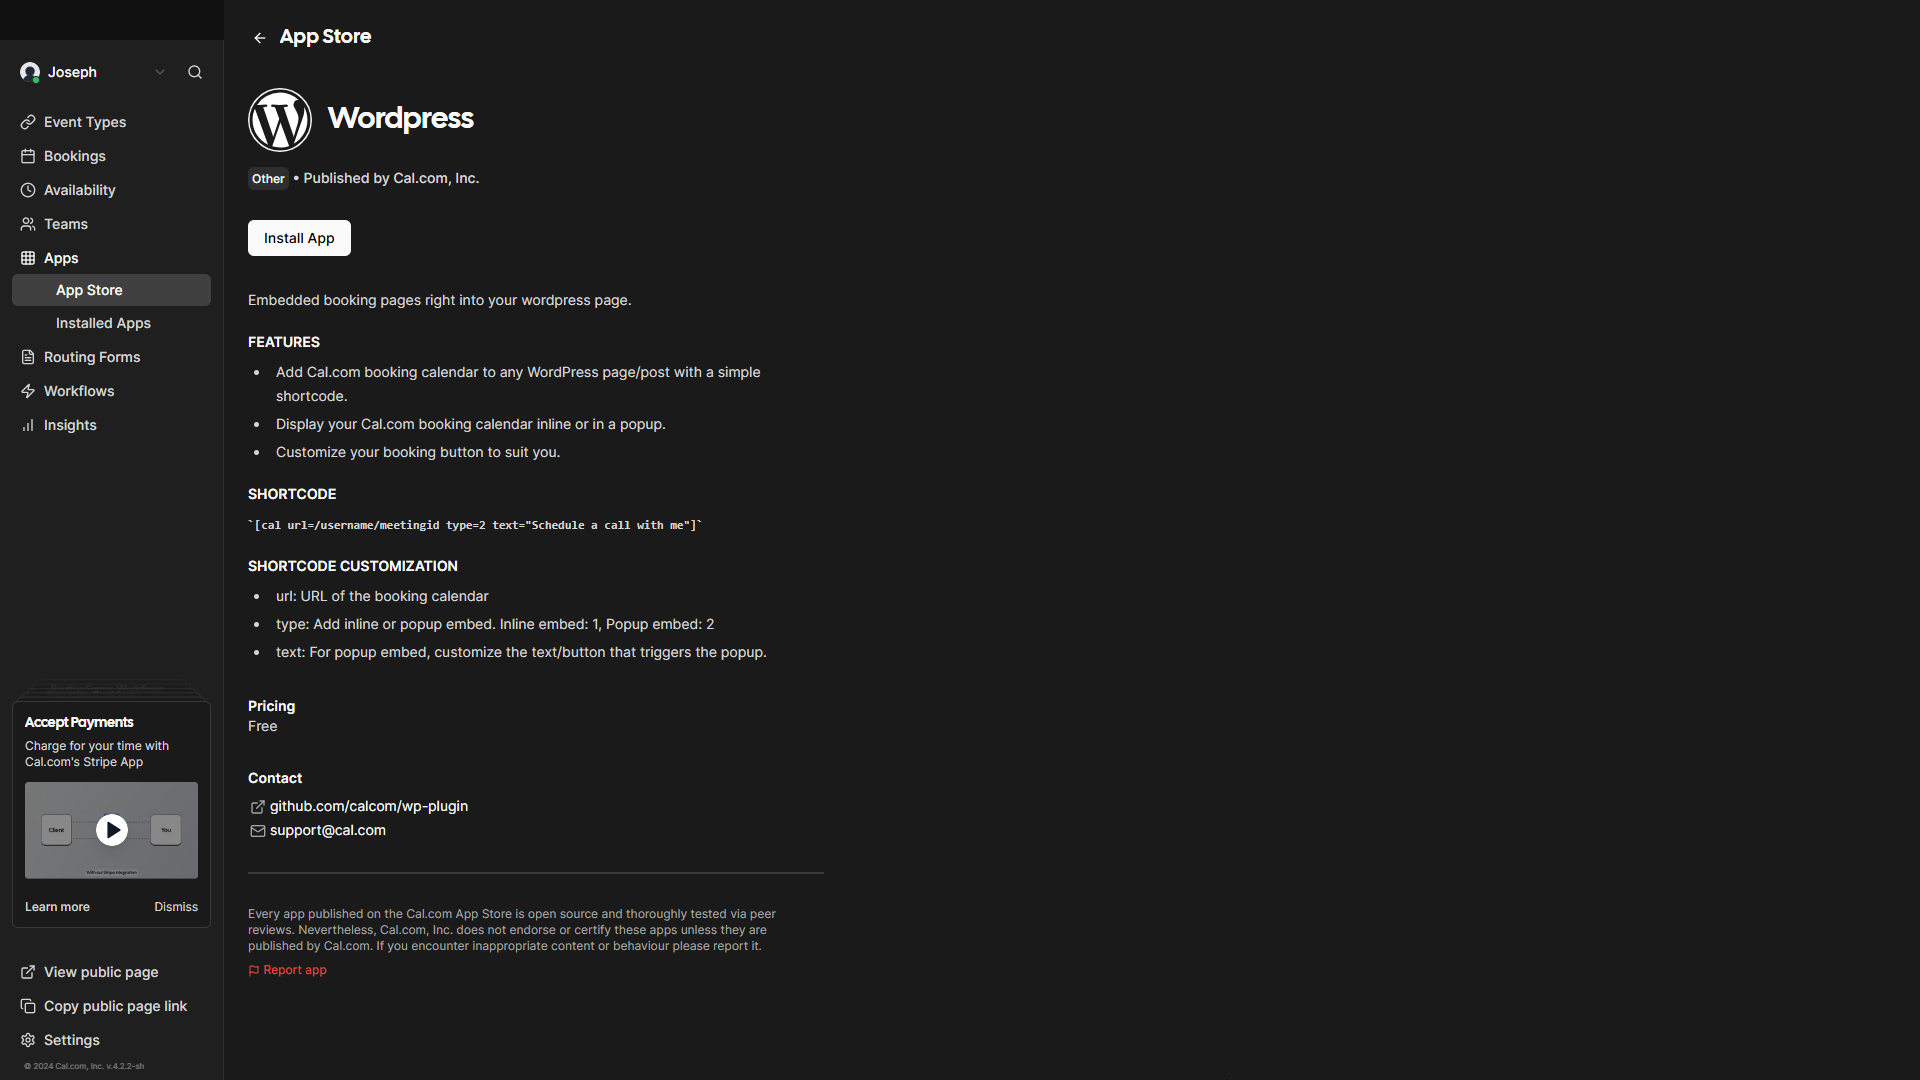
The app enables you to use the shortcode block to embed Events in your WordPress pages.
Clicking on ‘Install App’ from this page, or ‘+ Install’ from the Cal.com App Store prompts you to choose if the integration points to yourself or your team, and whisks you to the WordPress Plugin page: https://wordpress.org/plugins/cal-com
I chose myself and, curious to see if I could also add team availability, clicked the ‘Install App’ button a second time. I was pleased to see that both options could be enabled – meaning that embedding events for individuals and for teams is possible.
The WordPress Cal.com plugin page had a concerning message:
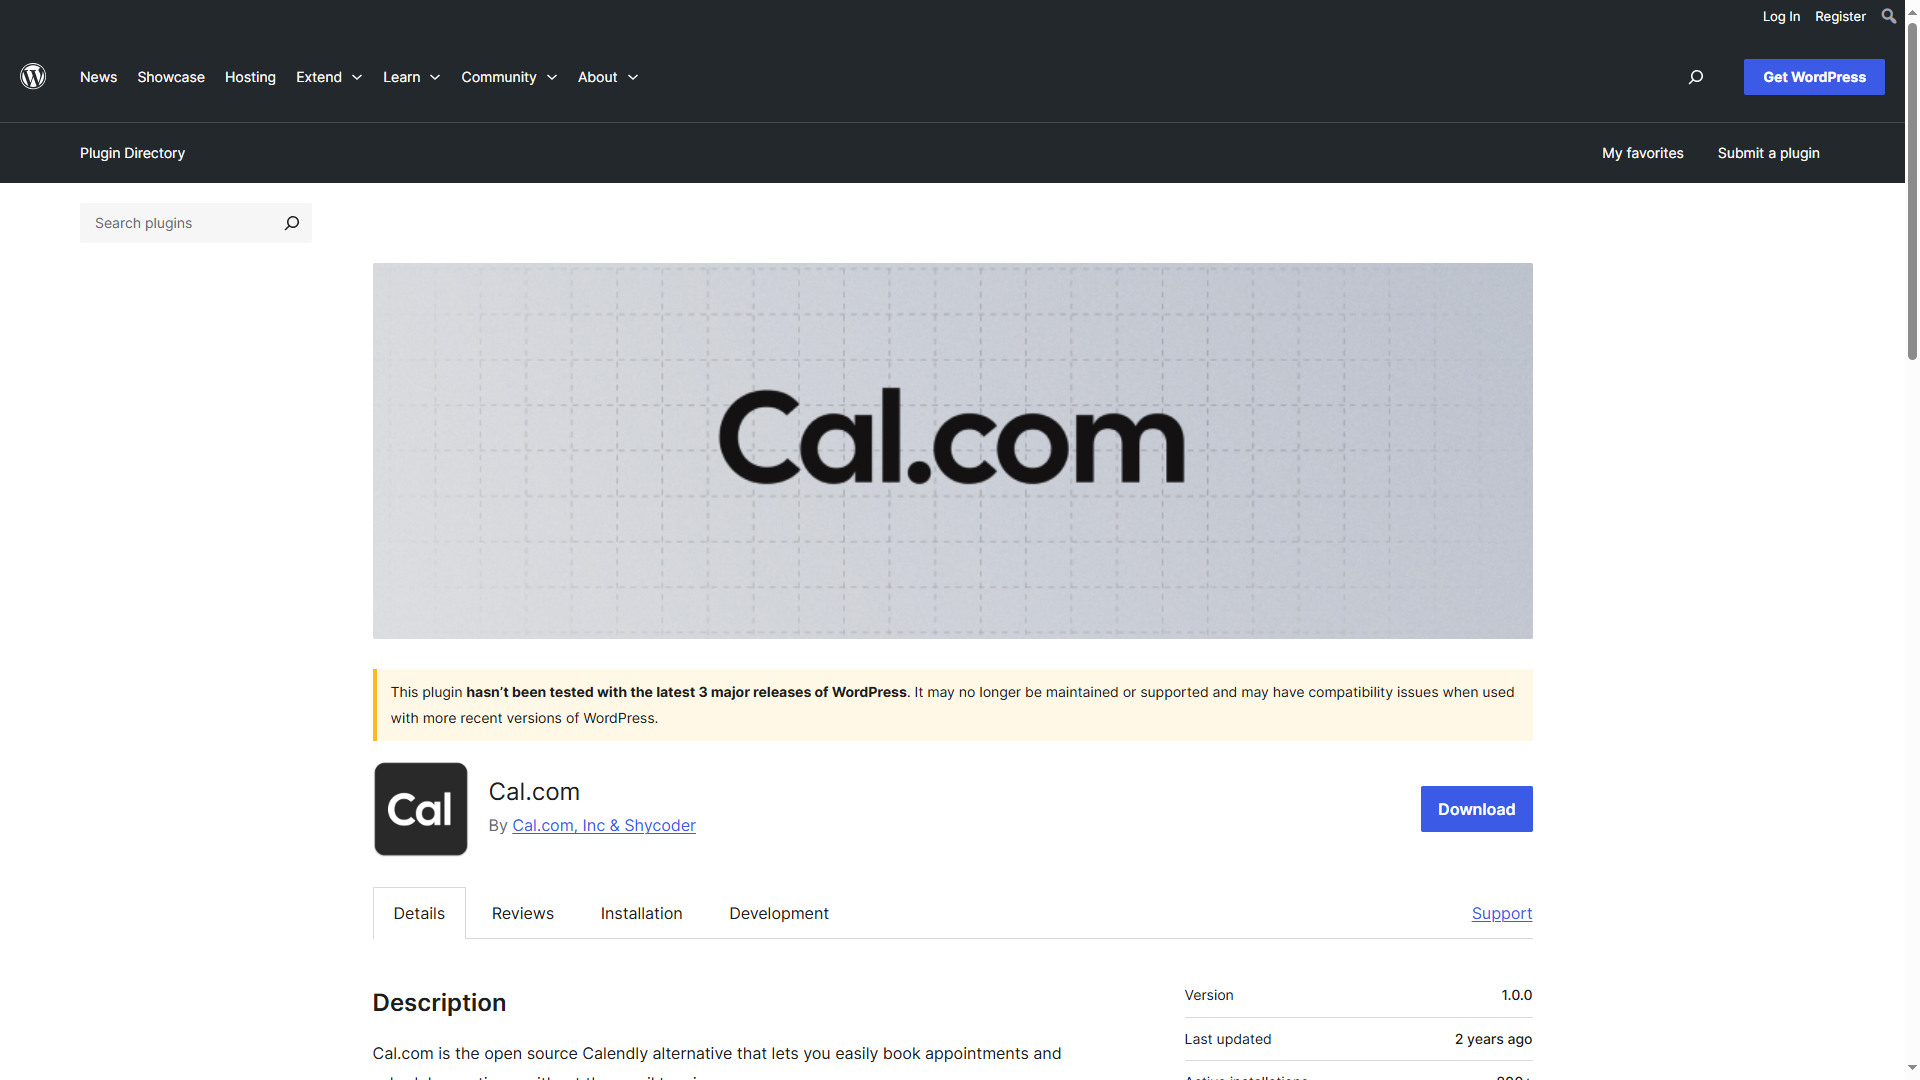
“This plugin hasn’t been tested with the latest 3 major releases of WordPress. It may no longer be maintained or supported and may have compatibility issues when used with more recent versions of WordPress.”
Error messages like that are rightly off-putting for security savvy users. Given the extensive in-built security features of our platform, and the fact I was conducting my testing on a staging site, I decided to click ‘Download’.
From my WordPress 6.5.5 site I was also able to find the Cal.com plugin from the Plugins > Add New Plugin search menu. The warning here was a little less concerning:
“Warning: this plugin has not been tested with your current version of WordPress.”
When installed, the plugin lets you embed your Events by adding a Shortcode block to a WordPress page, entering the details of your Event and how you want your call-to-action to be displayed. The Cal.com plugin can be configured to present your Events in two ways:
1/ Inline
[cal url=/username/meetingid type=1]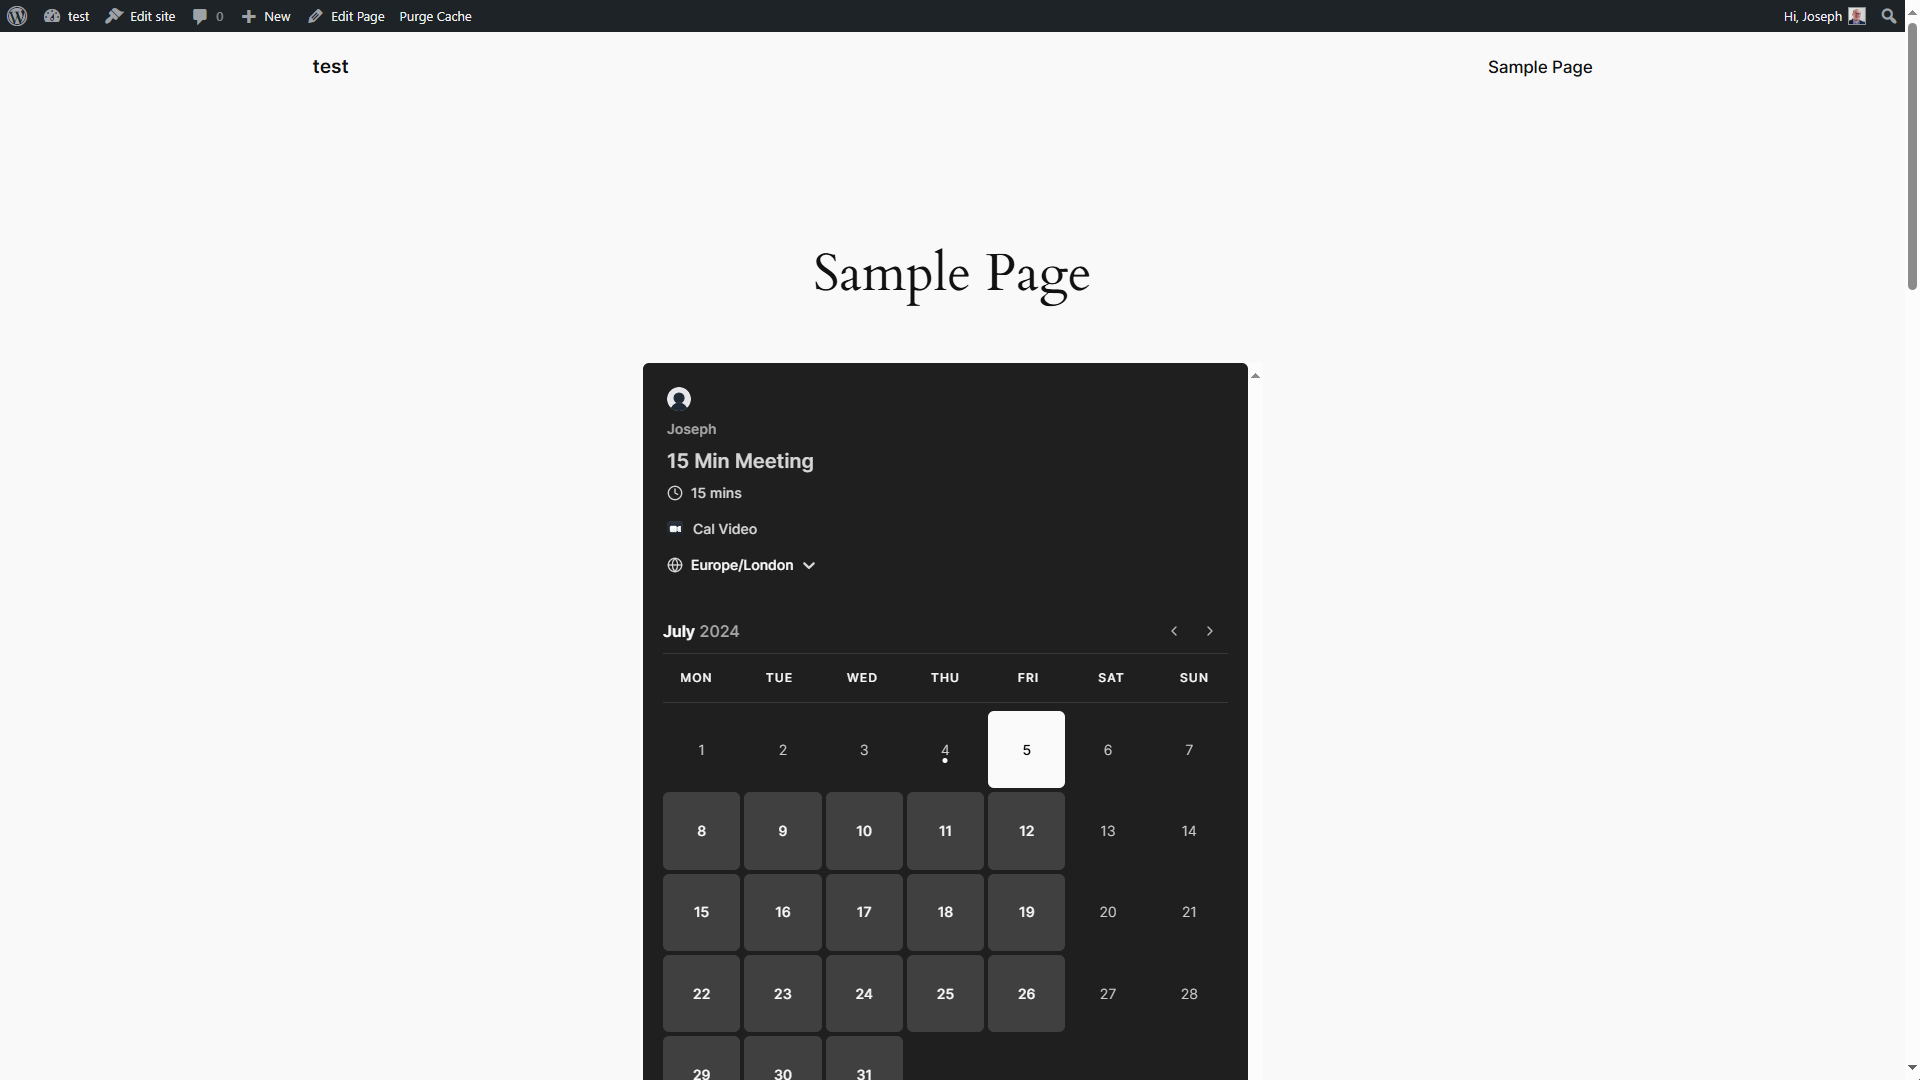
2/ Pop-up
[cal url=/username/meetingid type=2 text="Schedule a meeting with me"]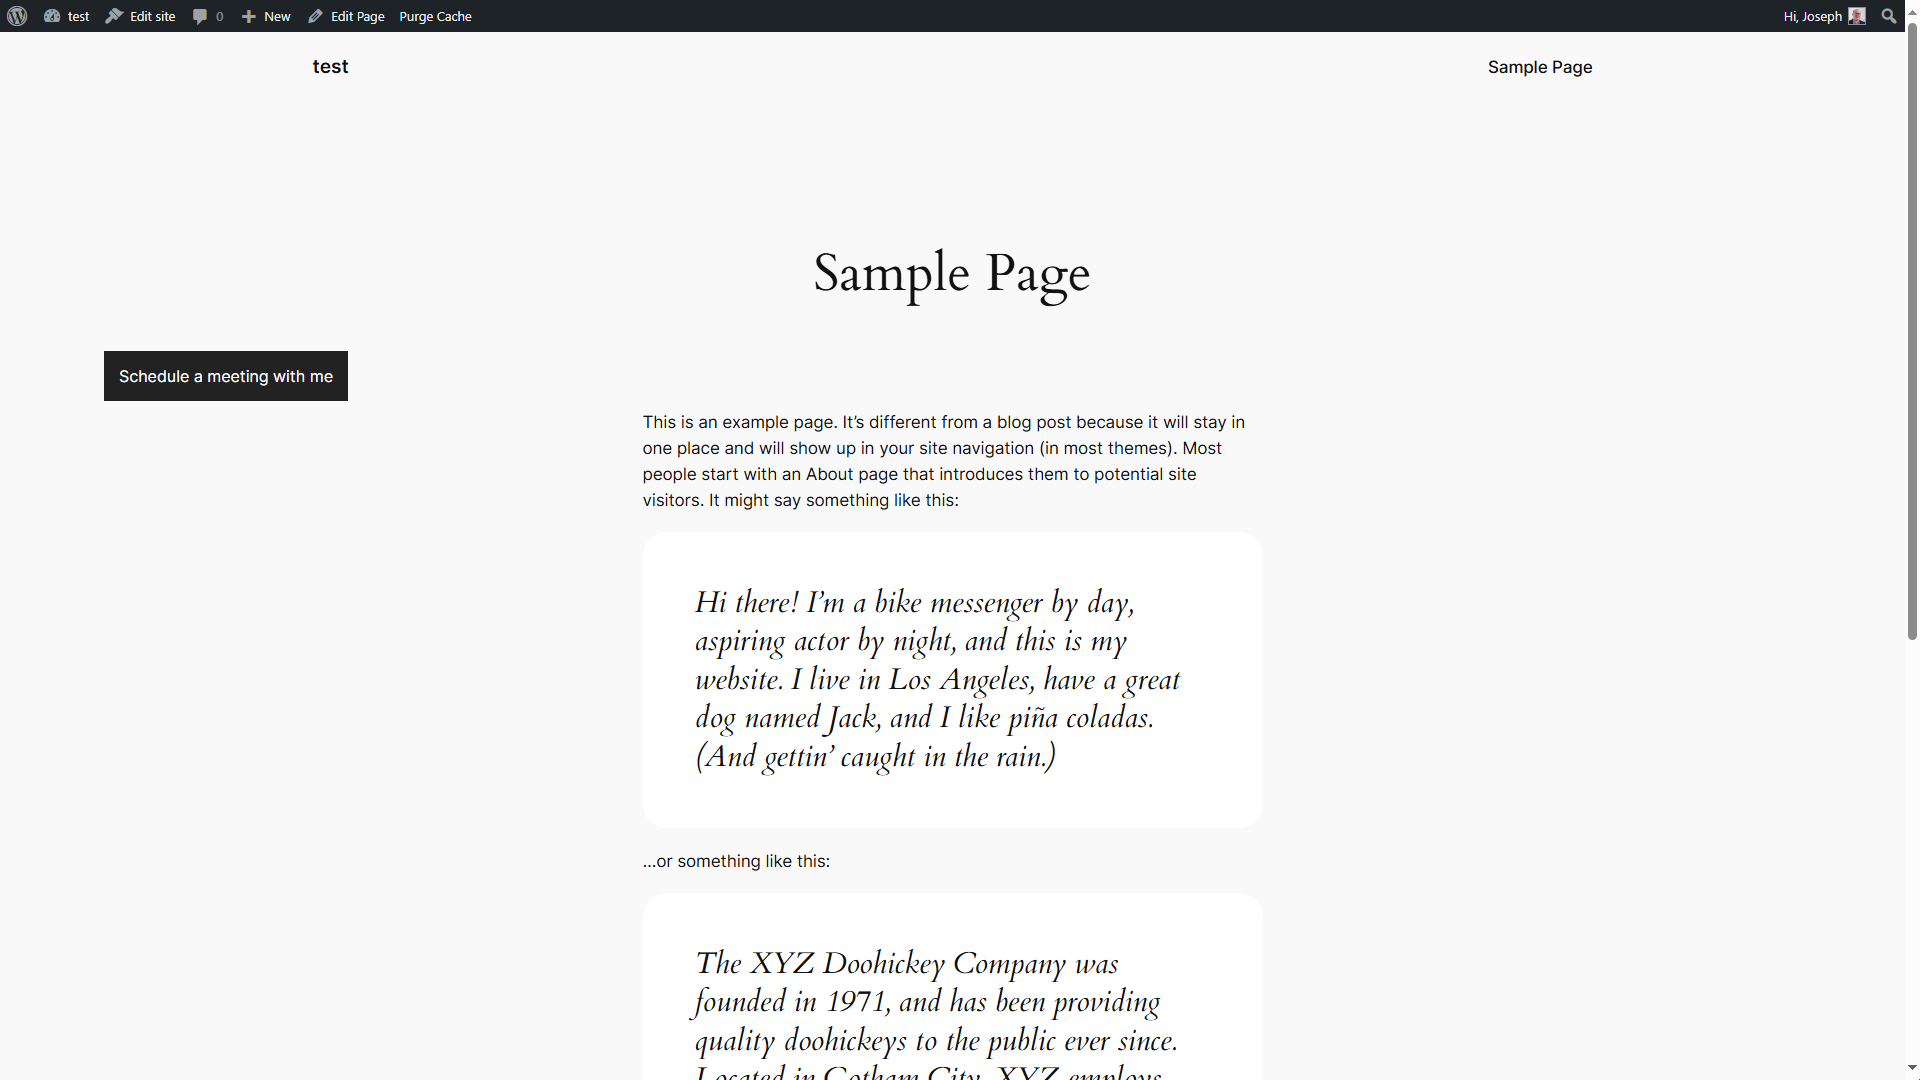
The pop-up version is a little fiddly, and doesn’t respect the layout of your page without further tweaking.
There are better ways to display your availability on your website for your clients to see. I’ll show you how to do this using WordPress, but the principles apply to any platform that lets you use HTML.
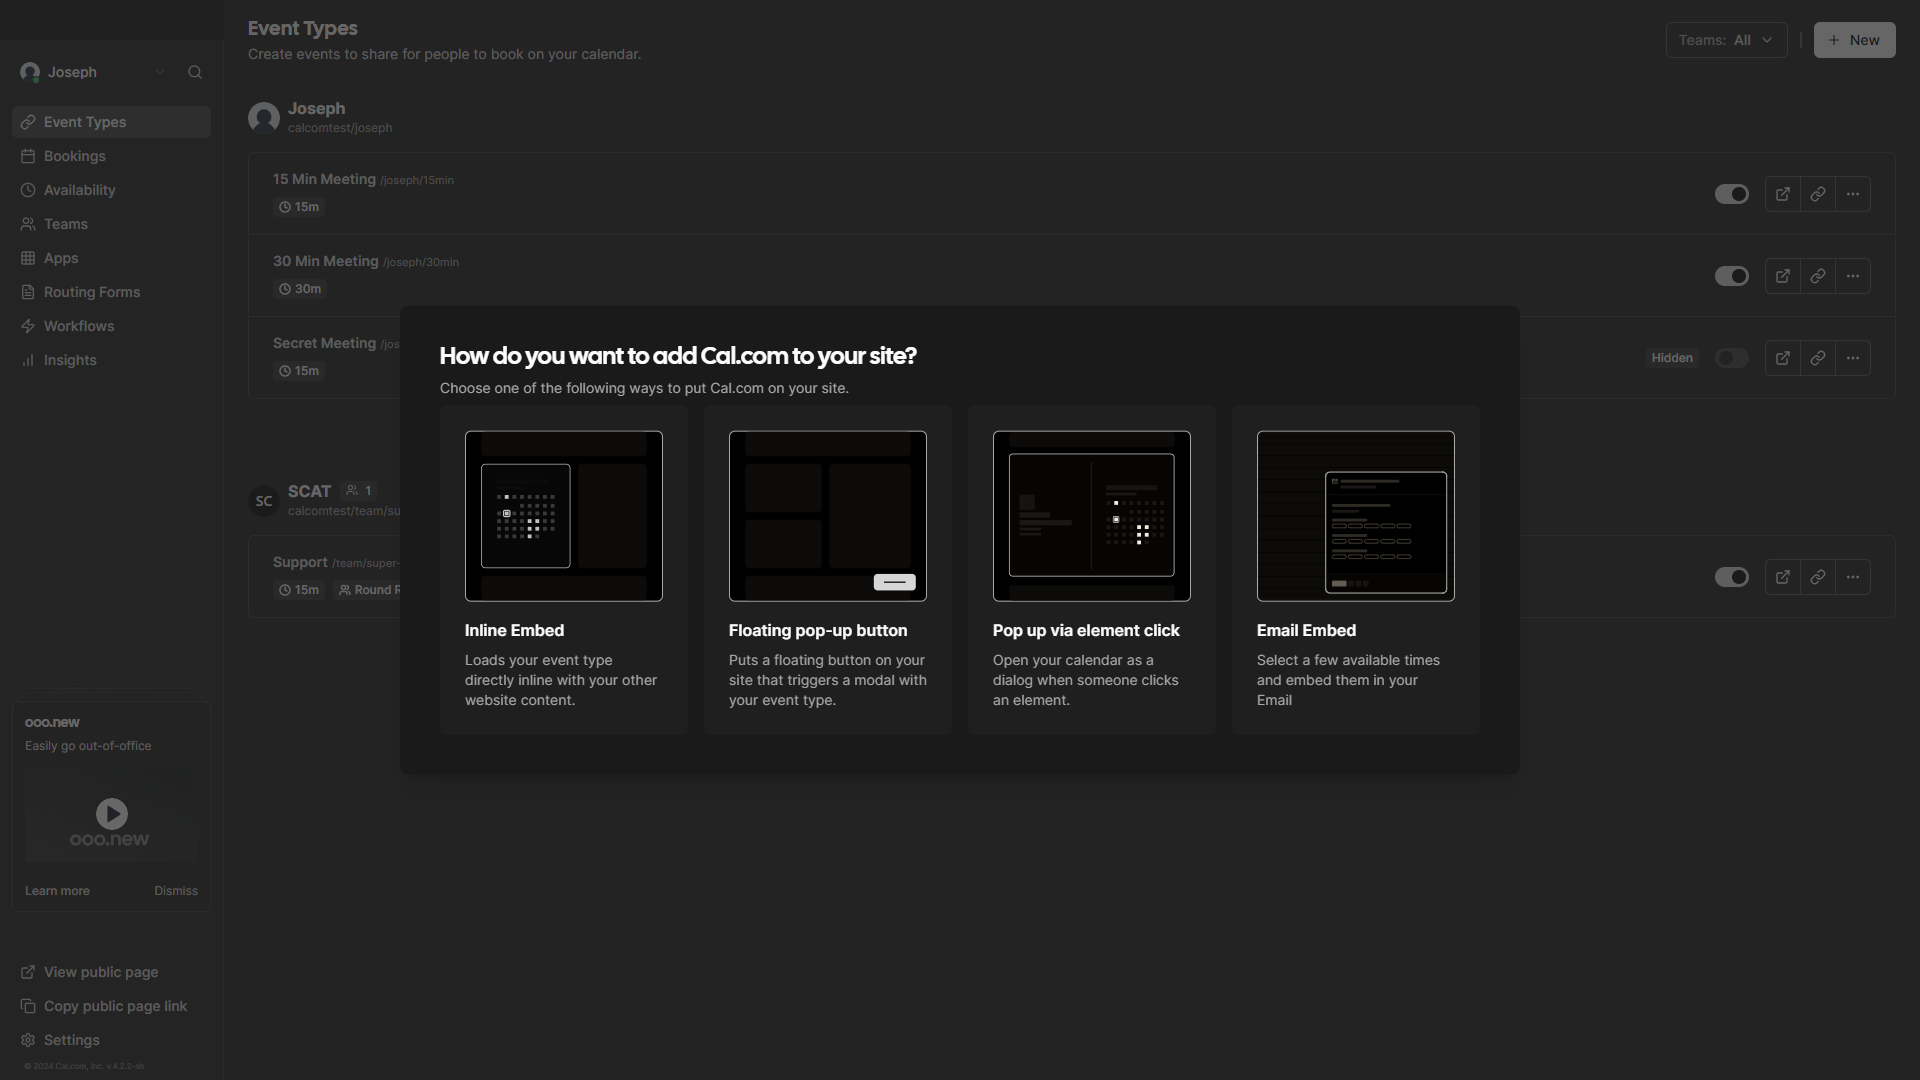
From the Cal.com dashboard, in the Events tab; you can click the overflow menu (three dots) top reveal 3 methods of adding Cal.com to your website (and 1 of adding it to your emails):
- Inline Embed
- Floating pop-up button
- Pop up via element click
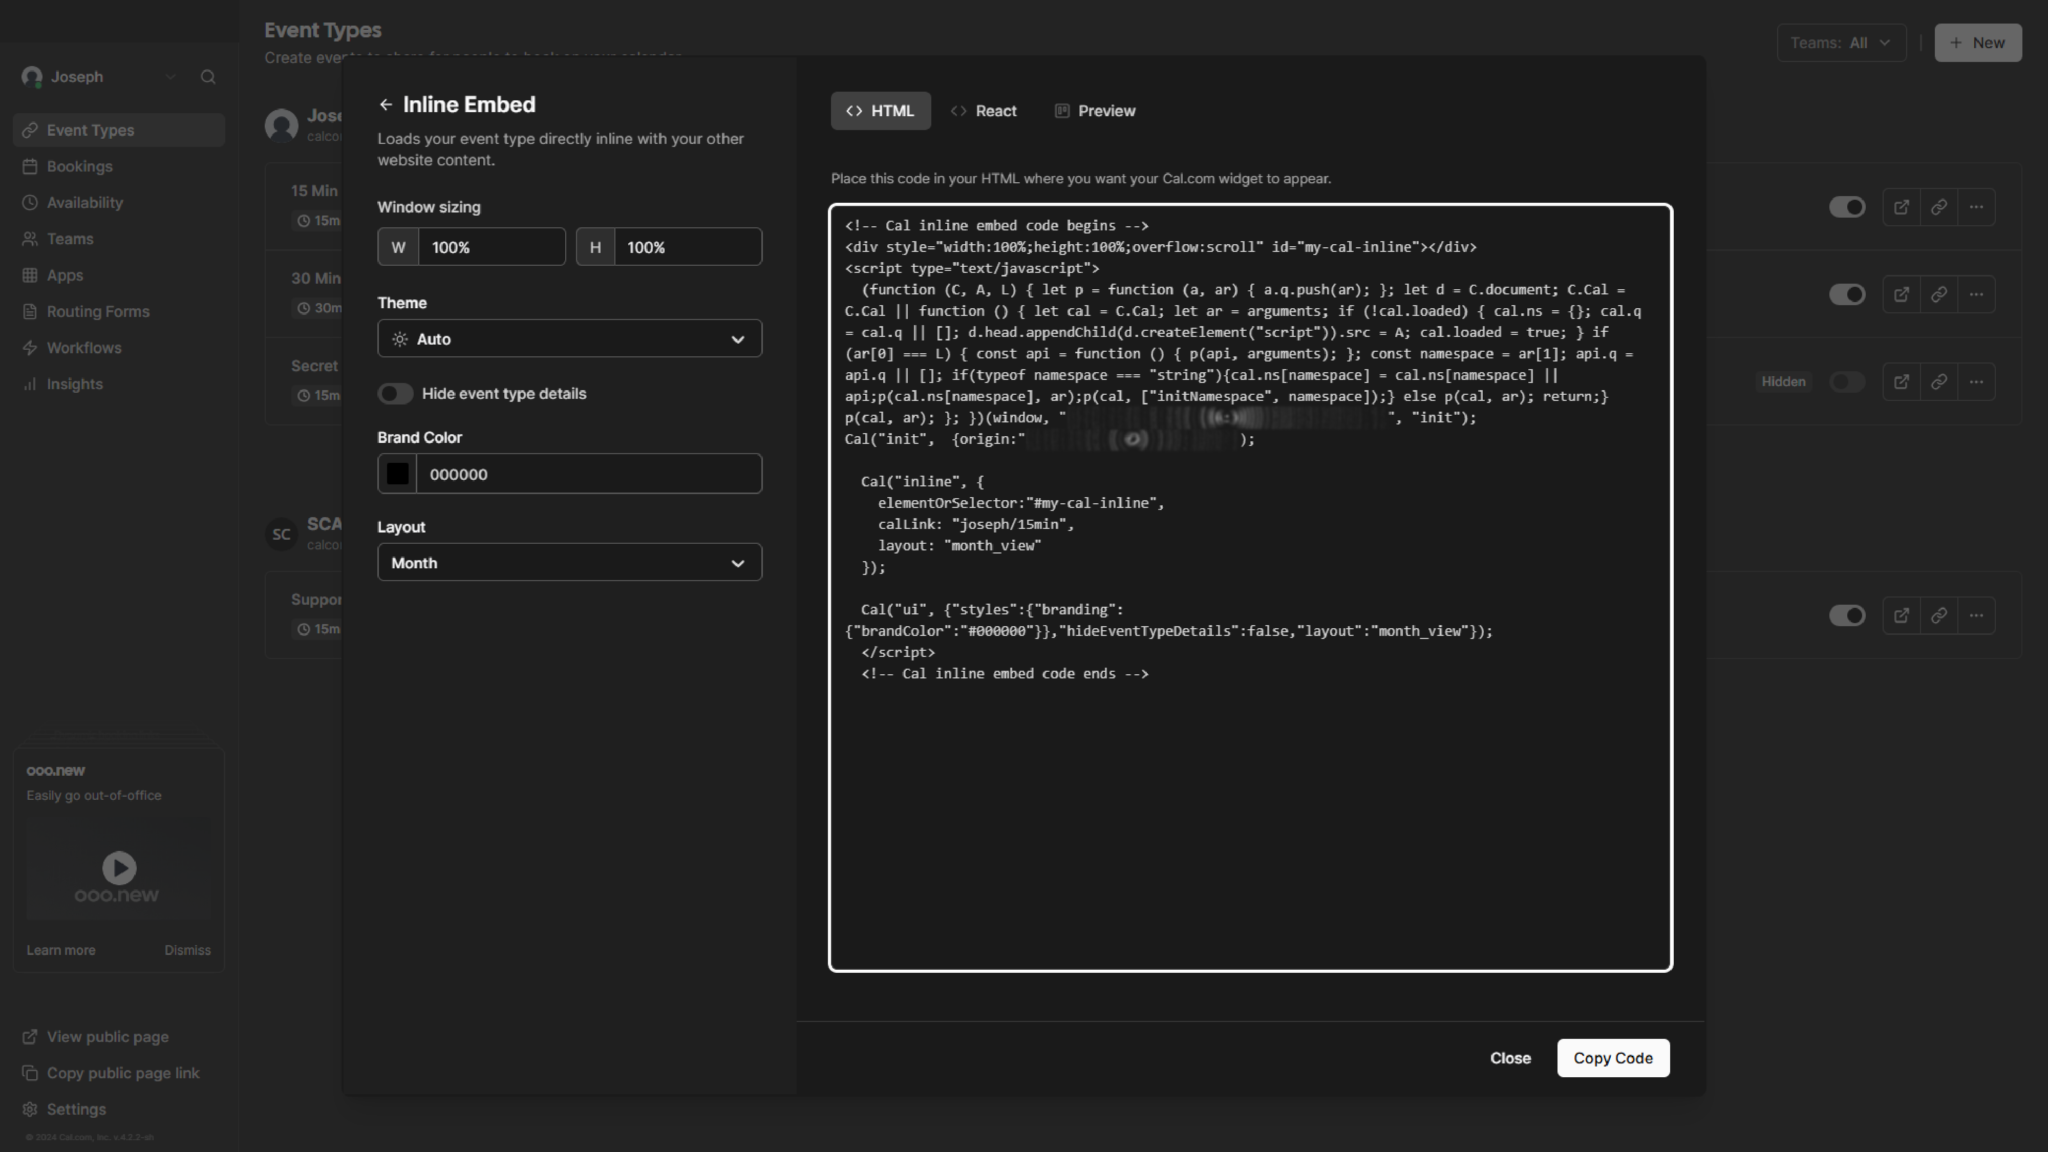
Inline Embed
This is incredibly simple! You click on Inline Embed, copy the code and pop it into a HTML container on your website. Update your page and you’re in business with a view of your Cal.com schedule for all to see.
You can customise the colour of this element using hex codes to better fit your brand colours:

Floating pop-up button
Just as easy as Inline Embed; you click on ‘Copy code’ and paste it into a HTML container. After saving and then refreshing a live version of your page you’ll see the new button follow you as you scroll up and down your page.
For this option you can set the text displayed on the button, the colour of the text and the colour of the button itself in addition to the brand colours of the Cal.com element that loads when the button is pressed.
This is a great option if you don’t have a digital assistant or messenger widget, or simply don’t want to directly embed your calendar.
Pop up via element click
This is slightly tricker than the other two methods. As before, you grab the code and put it in a HTML container. The difference here is we need to appropriately configure the element. In this example we’ll use a button as the element that triggers the pop up
After adding a button, open the overflow menu and click ‘Edit as HTML’. Here is the code I used:
<div class="wp-block-button has-custom-font-size has-medium-font-size">

<a class="wp-block-button__link wp-element-button" href="#" data-cal-link="calcomtest" data-cal-namespace="" data-cal-config='{"layout":"month_view"}'style="border-radius:25px;box-shadow:var(--wp--preset--shadow--natural)">

    Book my cal

  </a>

</div>
Editing the button like this allowed me to preserve the styling that I had set for the button, which the Floating pop up button method above did not do by default.
Being able to use Cal.com in conjunction with your website (and your email footer) really helps to integrate it into your workflow/funnel with very little friction. Round robin team Events can be integrated using the methods we just covered just as easily. Powerful stuff for free software!
Cal.com Insights
This is where the Cal.com analytics are accessible. The default configuration of the dashboard, and the filtering options give users a straightforward and swift way of assessing success.
The Insights dashboard presents:
- Events Created
- Events Completed
- Events Rescheduled
- Events Cancelled
- Average Ratings
- Host No Show
- CSAT Score
The drop-down menu in the top left lets you cycle between yourself and the teams you’ve set up. Filters can be added to drill deeper.
Date ranges can be selected from options in the ‘Select’ dropdown menu in the top right, or by manually choosing a start and end via the calendar next to it.
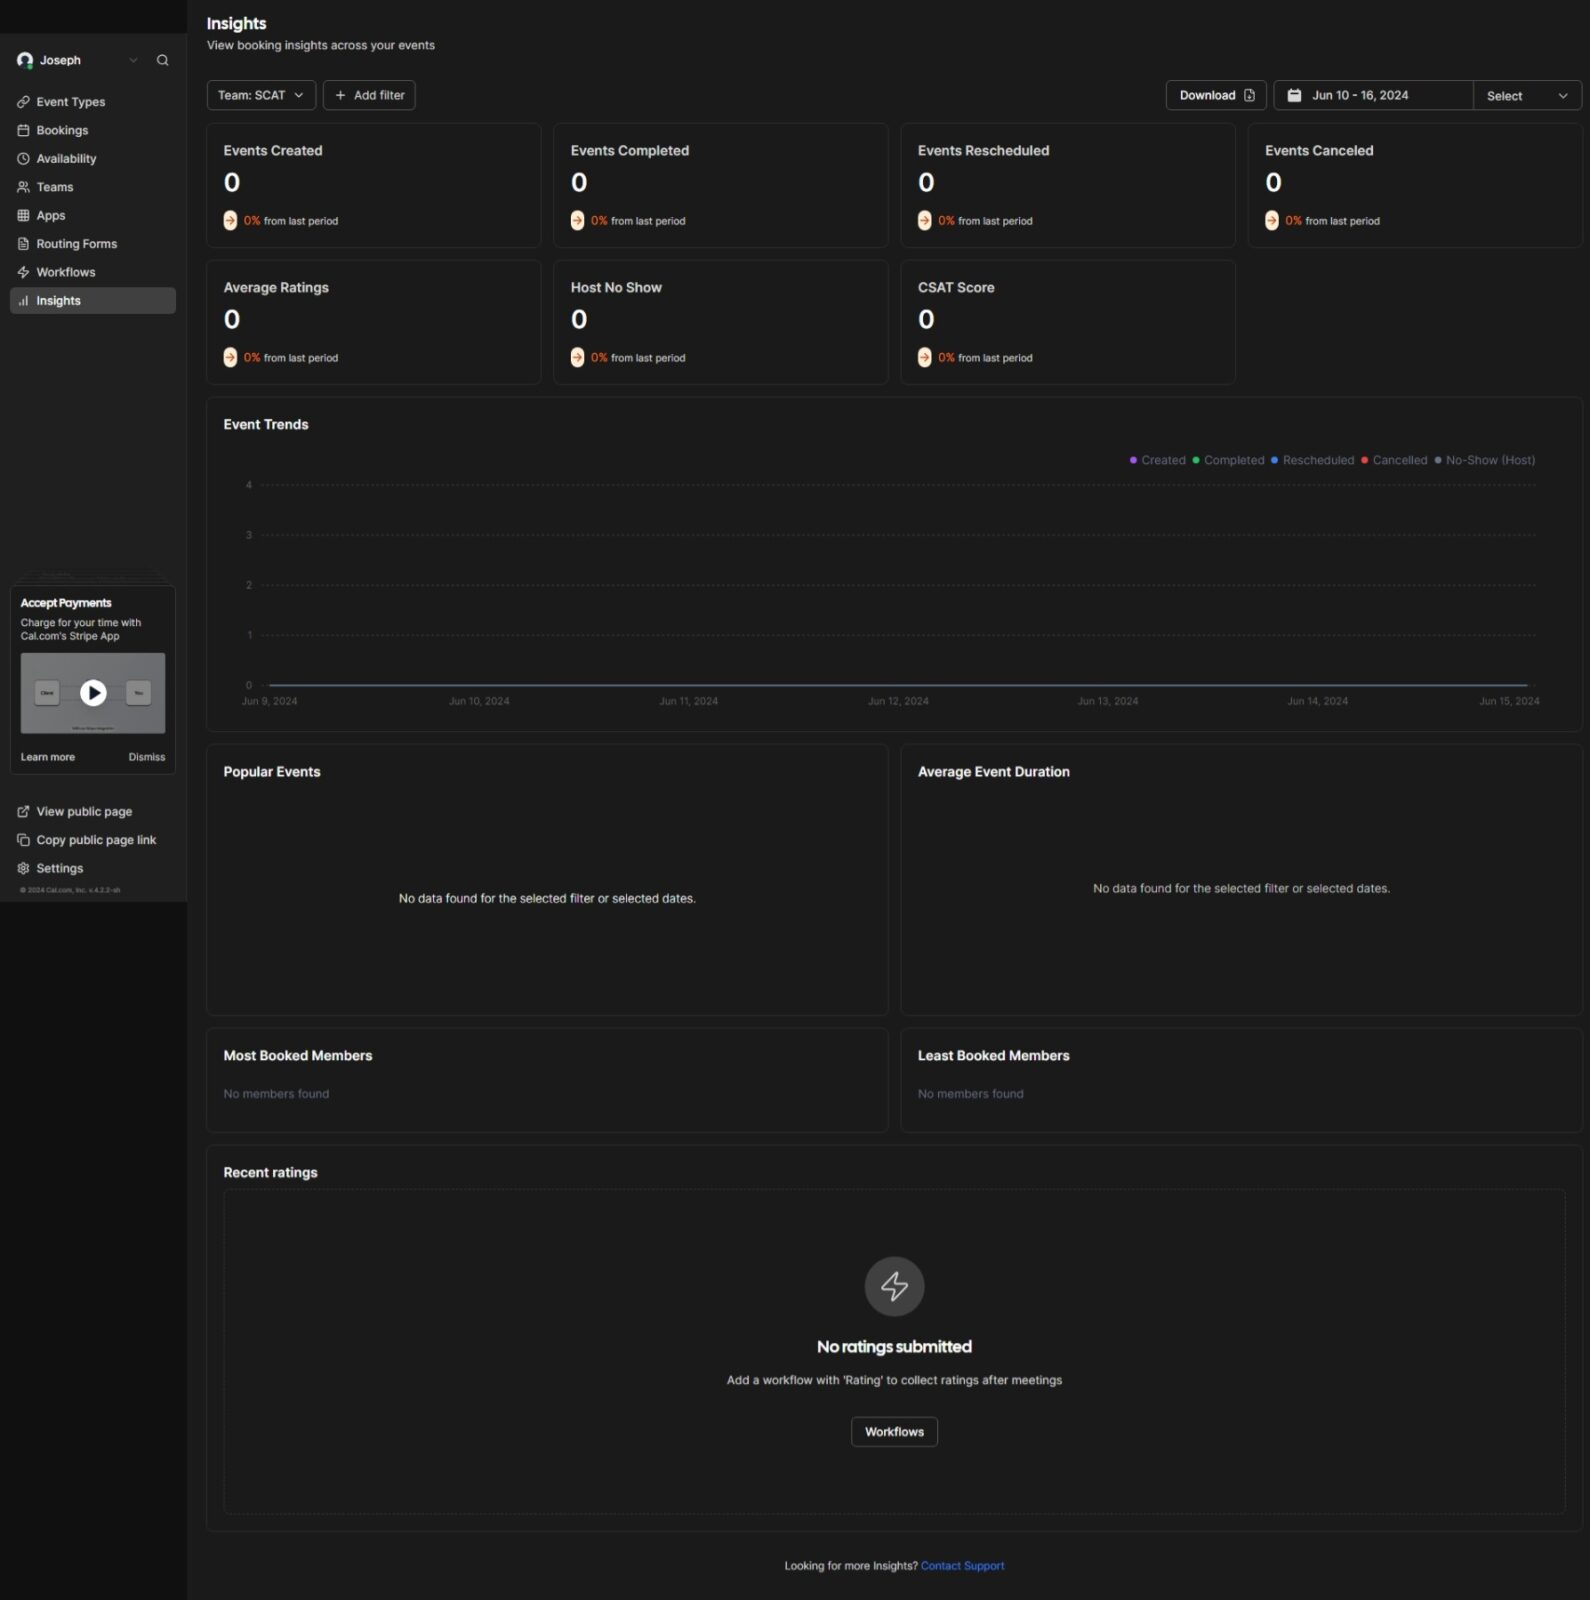
You can export .csv files and use them to get the clearest possible picture of how things are going.
One feature present on the .csv is whether an event/meeting has been paid for. There is a gap where that information would fit perfectly on the Insights dashboard, which would be useful.
Final thoughts
If you are looking for solution to book, schedule and manage appointments with your customers – Cal.com is highly recommended.
You need access to a VPS and preferably a domain to get the most out of it: but the free version is feature rich, integrates well with many third-party applications, is intuitive and a joy to use.
If you are a solo practitioner, part of a small team or if you’d like to make use of some of the untapped power of your VPS to arrange your meeting with a client – I’d strongly recommend checking out Cal.com


Add comment