
In this review I’ll be looking at Piwigo to find out if free, open-source digital asset management (DAM) software has what it takes to be a viable alternative to titans like iCloud, Google Photos and Adobe.
Piwigo Review
TL:DR
✅ Easy to set up
✅ Intuitive
✅ Strong range of themes & plugins
✅ Great mobile app
❌ Limited default file type support
What is Piwigo?
Piwigo is free, open-source photo management software designed to help individuals and organizations efficiently organize, manage, and share their digital photo collections.
Launched in 2002 and with over 2.8M installs to date, Piwigo is built on PHP and MySQL, making it a highly customizable and scalable solution suitable for a wide range of users—from amateur photographers to large companies needing robust image management.
Unlike many other photo management tools, Piwigo is self-hosted, giving users full control over their data and allowing them to tailor the platform to their specific needs.
The platform offers an array of features, including album creation, tagging, geolocation, and a plugin ecosystem that extends its capabilities.
Getting started with Piwigo
Piwigo has several paid tiers that come with varying levels of storage, support and features – but I’ll be looking at what can be achieved with the free, self-hosted version of Piwigo in this review.
Head to https://piwigo.org/get-piwigo and you’ll see the self-hosted version in orange.
Piwigo, is available as a one-click install on our Reseller Hosting, Web Hosting and Managed Hosting platforms – which made the setup process effortless.
If you aren’t hosted with us then you’ll need to install Piwigo manually or via netinstall. The documentation is easy to follow but you’ll need to be comfortable using FTP.
With installation completed I connected a database and entered the username and password that I wanted to use:
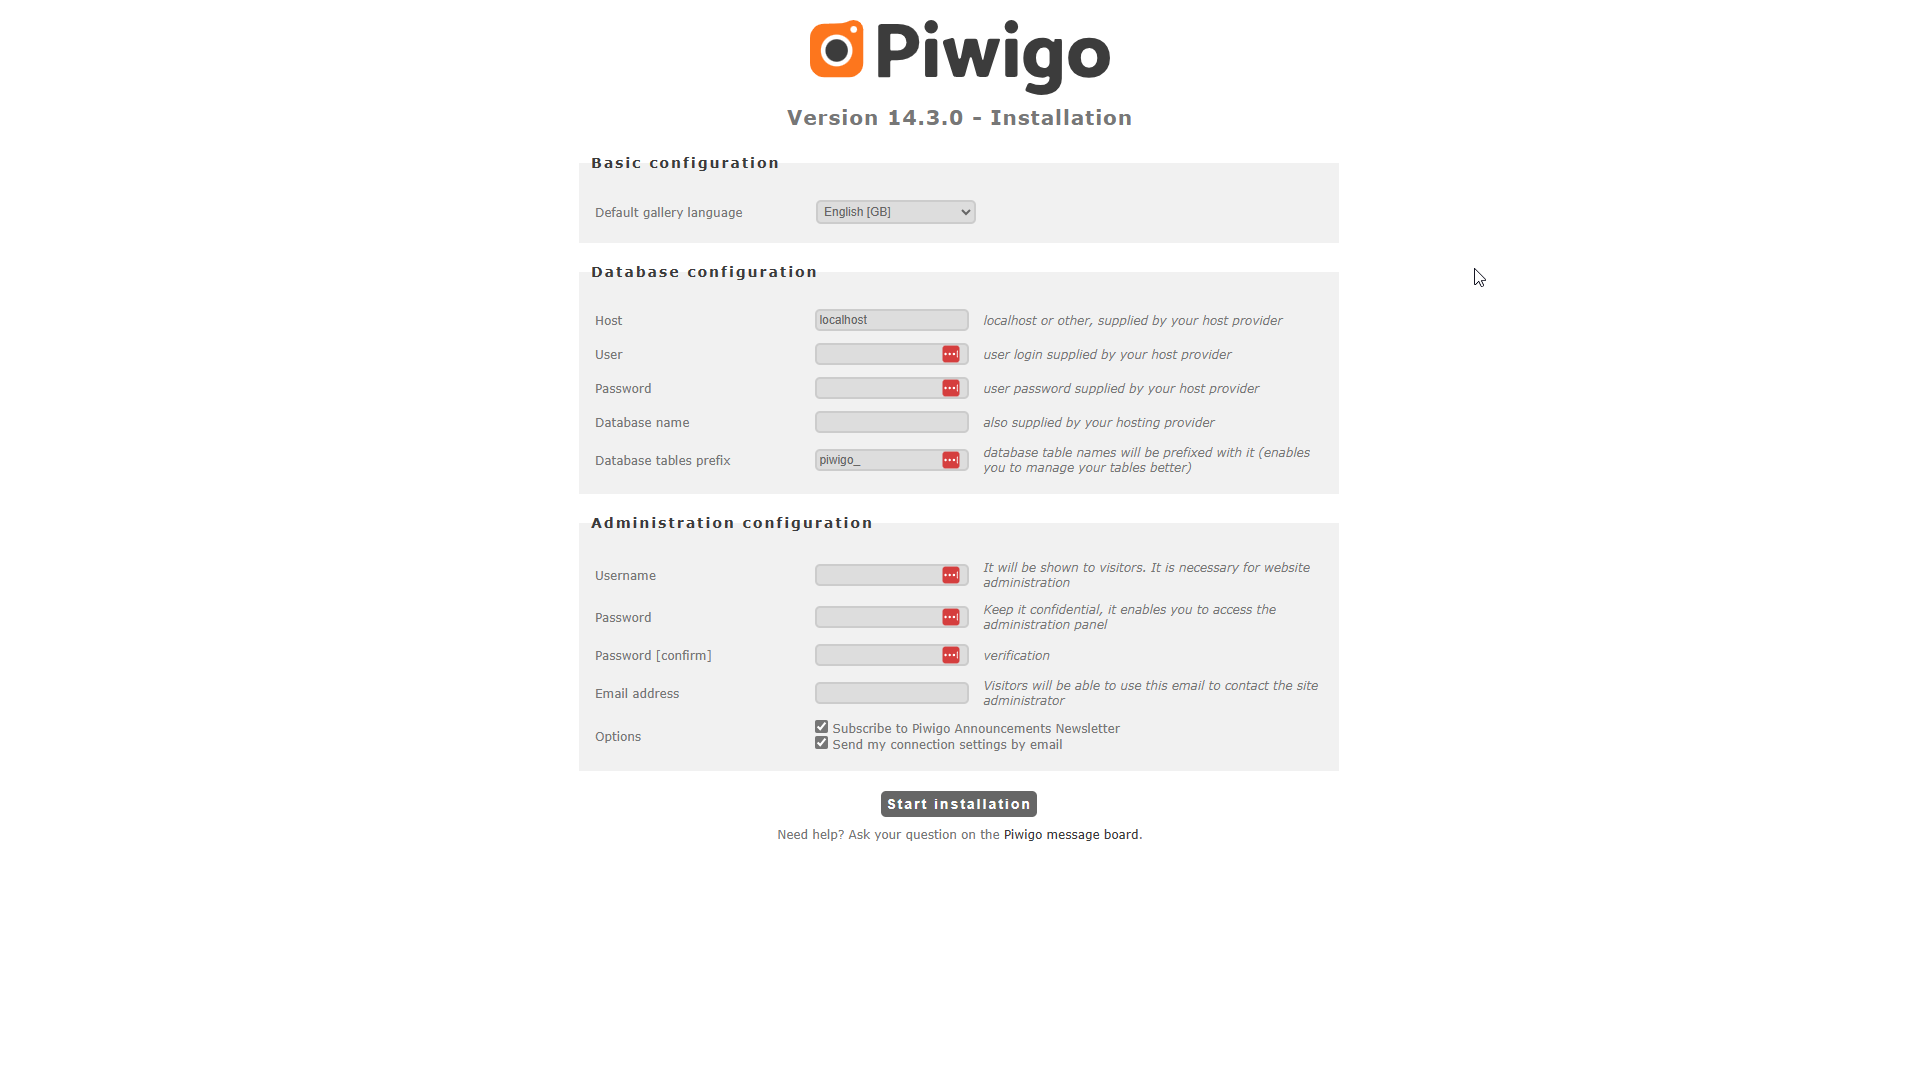
.. and was ready to begin putting Piwigo through its paces.
Using Piwigo
With version 14.5.0 running, the dashboard shows you useful stats at a glance including:
- Storage used
- Number of photos
- Number of albums
- Users
- Groups
- Pages seen
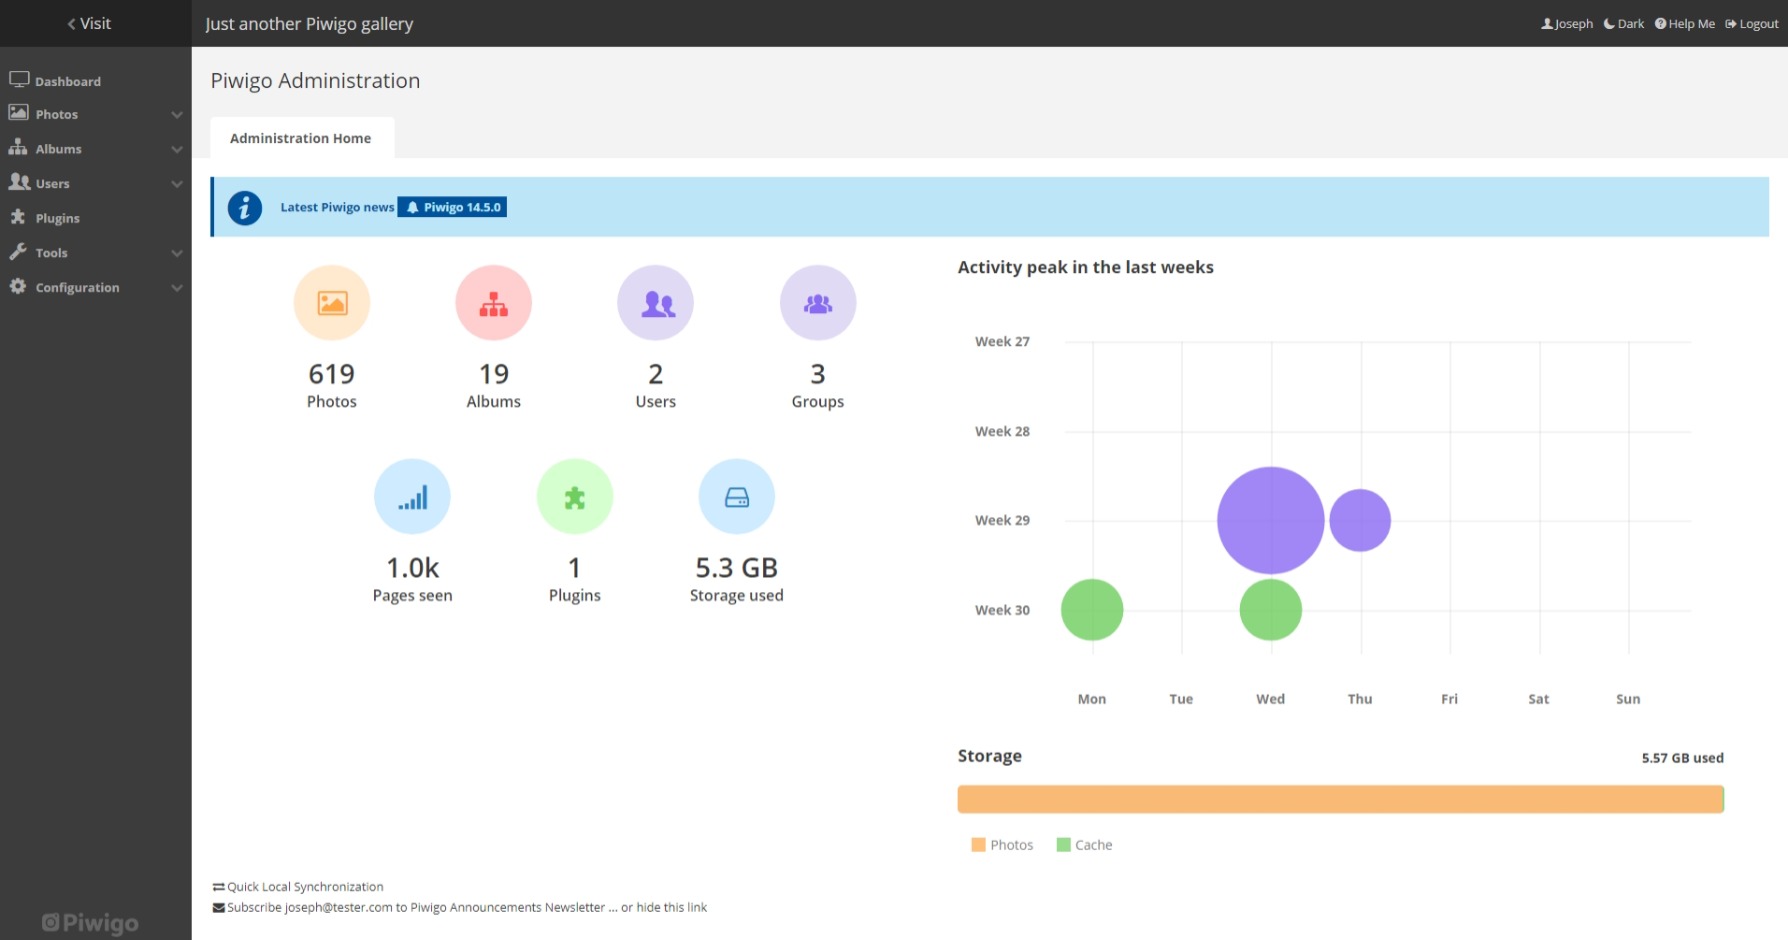
The side menus are intuitive, and I easily found everything I wanted very quickly.
You can customise the experience of using Piwigo for yourself and your users with themes, many of which have switchable light and dark modes.
Over a hundred themes are available, and you can have a look at them from the Piwigo website without needing to install anything: https://piwigo.org/ext/index.php?cid=10&page=1
Menus, languages and how media is displayed can all be dialled in to taste.
Uploading Photos & Media to Piwigo
To make this review as true-to-life as possible I used photos from my iPhone and mirrorless cameras (Sony A6700 & Sony ZV-E10mk1).
File sizes from these sources range from 3MB up to 30MB
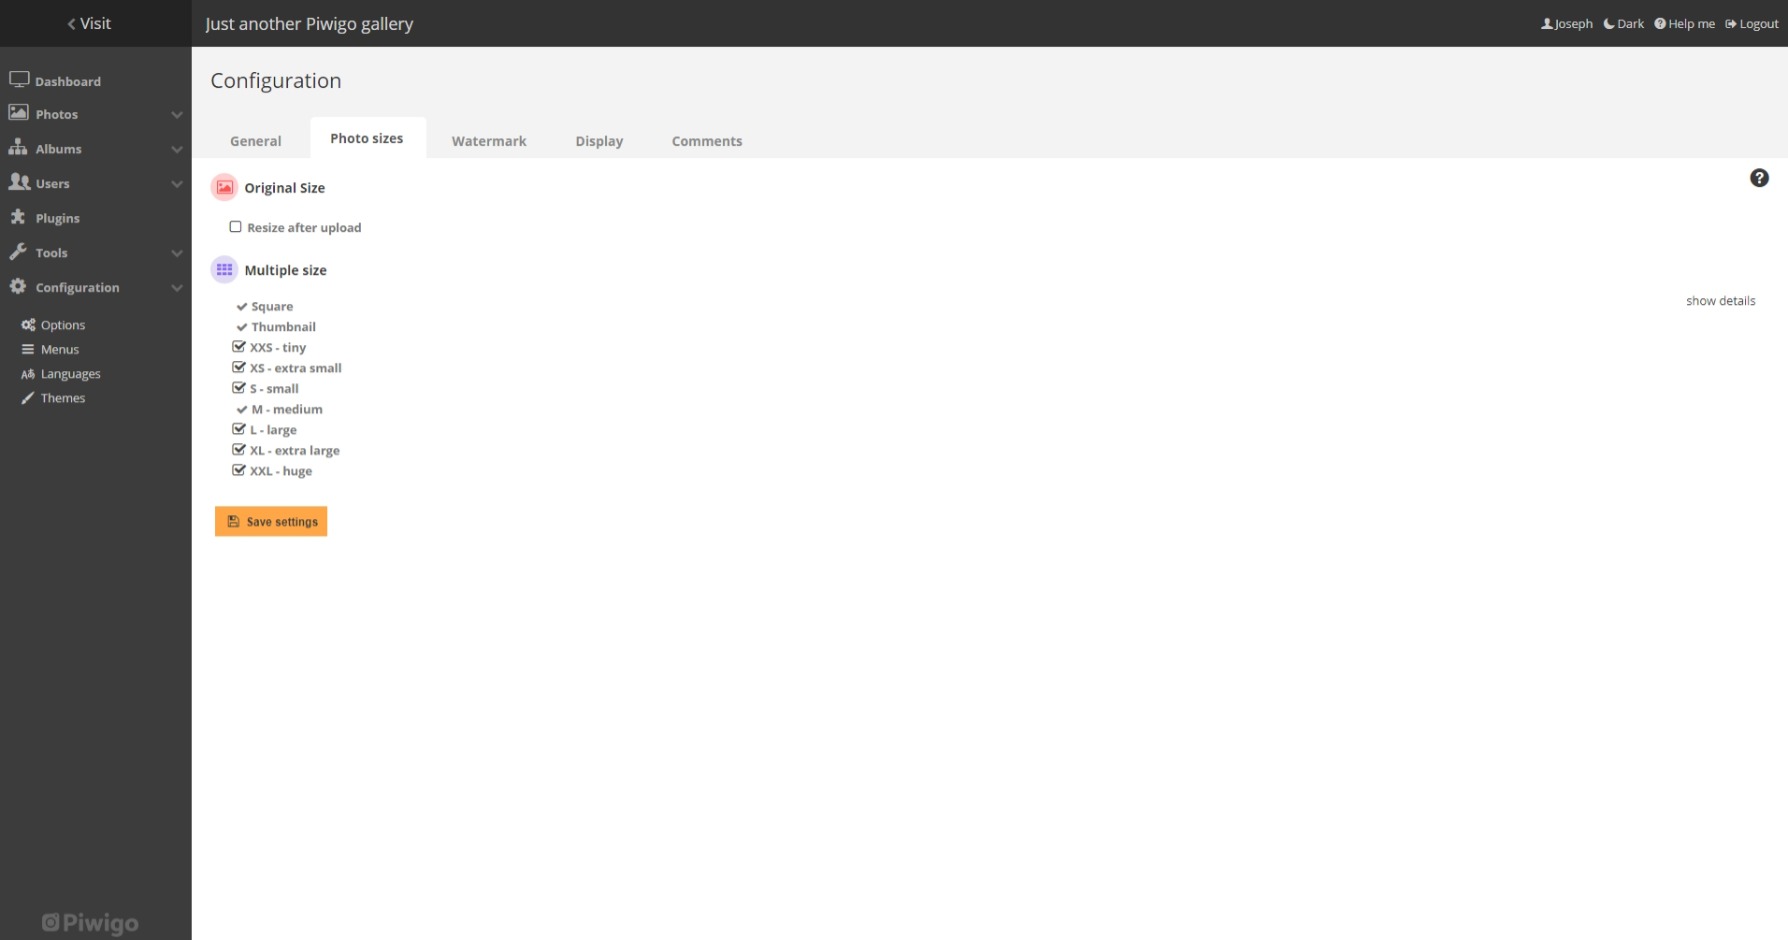
By default, Piwigo processes the photos you upload and makes copies to use as thumbnails and as smaller versions which it serves to users to save bandwidth.
You can configure exactly how this re-encoding behaviour is handled from Configuration > Options > Photo sizes menu.
Bear in mind that the copies of your photos take up storage space, and processing large batches will put a lot of strain on your hardware.
For context: XXS – tiny is 240×240 pixels and XXL – huge is 1656×1242 pixels. XXL – huge is far smaller than the full size 6000×4000 pixel images from the digital cameras.
Uploading photos and media can be done in three ways:
All three are simple to use.
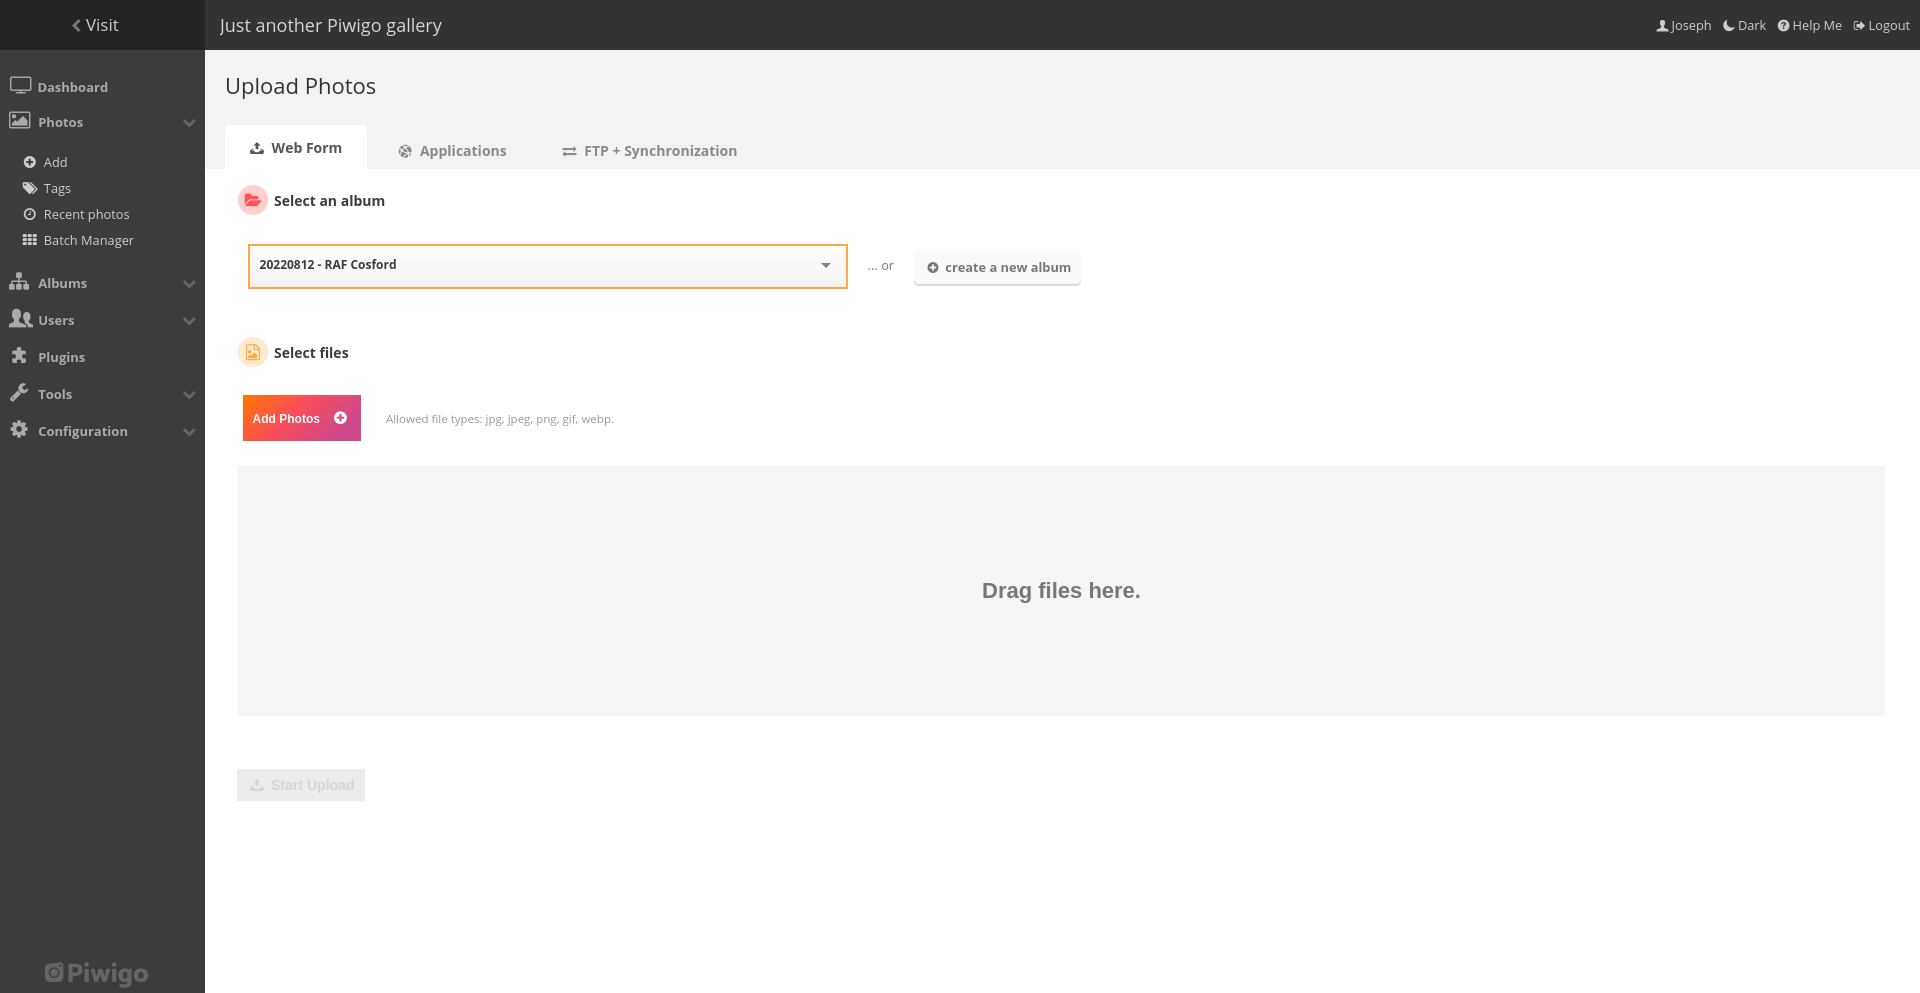
Web Form
This couldn’t be easier – you choose an album you want the photos to go into with the drop down menu. If there are no albums to choose from you can create a new one.
Then, you drag and drop your photos into the big grey box or click the orange-pink ‘Add Photos +’ button to select them using a file manager window.
You’ll see the file size for each image in the queue and, when you press the ‘Start Upload’ button; a progress bar lets you know when each file is uploaded.
Applications
Piwigo has several desktop, iOS and Android apps to make uploading photos and assets convenient to different workflows.
Alongside contemporary options, some of the tools available here will seem out of place to security conscious users for being wildly out of date or long since depreciated.
Piwigo is aimed at photographers, many of whom still shoot film – a technology developed (pun intended) in 1888. Keeping these options available caters for users who passionately prefer particular processes and tools.
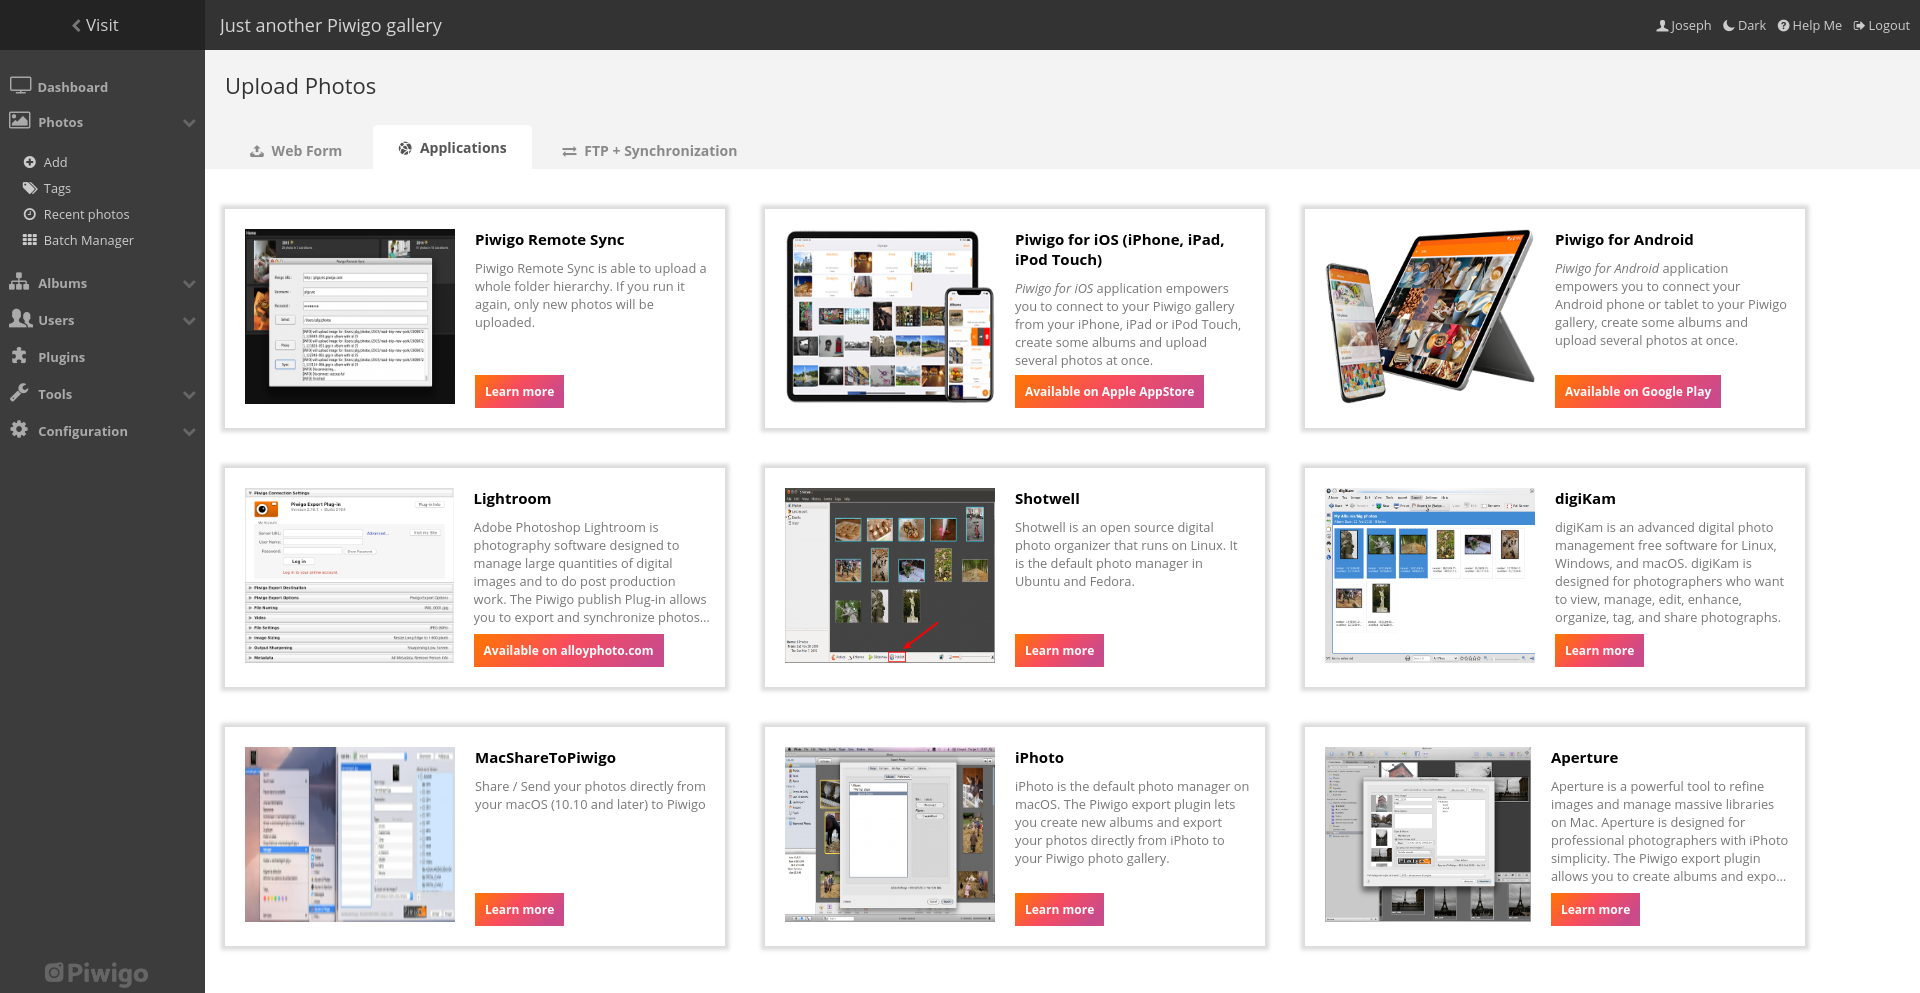
Many more options can be found here: https://piwigo.org/ext/index.php?cid=11&page=1
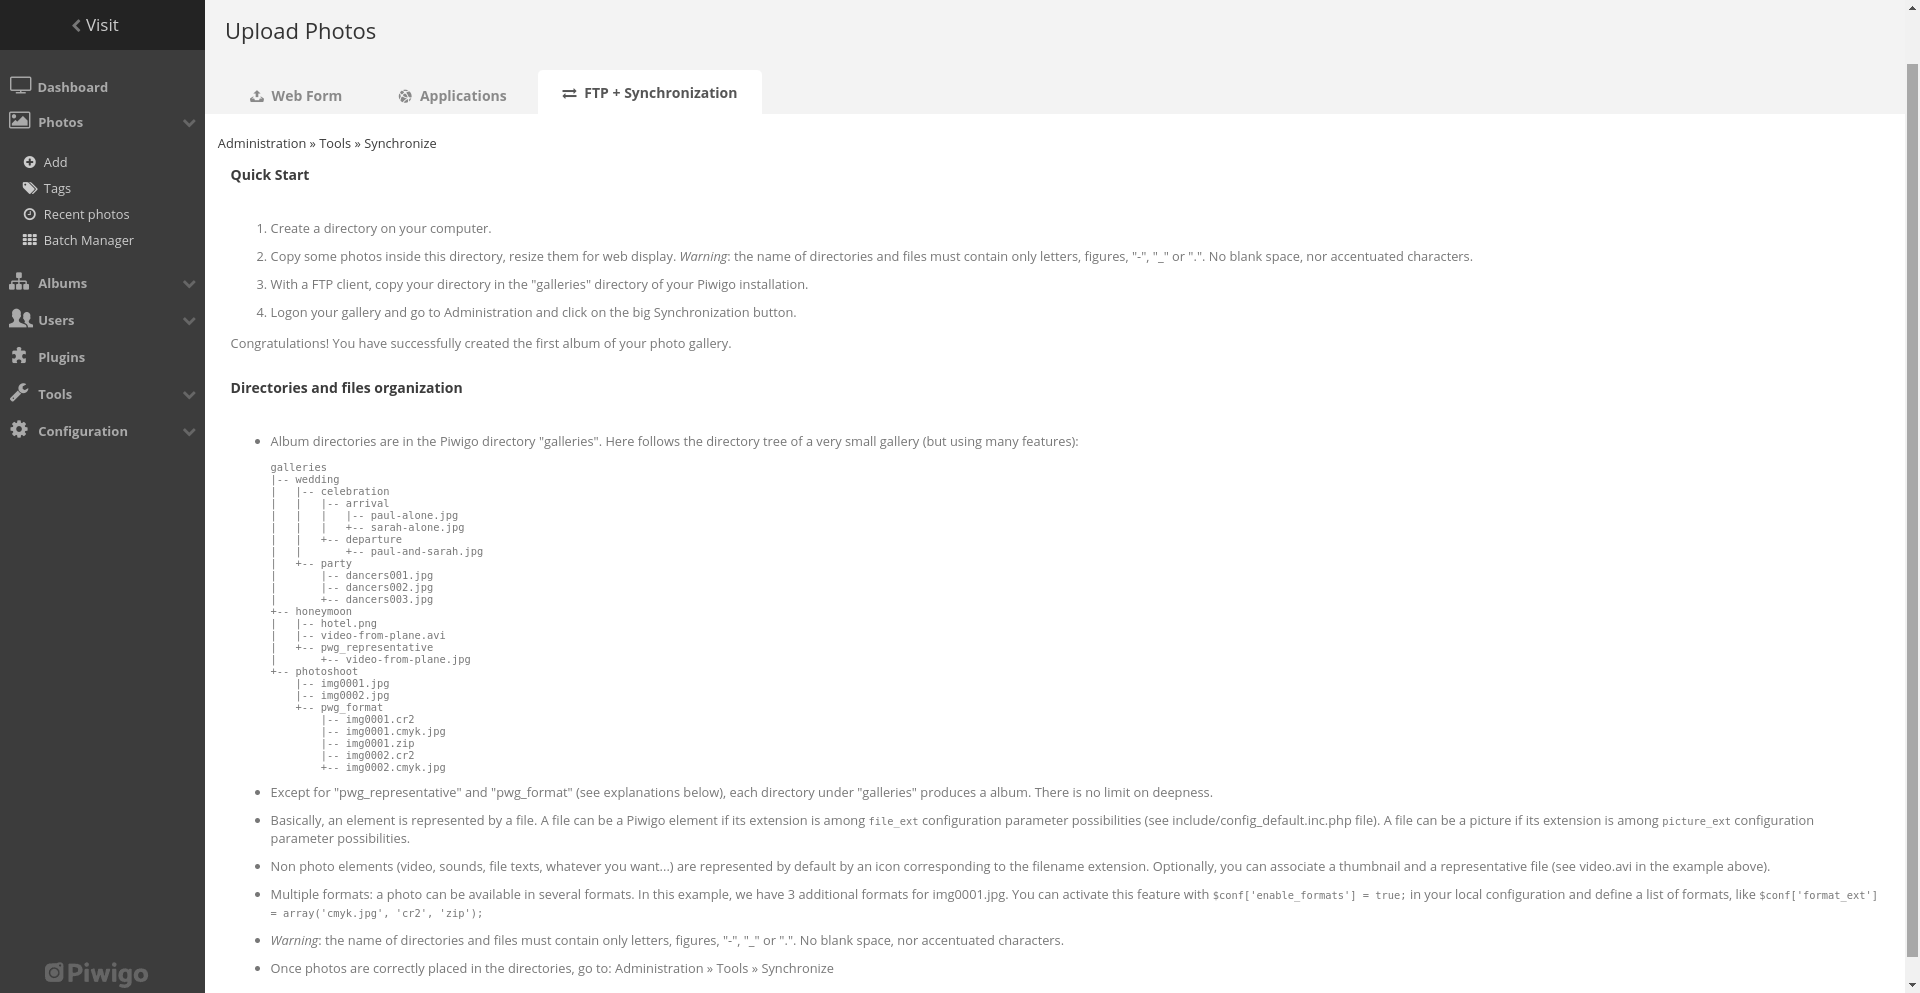
FTP
This is a great option for users who deploy Piwigo as a backup solution. Following the instructions on the page will synchronise your local and server-based directories, and keep photos save from failing drives and disasters.
Supported File Types
Later in this review I cover how Piwigo can be altered to support a range of files, but in this section I’ll cover what worked ‘out of the box’ for the most popular current and next-gen image formats.
| File Type | Piwigo | Google Photos | iCloud Photos | Adobe Cloud |
| Jpg | ✅ | ✅ | ✅ | ✅ |
| Png | ✅ | ✅ | ✅ | ✅ |
| WebP | ✅ | ✅ | ❌ | ❌ |
| JpegXL | ❌ | ❌ | ❌ | ❌ |
| AVIF | ❌ | ✅ | ❌ | ❌ |
| HEIF/HEIC | ❌ | ✅ | ✅ | ❌ |
| Sony RAW | ❌* | ✅ | ❌ | ❌ |
Professionals will be pleased to hear that Piwigo natively supports:
- svg
- tif/tiff
- eps
- ai
- psd
Vanilla configurations of Piwigo do not come with support for all image file types – and nothing at all for video – but we can sort that quite easily.
Adding more file types
With a little work you can have Piwigo accept, recognise, process and display any of the containers and formats supported by ImageMagick: https://www.imagemagick.org/include/formats.php
To do this you need to manually add file extensions to the list of formats that can be uploaded.
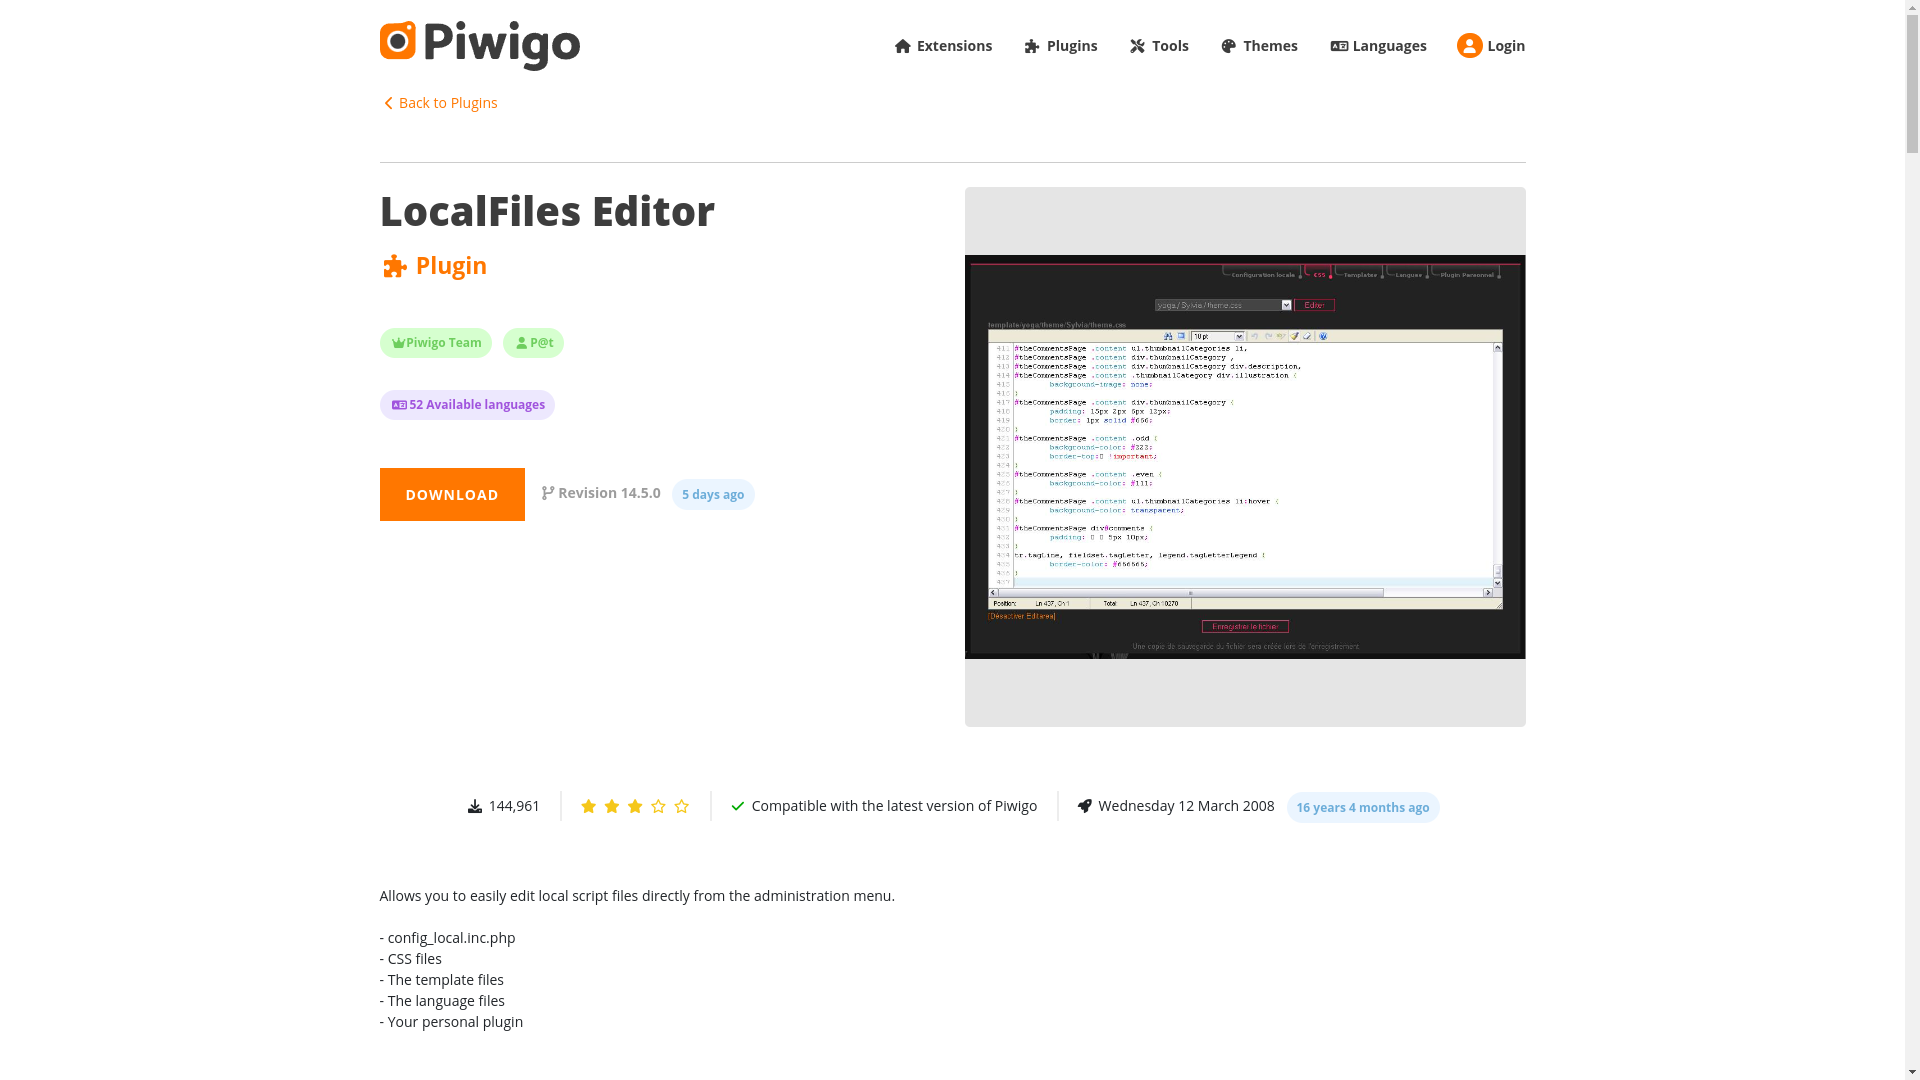
Edit the Piwigo config file with the LocalFiles Editor plugin or Notepad++ and FTP and enter the extensions you want to add, save your changes and run the ‘Repair and optimize database’ function. You can also use community plugins, like Video.js, to achieve the same results.
Another important note is that the device and browser you are viewing images on has to support these file types and extensions.
Windows, for example, does not natively support HEIF/HEIC files and requires an extension from the Store – whereas macOS does support this natively.
Sharing and permissions
The simple, effective way that groups and users work in Piwigo gives you a great deal of control over who can view your media. This has many useful, real-world applications.
Each album that you create, and each photo you upload, can be assigned to be viewable by ‘Groups’.
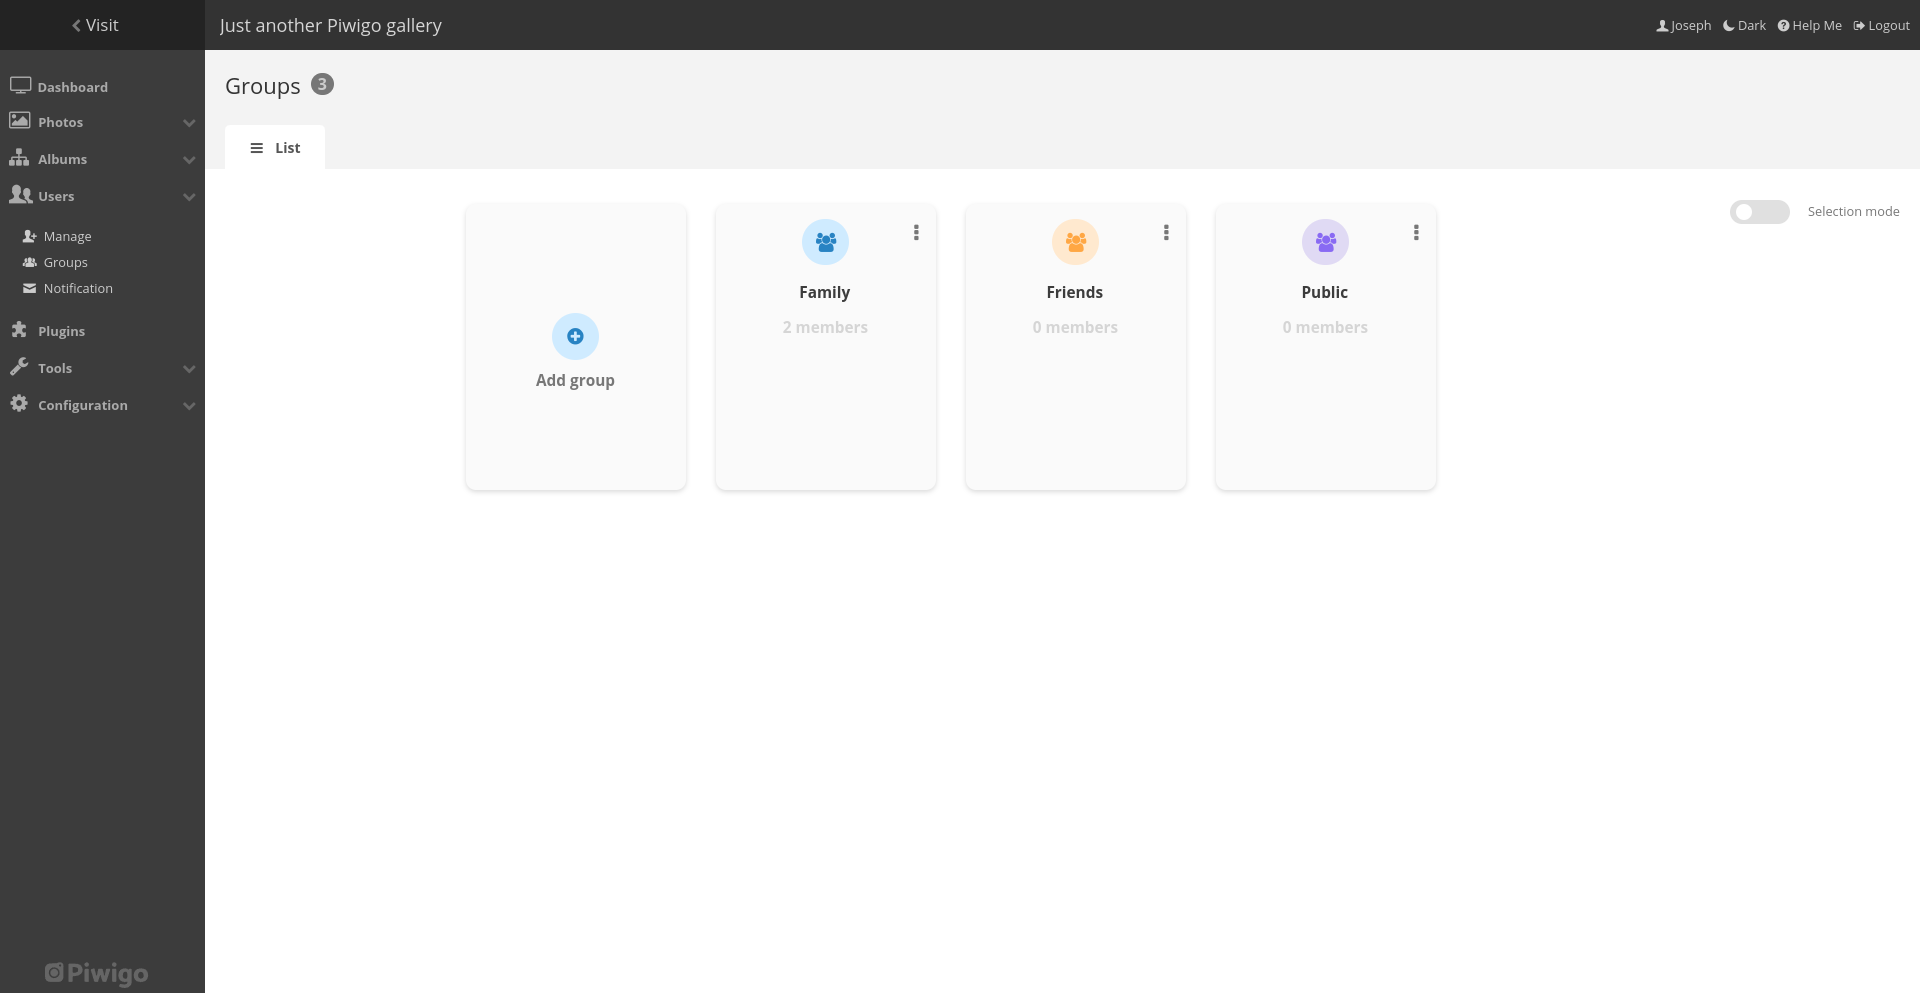
The default groups are ‘Family’, ‘Friends’ and ‘Public’.
Albums or photos you set to ‘Public’ are accessible by anyone who visits your Piwigo site. Media that you set to any other Group involves creating Users.
Moving albums between Groups is as simple as clicking on the name of the album and then clicking the ‘<<’ button to move it to the ‘Authorized’ column for that Group.

If you have an album that covers an event – a day out with family or a wedding – you can go through and set the permissions of individual photos to hide them from particular groups. This is very useful for safeguarding.
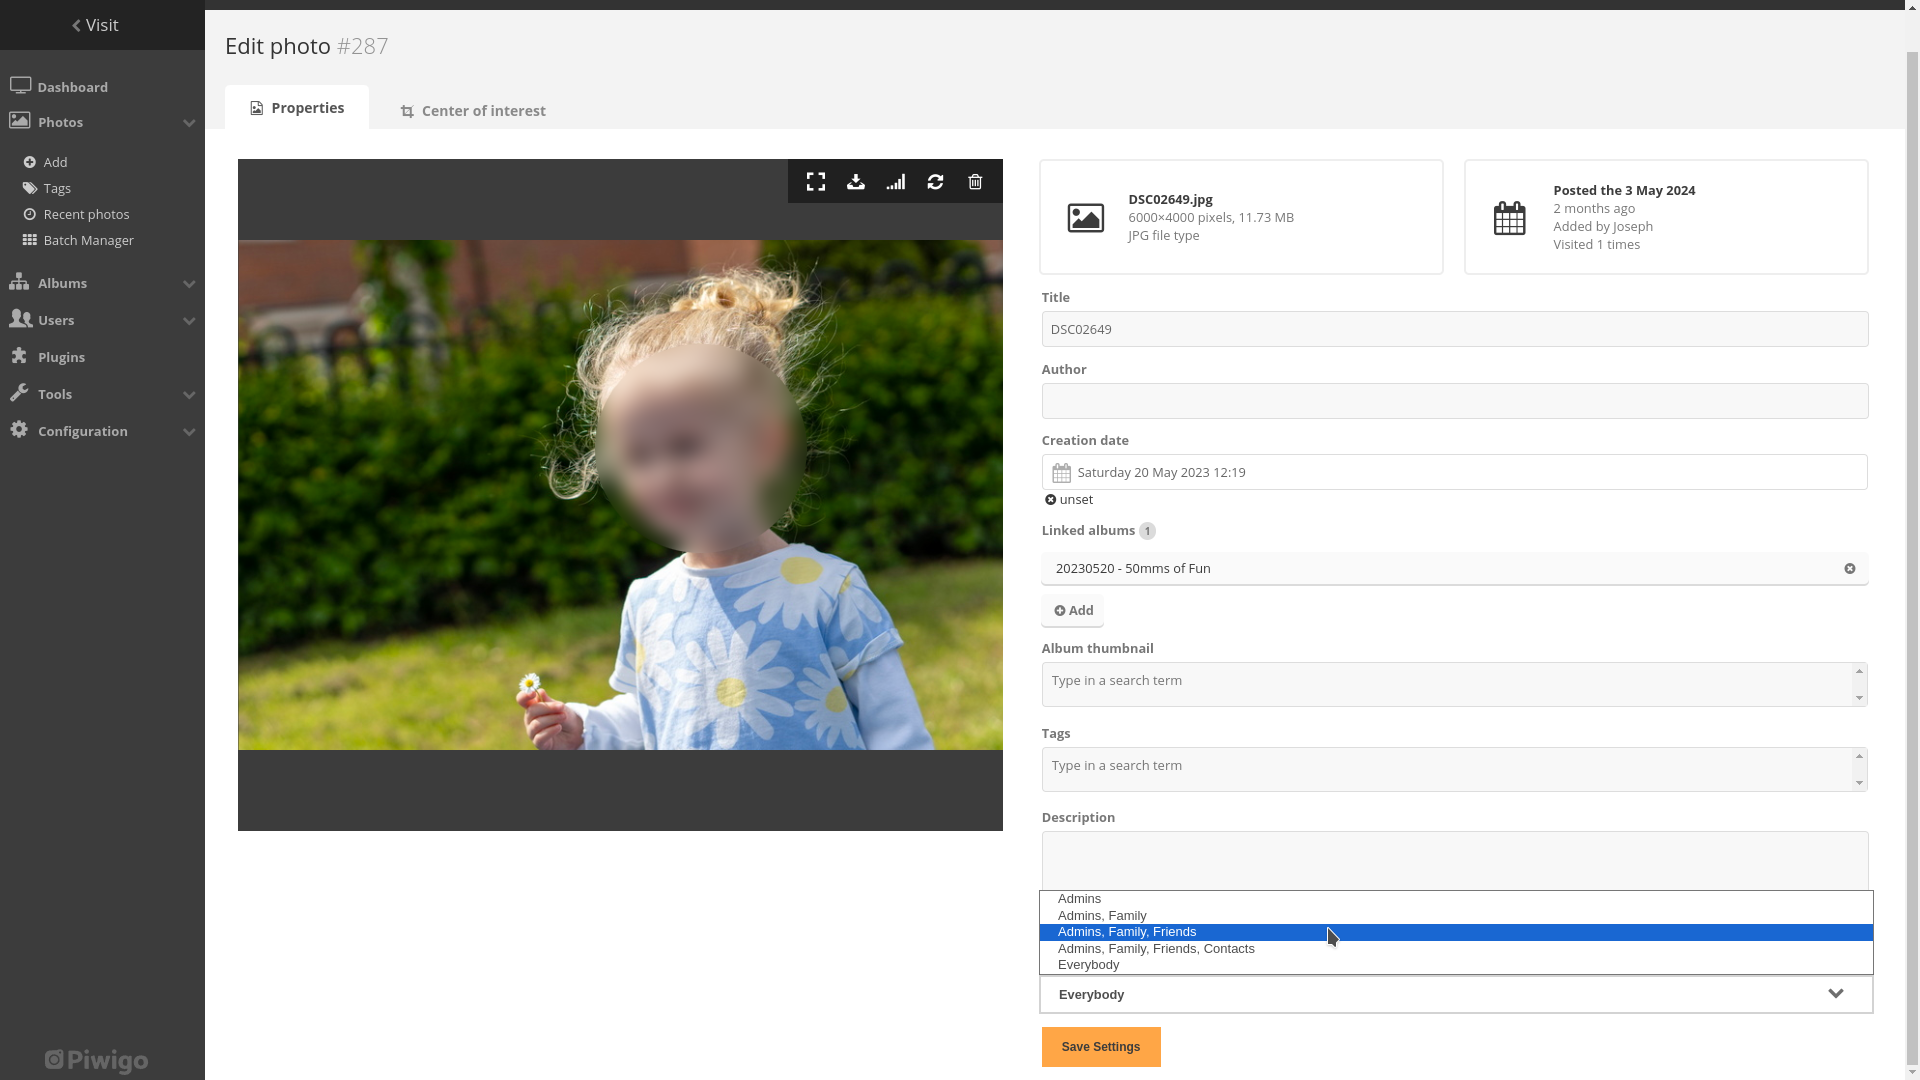
You can also set your media to be viewable by permission level. In the screenshot above, I changed the settings so that Users of any Group that has ‘Admin’, ‘Friends’ or ‘Family’ can see the photo.
These features give you greater control over your assets than with the WordPress gallery or DAM solutions like iCloud, Google Photos and Adobe Cloud as you can configure ‘Users’ and ‘Groups’ with different permissions to show or restrict access.
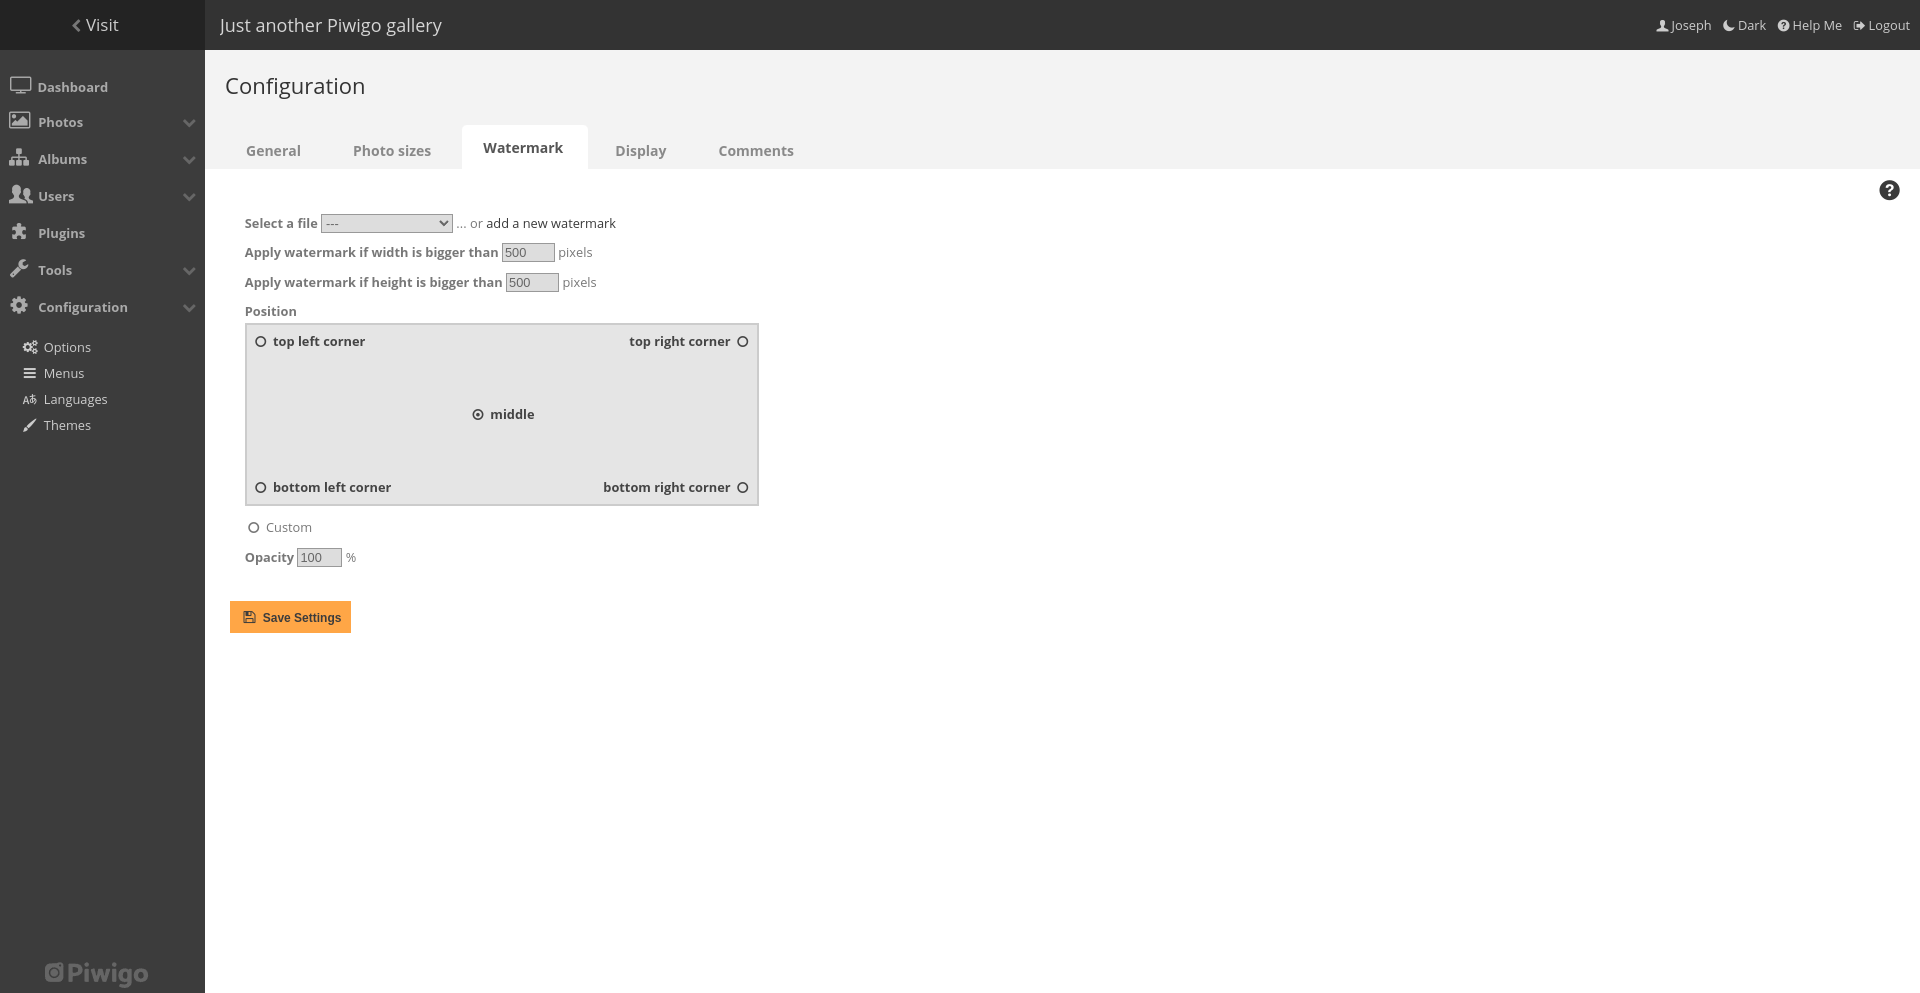
Another noteworthy feature is being able to add watermarks to photos. This is done through the Configuration > Options > Watermark menu and is useful for keeping the images you share from being used without proper attribution.
Plugins
I used the LocalFiles Editor for this review, which enabled me to make changes to config files from the admin menu. There are more than 350 plugins available at the time of writing: https://piwigo.org/ext/index.php?cid=12&page=1
Each plugin has a dedicated page with a star rating, number of downloads and a checkmark to show if it is compatible with the latest version of Piwigo:
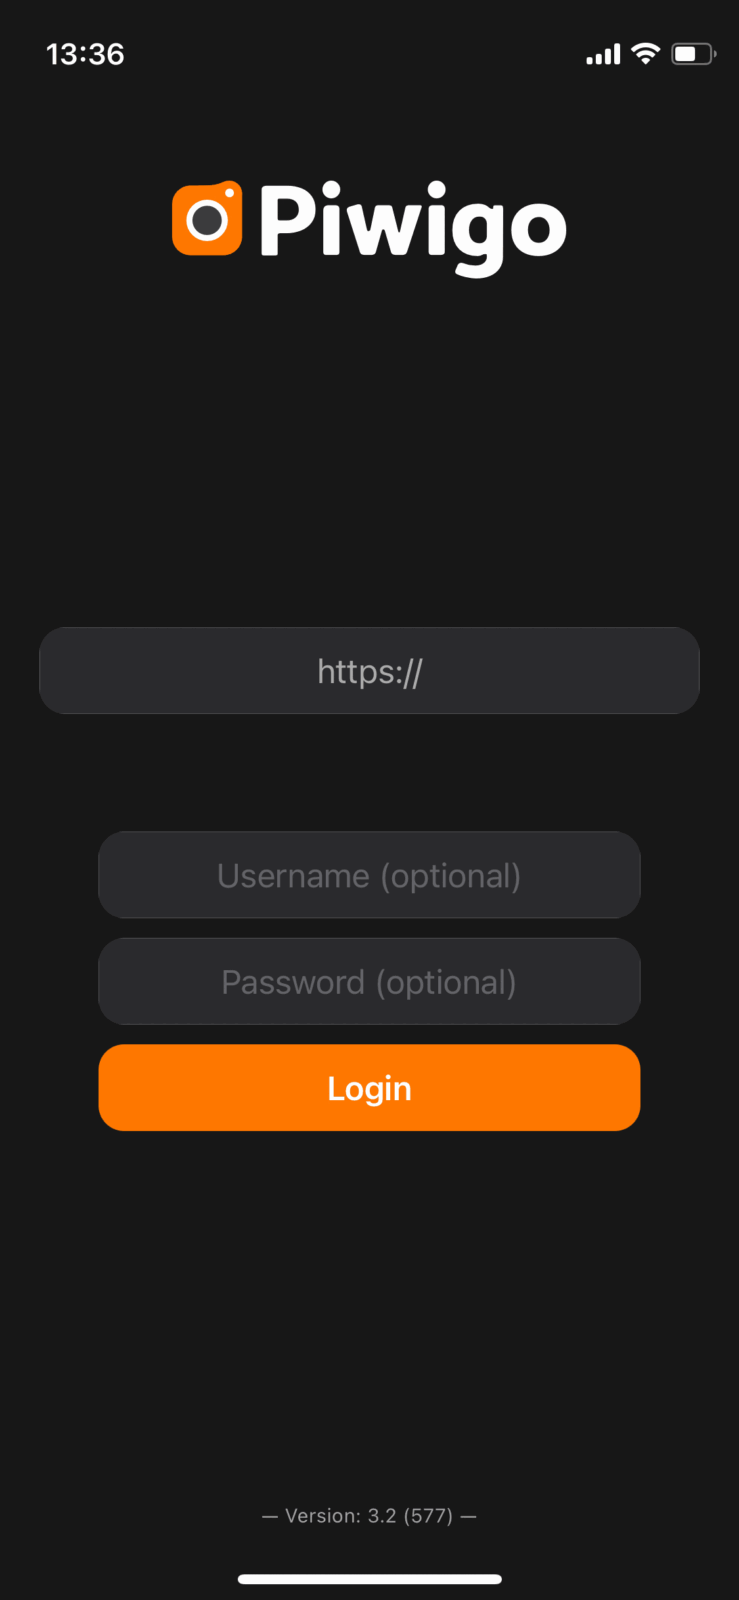
The Piwigo Mobile App
The Piwigo mobile app was easy to operate as a first-time user. You connect to your Piwigo server by entering the URL or IP address and then your login details.
Viewing albums and existing media, creating albums and uploading new photos is intuitive and responsive.
HEIF files are automatically converted on device to .jpg before being uploaded, so you don’t run into any issues with your phone pictures – but without putting in the work mentioned above you won’t be able to upload videos.
The only moment of friction I had with the app was having to click ‘Cancel’ after uploading photos to go back to the main screen.
I wasn’t sure if this would undo the uploads, but thankfully it didn’t.
Final thoughts
Your experience with Piwigo will depend on how you connect to your server. Hosting from lightning-fast hardware in a world class data centre meant that there were times where photos and albums loaded so quickly it felt like it was running locally.
The control over who can see your media opens up a lot of possibilities for personal and commercial use, and a competent mobile app is a nice addition.
I would have liked to see a broader range of supported file types enabled by default, but as these can be added in as desired I can’t complain.
Piwigo is a fantastic solution for media asset management, and I confidently recommending it to anyone who needs broader control than WordPress, Google Photos, iCloud etc can provide.


Add comment