
WEFCo is an approach to photography that emphasises getting the best results in-camera, and stands for:

WEFCo applies to professional and personal projects, and following this sequence will dramatically increase the quality of your photo and video output, saving you a lot of time in post-production/ editing.
In this blog post, we’ll explore ‘WEFCo’ and how to apply its principles to enhance the quality of your photography and videography.
White balance
The ‘W’ in WEFCo stands for white balance.
The spectrum of visible light ranges from violet to red. When all primary colours of light (red, blue and green) come together in equal amounts, you get white. Typically, white balance is adjusted (or ‘corrected’) in-camera before shooting to help scenes and subjects to appear more ‘natural’ and ‘real’, so that white objects appear white.
Striving for true-to-life accuracy gives you a strong starting point for your content, particularly if your camera is outputting 8-bit colour and your turnover time doesn’t permit heavy colour grading.
Phones and cameras have automatic white balancing as part of their image processing pipelines, so why not rely on that feature and call it a day? Take a look at these photos:
 |  |  |
The only difference between these images is white balance, but the feel of each image is significantly different.
Adjusting white balance gives you creative control over the ‘temperature’ of your projects from cool and clinical (left) through to warm and inviting (right).
Leaving your camera to automatically adjust white balance is great if you don’t have time to set up your shots, but you’ll run into unwanted colour shifts when panning in video.
Auto-white balance complicates matching colours across multiple cameras, so strive for accurate in-camera white balance before capturing your shot.
Tips for Mastering White Balance
- Reference Shots – Capture a photo or short video clip of a white object and use it to set your white balance in-camera before you start creating.
- White Paper Trick – Crumple, then flatten a white piece of paper. Take the flattened-out paper to where your subject will be and take a photo or short video clip of the paper to get a good reference point for your white balance for that scene.
- Shifting Light Conditions – Natural light changes throughout the day. Blue hour, golden hour and noonday have very different tones. Take reference shots and update your white balance every hour where possible. Place a white object in your scene where appropriate and use this as a reference for optimal results.
- Mixed Lighting Challenges – Different light sources blending together can create unexpected colour shifts, making white balance trickier to manage. Take an additional reference shot using only your key light as insurance.
- Fix it in Post – Use vectorscopes and the white balance pipette tool in your editing software to achieve an accurate white balance. You can copy and paste the corrected settings onto other photos or video clips to save time. Do this before applying artistic grading for greater consistency.
Exposure
The ‘E’ of WEFCo is exposure.
Exposure in photography and videography is all about light and our camera’s sensor.
Let’s look at the effects of exposure on the three photos below:
 |  |  |
The photo on the left is overly dark, or underexposed. Detail is missing in the blacks and shadows. Notice how the shape of the cloth under the skull differs from the other images?
The image on the right is overexposed and detail is missing from the whites and highlights. The texture and fine detail of the shape of the skull along the lit edge is gone.
The correctly exposed image in the middle preserves textures and tones across the image and is more neutral and natural. This encourages the viewer to focus more on the subject – the skull.
One stylistic opportunity of exposure is that you gain some control over the time of day. The overall feel of the image is on the left is of night. The right image, being blown out, gives the impression of exceedingly bright, noon-day sunlight. Be sure to use exposure to your advantage when planning and creating content for your clients.
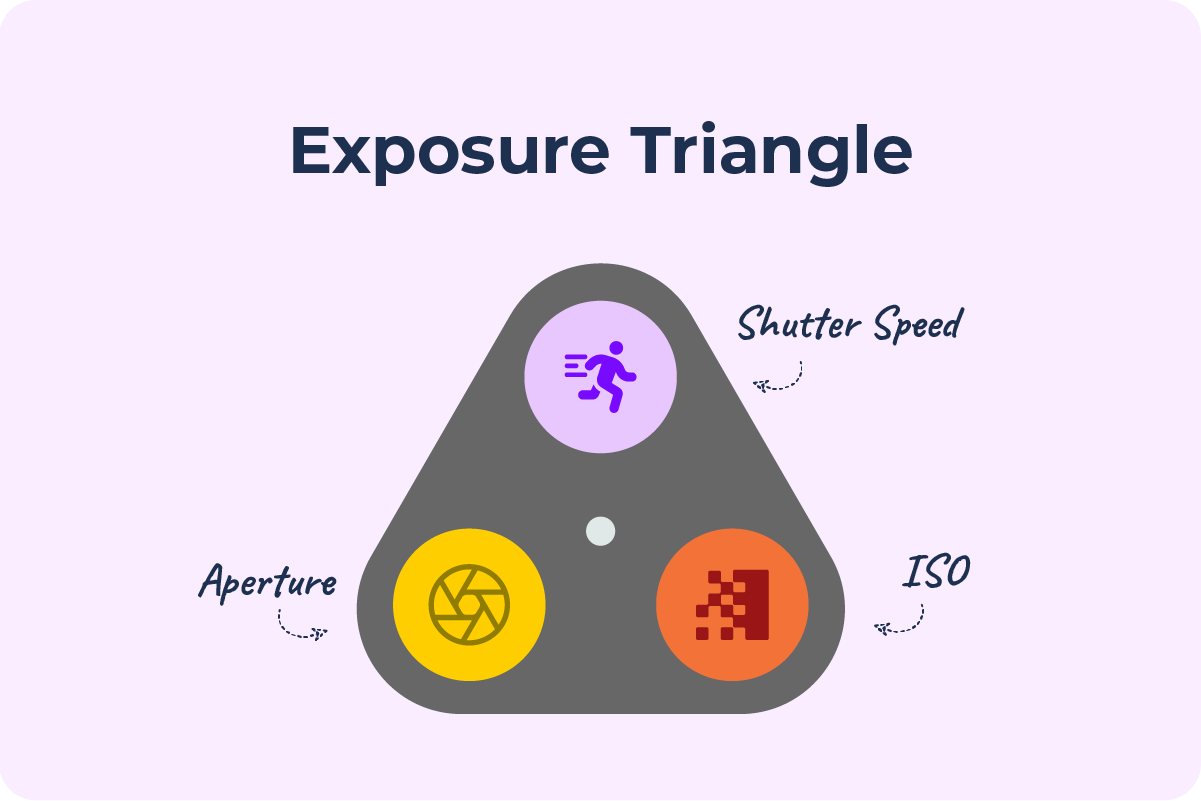
There are 3 factors that contribute to the exposure of your image:
These factors are intrinsically linked, and each has an impact on the look and feel of your content that you’ll want to consider when creating. They are known as the Exposure Triangle.
Shutter Speed
Shutter speed is how long light is exposed to the camera sensor for and is usually measured in fractions of a second.
Understanding and using shutter speed for deliberate effect can be tricky, so here’s a useful analogy:
Imagine you have a tap and a cup. If you turn the tap to full for 3 seconds, you’ll have more water in your cup than if you turned the tap on full for 1 second, or ¼ of a second, or 1/125 of a second.
The same principle applies to light. Having your shutter open for longer lets in more light. So, if you’re in a dark environment and need more light to nail a proper exposure; open up the shutter.
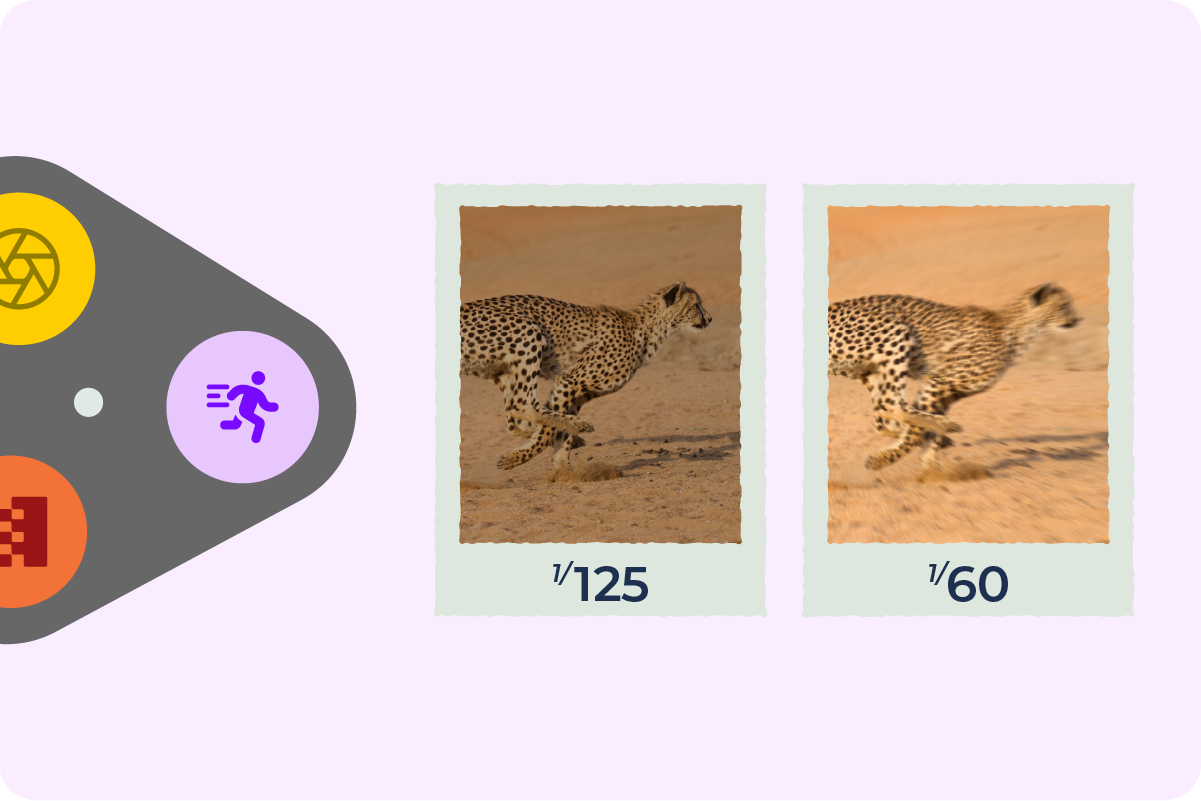
There’s a noteworthy component to shutter speed: along with controlling how much light comes into your camera – shutter speed has a relationship with motion.
If your shutter is open for 5 seconds your camera sensor will capture all the light – and all movement that occurs – in those 5 seconds. In other words, if something in-frame moves while your shutter is open, that moving object will appear blurry in the final image.
Blur is desirable for creative effect in light painting, car light trails and moving water, but you’ll generally want to freeze motion.
Here’s a reference guide to help you find the optimal shutter-speed for a range of situations:
Shutter Speed General Guide
- Astrophotography – Up to 30”*
- Light painting – 15”
- Car light trails – 10”
- City at night – 5”
- Smooth water – 1”
- Landscape – 1/20
- Portrait – 1/50
- Walking – 1/125
- Running – 1/250
- Bird flight – 1/1000
- Motor racing – 1/2000
* Use the 500 rule to work out your shutter speed in relation to your focal length to avoid star trails
Video is a different story when it comes to shutter speed.
For interviews and normal speed b-roll footage you’ll want to set your shutter speed to double that of your frame rate to get natural looking motion blur.
If you’re shooting in 25 frames per second, like PAL countries do, your shutter speed will be 1/50. If you’re shooting in 24 fps then set your shutter to 1/48 – but beware of artificial lighting!
Bulbs, Christmas tree lights, LED strips, TV or computer screens and other sources of artificial light pulse, move or ‘band’ in line with the way they are powered.
NTSC countries operate at 60 Hz, so putting your shutter speed at 1/60 gets rid of this strange behaviour. PAL is 50 Hz, so you’ll not need to adjust from 1/50 if you’re shooting in 25 fps.
Things get tricky when it comes to b-roll, which is often shot at a higher frame rate: 60 fps or 120 fps. You’ll have to make a decision on preserving natural motion blur vs eliminating distracting flickering.
ISO

ISO can be a challenging concept to grasp initially. Imagine that your image requires three seconds’ worth of light to achieve proper exposure, but only one second’s worth is available. ISO allows you to make up for this shortfall by electronically stretching out your one second of light to the required level.
ISO is how sensitive you make sensor to light. By controlling how much power is put through your sensor, you can amplify small amounts of light to get closer to the effect of having a more well-lit scene.
Most mobile phones and digital cameras have what is called a base ISO. The base ISO is the value your sensor is optimised for and has the best signal to noise ratio. If you push your ISO further than this, you’ll begin to introduce grain, artefacts and digital noise to your image.
It is always optimal to get the right amount of light at your source, but don’t be afraid to use ISO to fill in the gaps.
Higher ISO values have a significantly greater impact in videography than in photography. While AI-driven tools have made remarkable strides in restoring grainy photos, noise reduction solutions for video remain less effective, producing results that leave much to be desired.
Aperture

Aperture is how we control the flow of light through our lens and onto our camera’s sensor. Revisiting our analogy, think of aperture as how widely opened up or closed up a tap is. A fully open aperture lets in light in the same way that a fully open tap allows the maximum amount of water to flow.
Aperture is measured in ‘f stops’. The closer to 0 your f value is, the more opened up your lens is and the more light is getting let in. For example; f1.2 lets in far more light than f8.
If you need more light in your image, you can correct your exposure by opening up the aperture. If you’re overexposed you’ll be able to close up the aperture a few stops to get the amount of light coming into your camera under control.
As with shutter speed and ISO, aperture has a secondary effect: your focus plane. We’ll talk more about focus in the next section, but a smaller focus plane means the foreground and background are blurrier. A larger focus plane means more of a scene is in focus.
Focus planes are not a perfectly straight line from left to right, they have a slight curve to them that follows the shape of your lens. If you are trying to capture a team at an awards ceremony, and your aperture is set quite low, you’ll find that people in the middle of your shot are in focus, and those on the outer edges are not.
In this situation you’ll need to bring your aperture down, which deepens your focus plane. This will let in less light, but it’ll get your group into the focus plane.
Focus
 |  |
The ‘F’ of WEFCo stands for focus.
This is the most straightforward aspect of WEFCo: you’ll always want your subject, or a particular detail of your subject, to be in focus.
Too much of a busy scene in focus will result in an image that distracts from your subject, and too much separation leaves your subject isolated and without context.
Including or excluding background elements is a stylistic choice that should be informed by your vision for storytelling: what do you want to direct your viewers’ attention to?
If you’re making photos to showcase the stunning landscapes then you’ll want as much in focus as possible, which you’ll achieve through using higher aperture settings and focus stacking.
Showcasing a piece of jewellery being worn by a model is best done with a greater amount of the background, and any other superfluous elements, out of focus. This draws attention away from distractions and onto the subject you want your audience to look at.

Composition
 |  |
The ‘Co’ of WEFCo is composition.
Composition is the most important element in photography and videography, the most difficult to get right, and the component that makes your work stand out.
If you’ve got an accurate white balance, perfect exposure, and your subject is in focus; you’re on the way to a well composed image.
Try these techniques if you’re struggling for inspiration:
- Leading Lines: Use natural lines to guide your viewer’s eye towards your subject.
- Framing Guides: Position key elements along grid lines (Rule of Thirds) or intersections (Golden Ratio) to create balance.
- Symmetry: Mirroring elements within your frame creates a sense of harmony.
- Frame Within A Frame: Create a secondary frame around your subject to add depth and focus.
- Break The Pattern: Using your subject to disrupt a repetitive pattern draws attention and creates visual interest.
- Fill The Frame: Get close to your subject to eliminate distractions and emphasise finer details.
- Negative Space: Use the empty space around your subject to create a sense of simplicity and focus.
- The Rule Of Space: Leave space in the direction that your subject is facing or moving in to create a sense of motion and context.
- Get Low: Change your perspective by shooting from a low angle to add drama and scale.
- Get High: Capture your scene from a high vantage point to provide an expansive view.
- Juxtaposition: Place contrasting elements side by side to highlight differences and create visual tension.
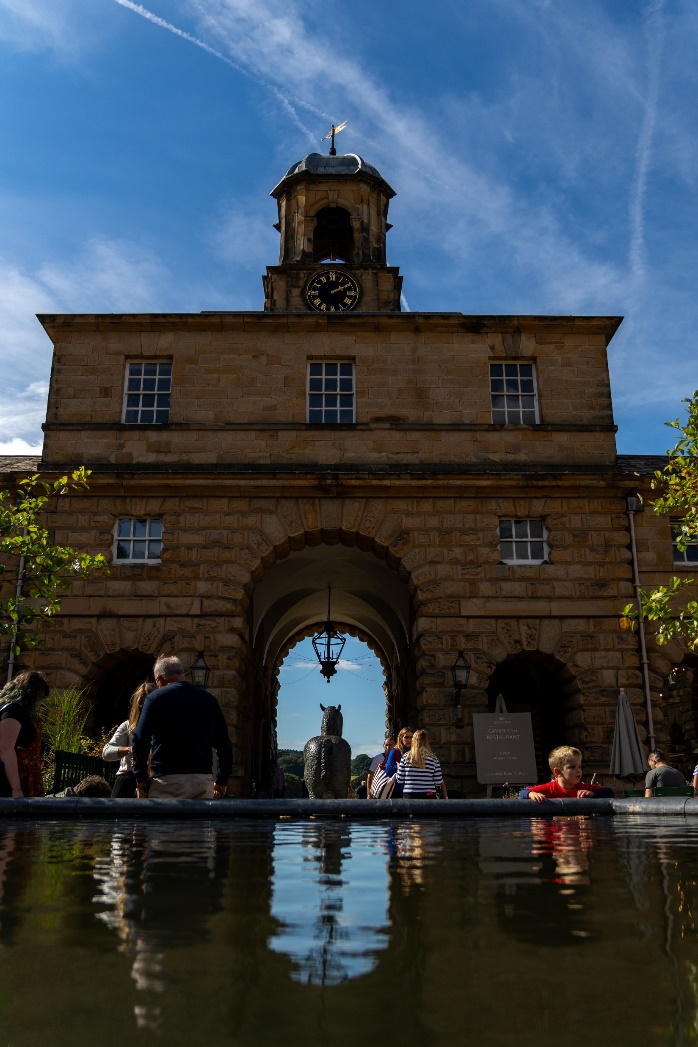
- Reflections: Incorporate reflections from surfaces like water, glass or mirrors to add depth and create intriguing visual effects.
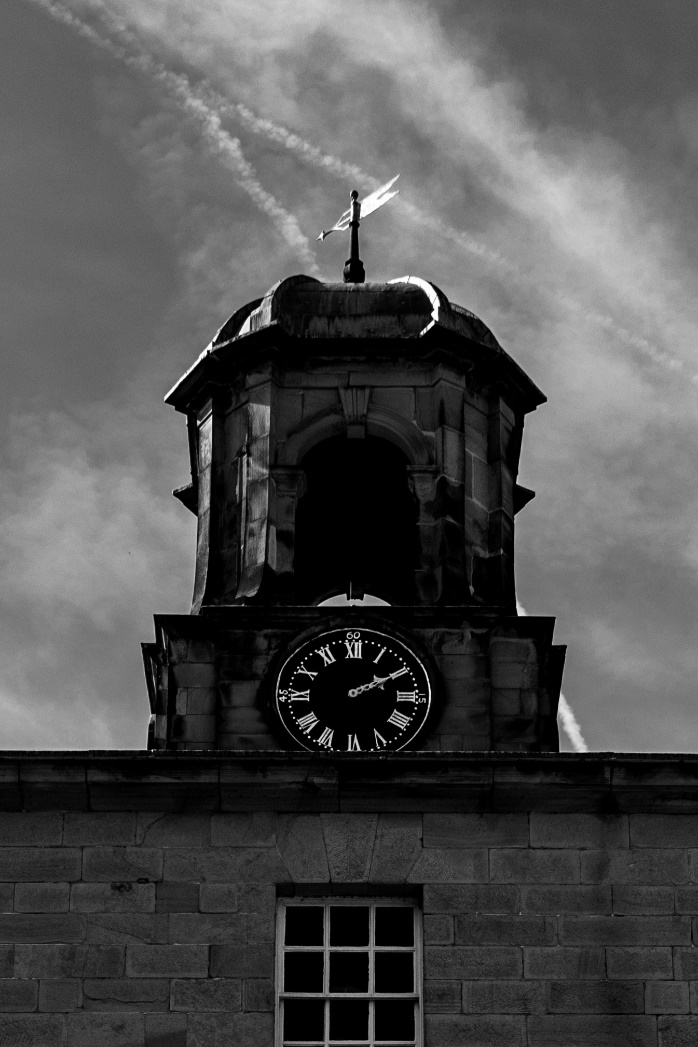
Every principle of WEFCo we’ve covered in this article culminates in composition. The image gallery below demonstrates the importance of composition as each of these examples does not have perfect white balance, exposure and/or focus:
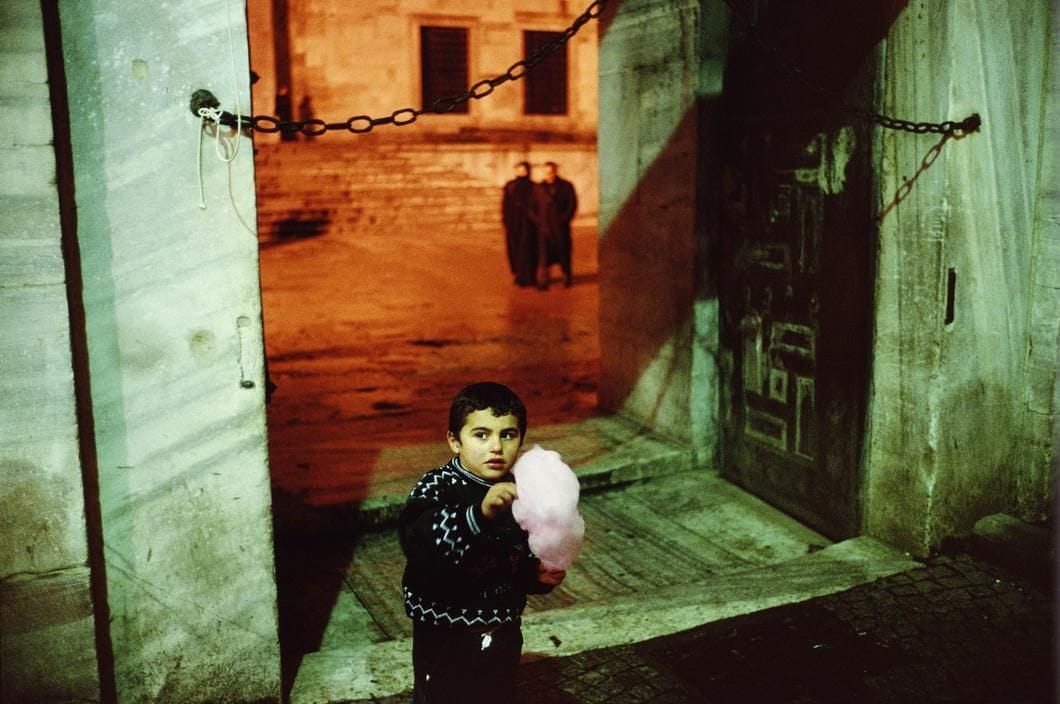
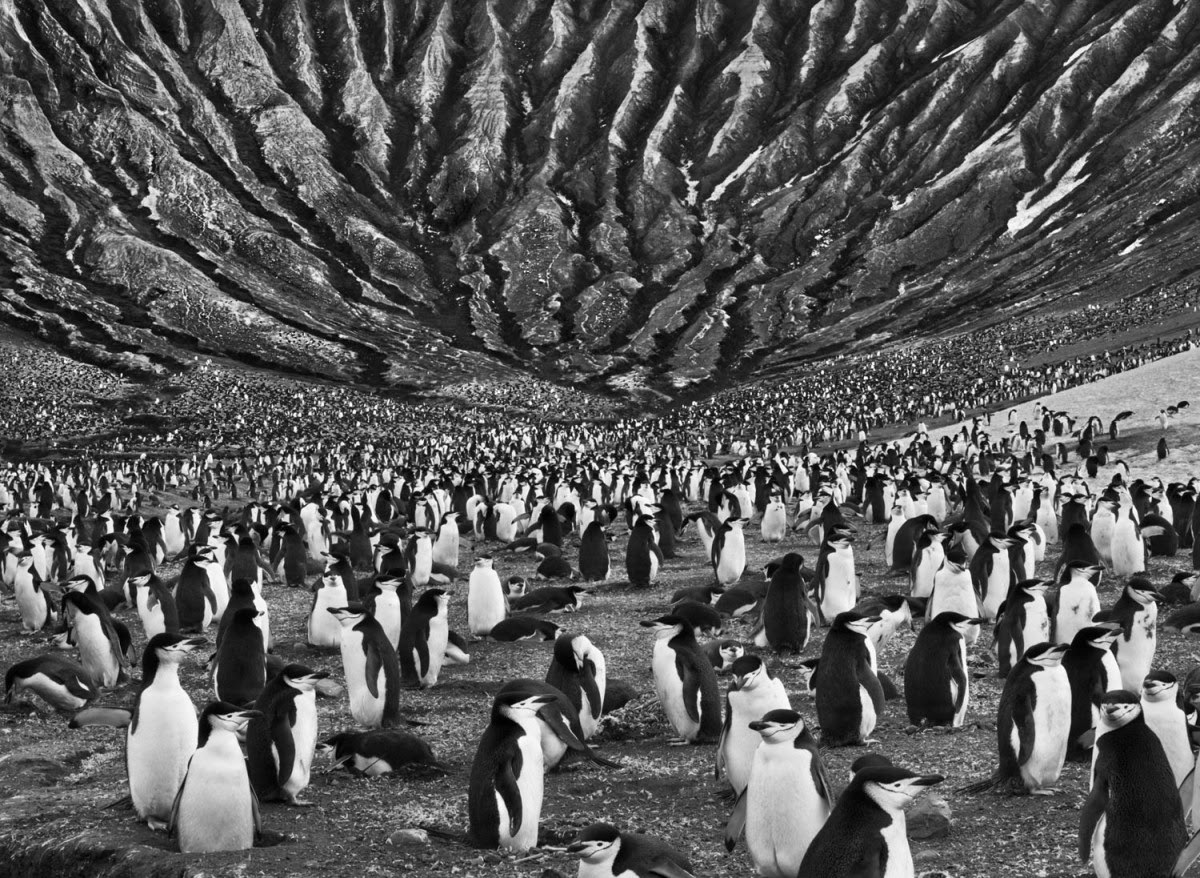
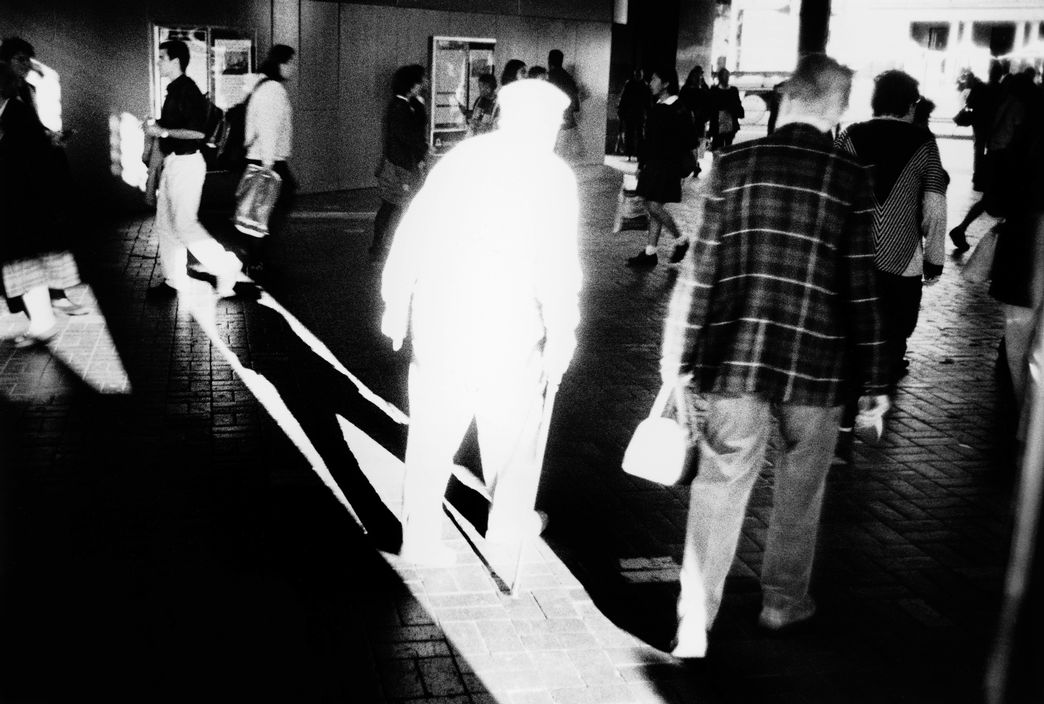

What they share is distinct character born of exceptional composition.
While it is possible to achieve great photo and video through composition alone, the white balance, exposure and focus all play an important role in storytelling and achieving excellent imagery.
The process of WEFCo should always be followed, even if the creative decisions you make veer away from what is real, accurate or technically correct. Being aware of each component of your images will only make you a better, more deliberate videographer and photographer.
Final Thoughts
We’ve covered the core aspects of photography and videography, but there’s a lot more to producing visual content: colour spaces, codecs, containers, chroma subsampling, bitrates, b-roll, NLEs, grading, saturation, contrast, bokeh, LoCA and much more.
We didn’t even mention audio – which has an enormous impact on the perceived quality of your video.
Leave a comment below if you have any questions and if you’d like more content like this.
Learn how to optimise your new images with our ultimate guide to image optimisation.


Add comment